In this tutorial, we will walk you through the basic steps of using Layer2.Finance. For the basic concept of Layer2.Finance, please read the introductory blog and the ELI5 article.
Connect Your Wallet
Before you get started, please prepare a MetaMask wallet (currently, Layer2.Finance only supports MetaMask wallet and the support for more wallets is coming soon).
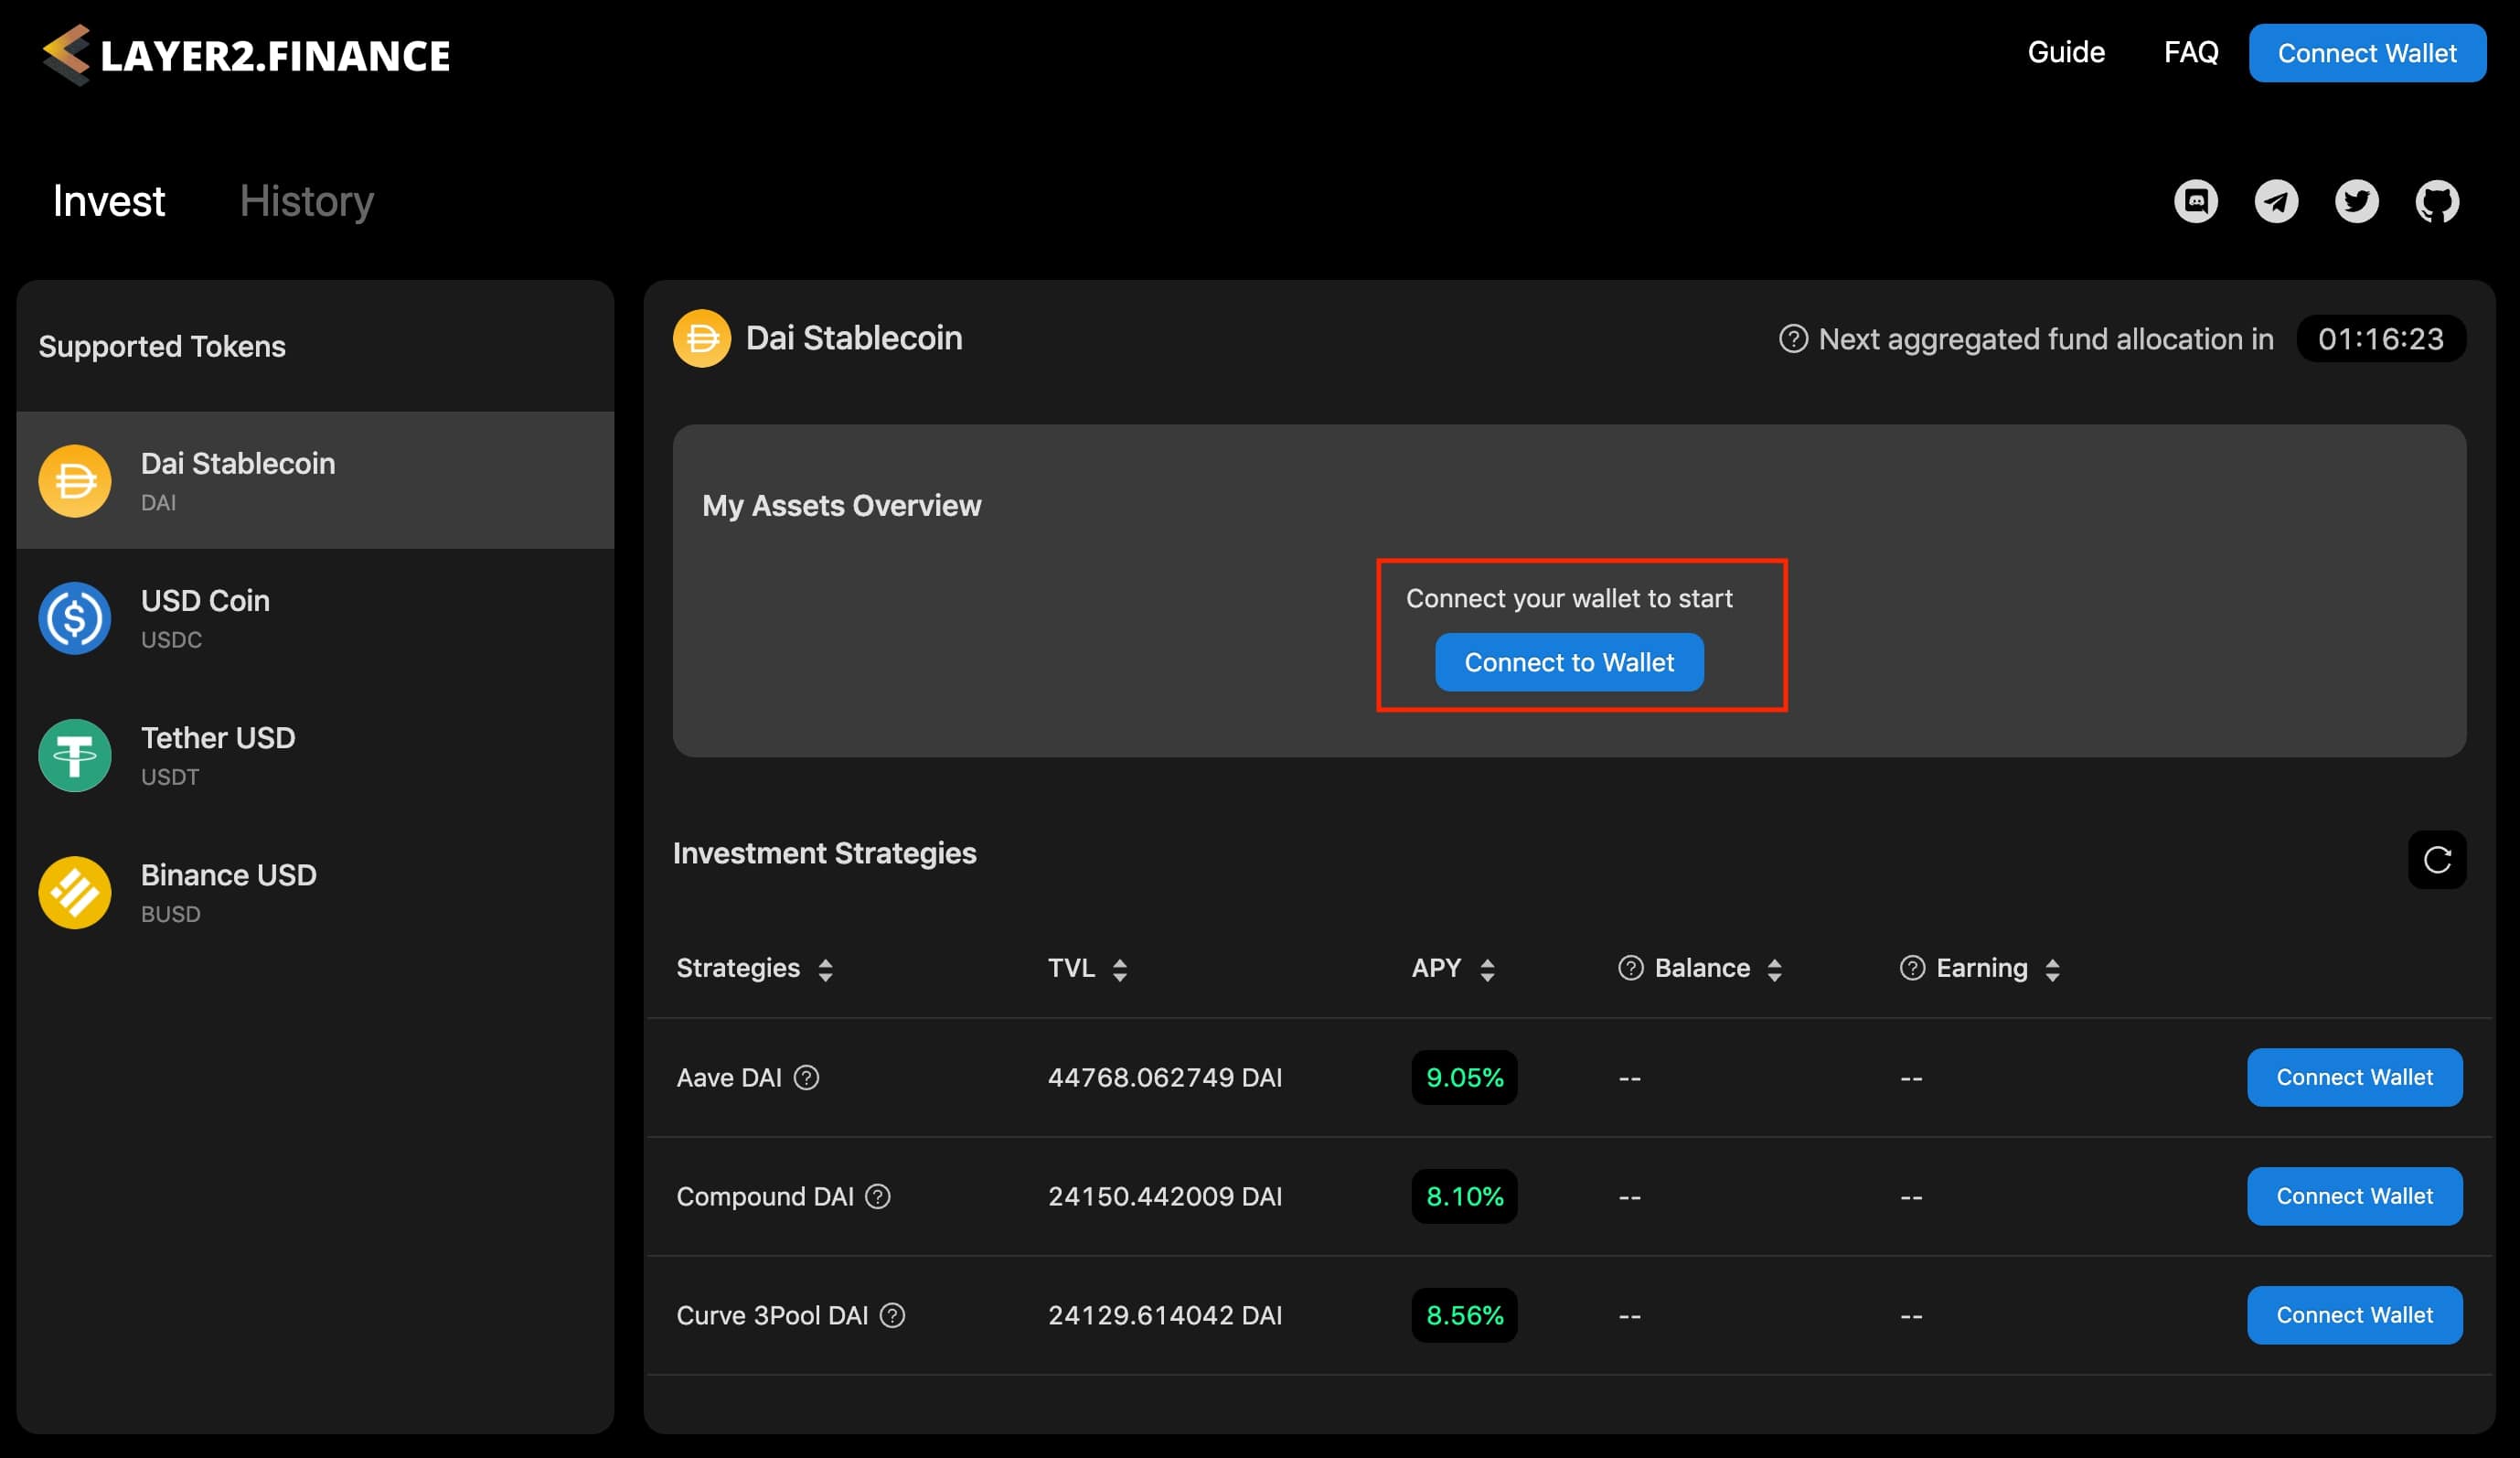
- On the homepage, click “Connect Wallet”
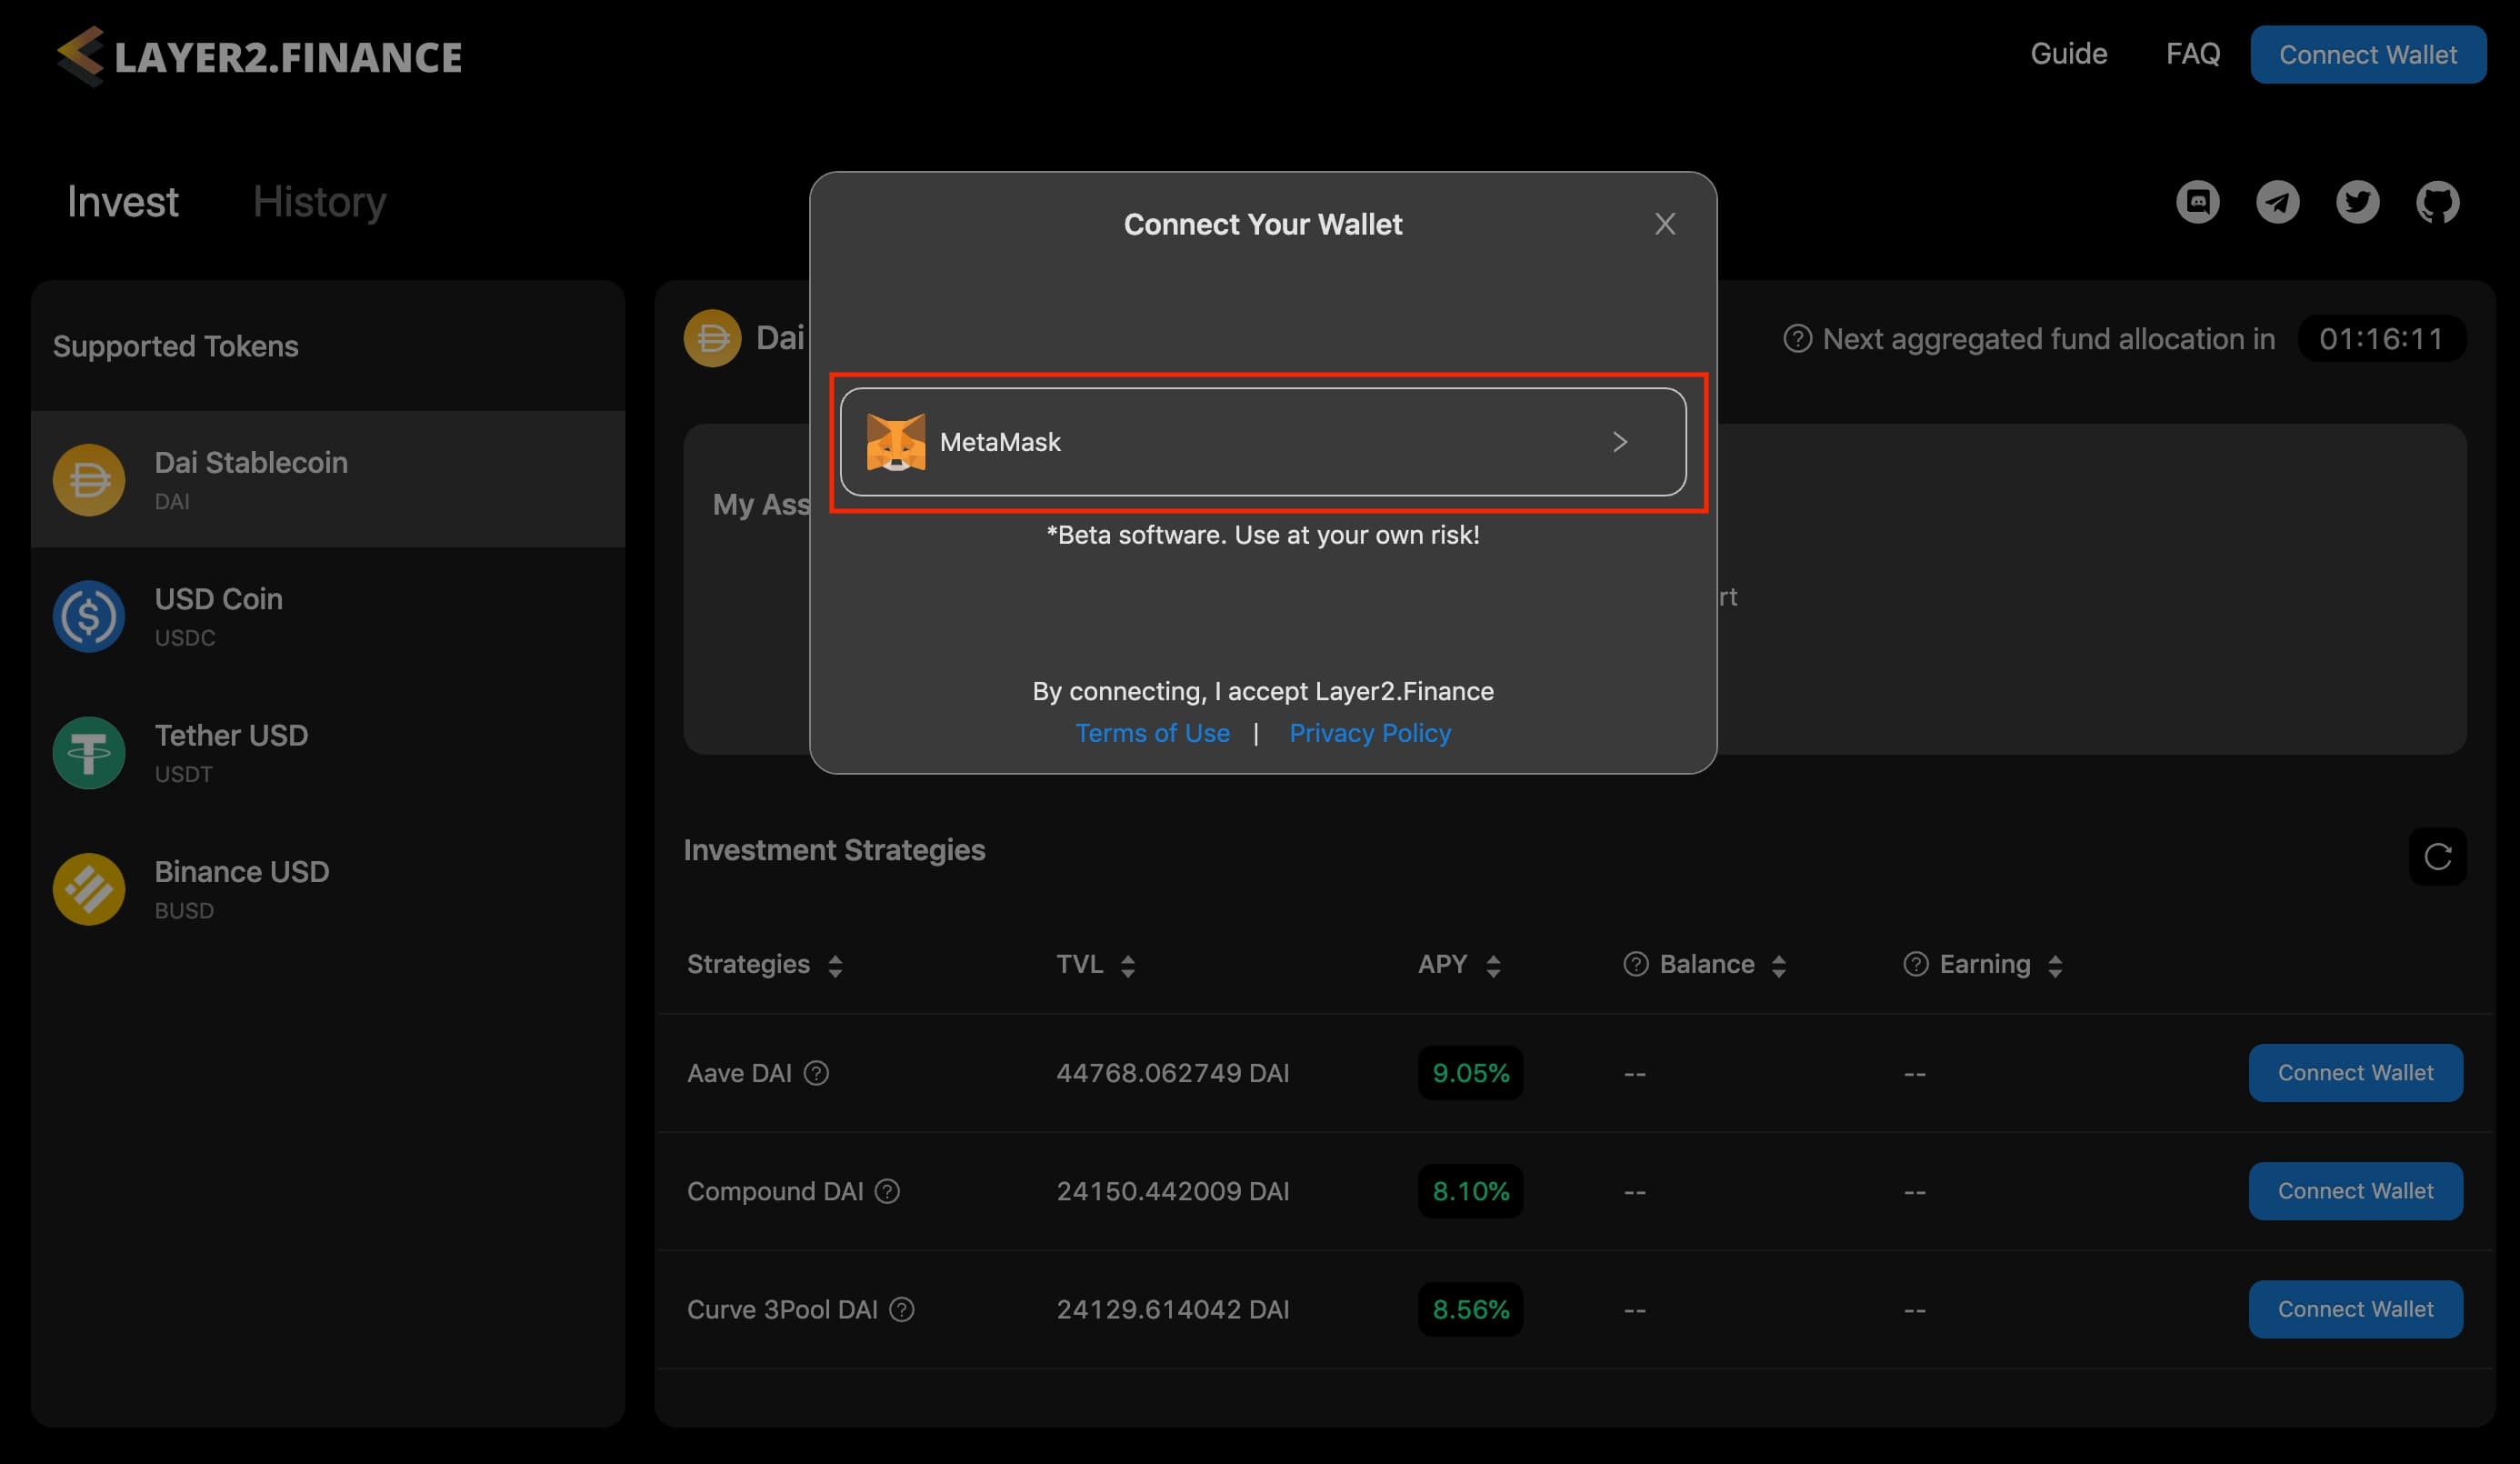
- Then you will be prompted to select a wallet. Select MetaMask wallet.
- Connect your wallet to Layer2.Finance in MetaMask. Please make sure you have switched to the Ethereum Mainnet.

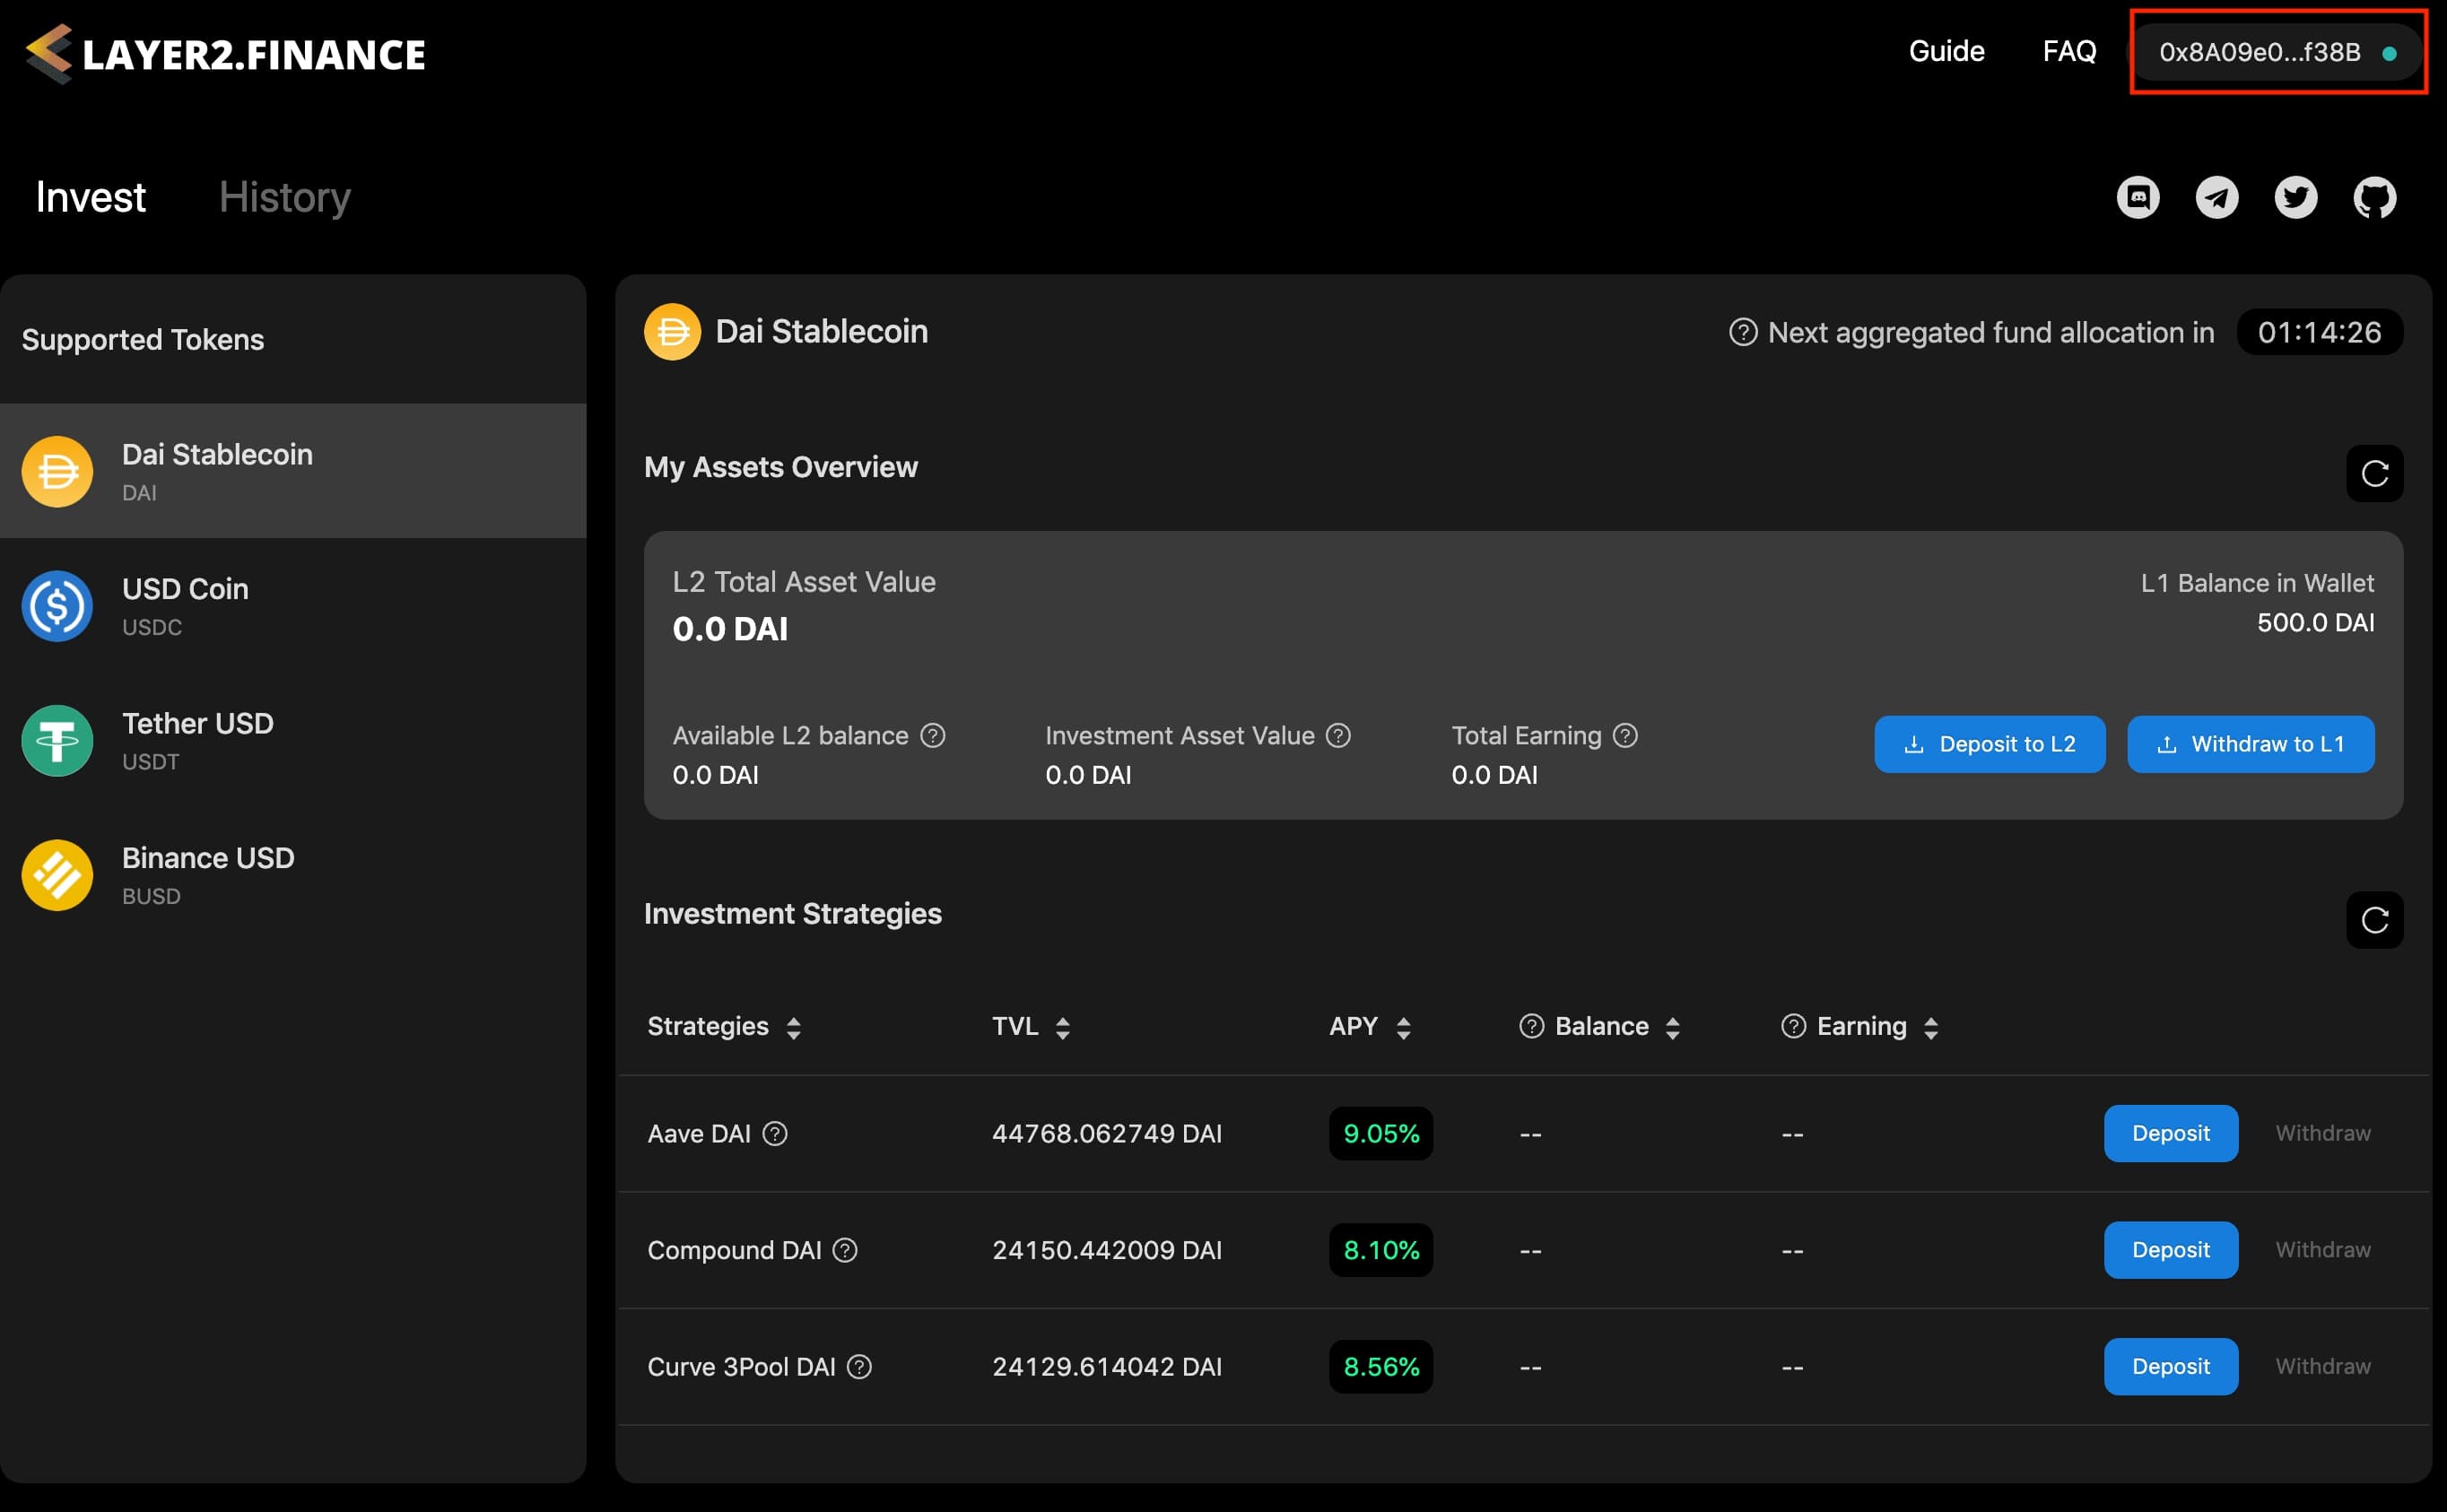
- After the wallet is connected, you will see your wallet address shown on the top-right corner.
In the rest of this tutorial, your connected MetaMask wallet will be referred to as L1 wallet (Layer-1 wallet).
Deposit funds to L2
Next, you will need to transfer funds from your connected L1 wallet to your L2 wallet (Layer-2 wallet) in Layer2.Finance, so that you can invest in different DeFi strategies and receive earnings!
You can choose to transfer the token of your preference, depending on which DeFi strategy you would like to invest. The list of supported tokens are shown on the left panel of the “Invest” page. In this tutorial, we use USDC as an example.
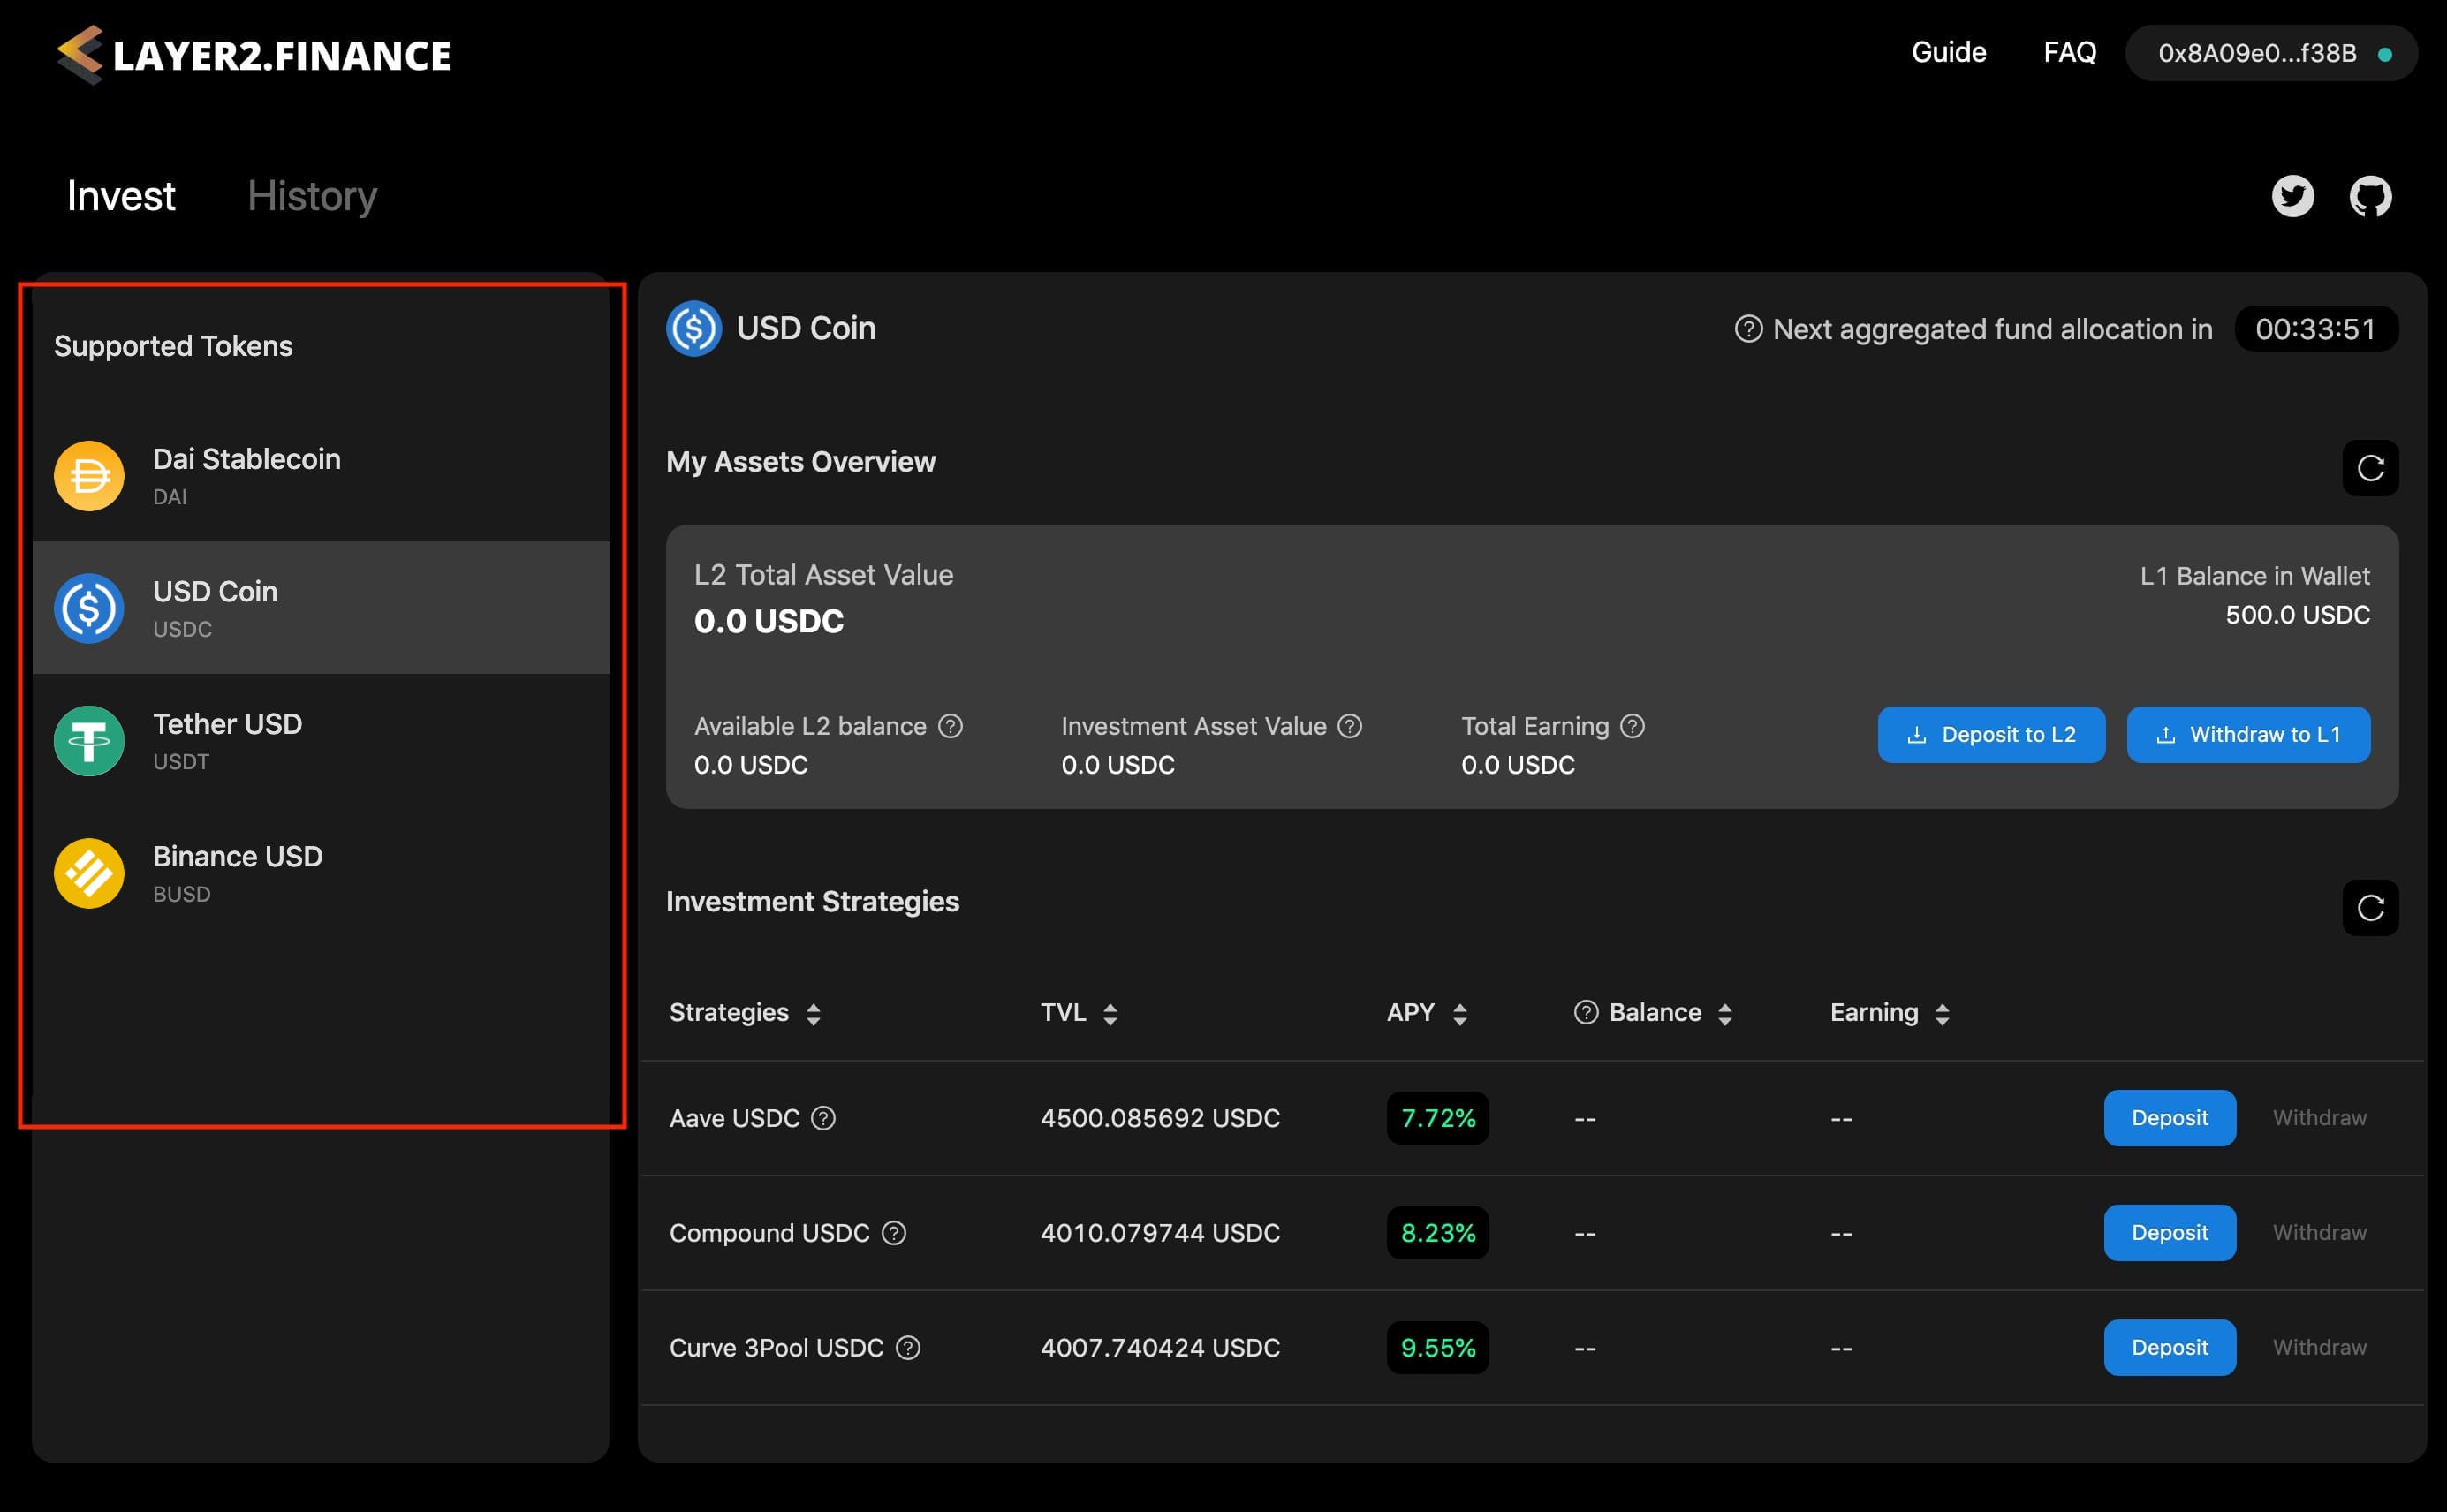
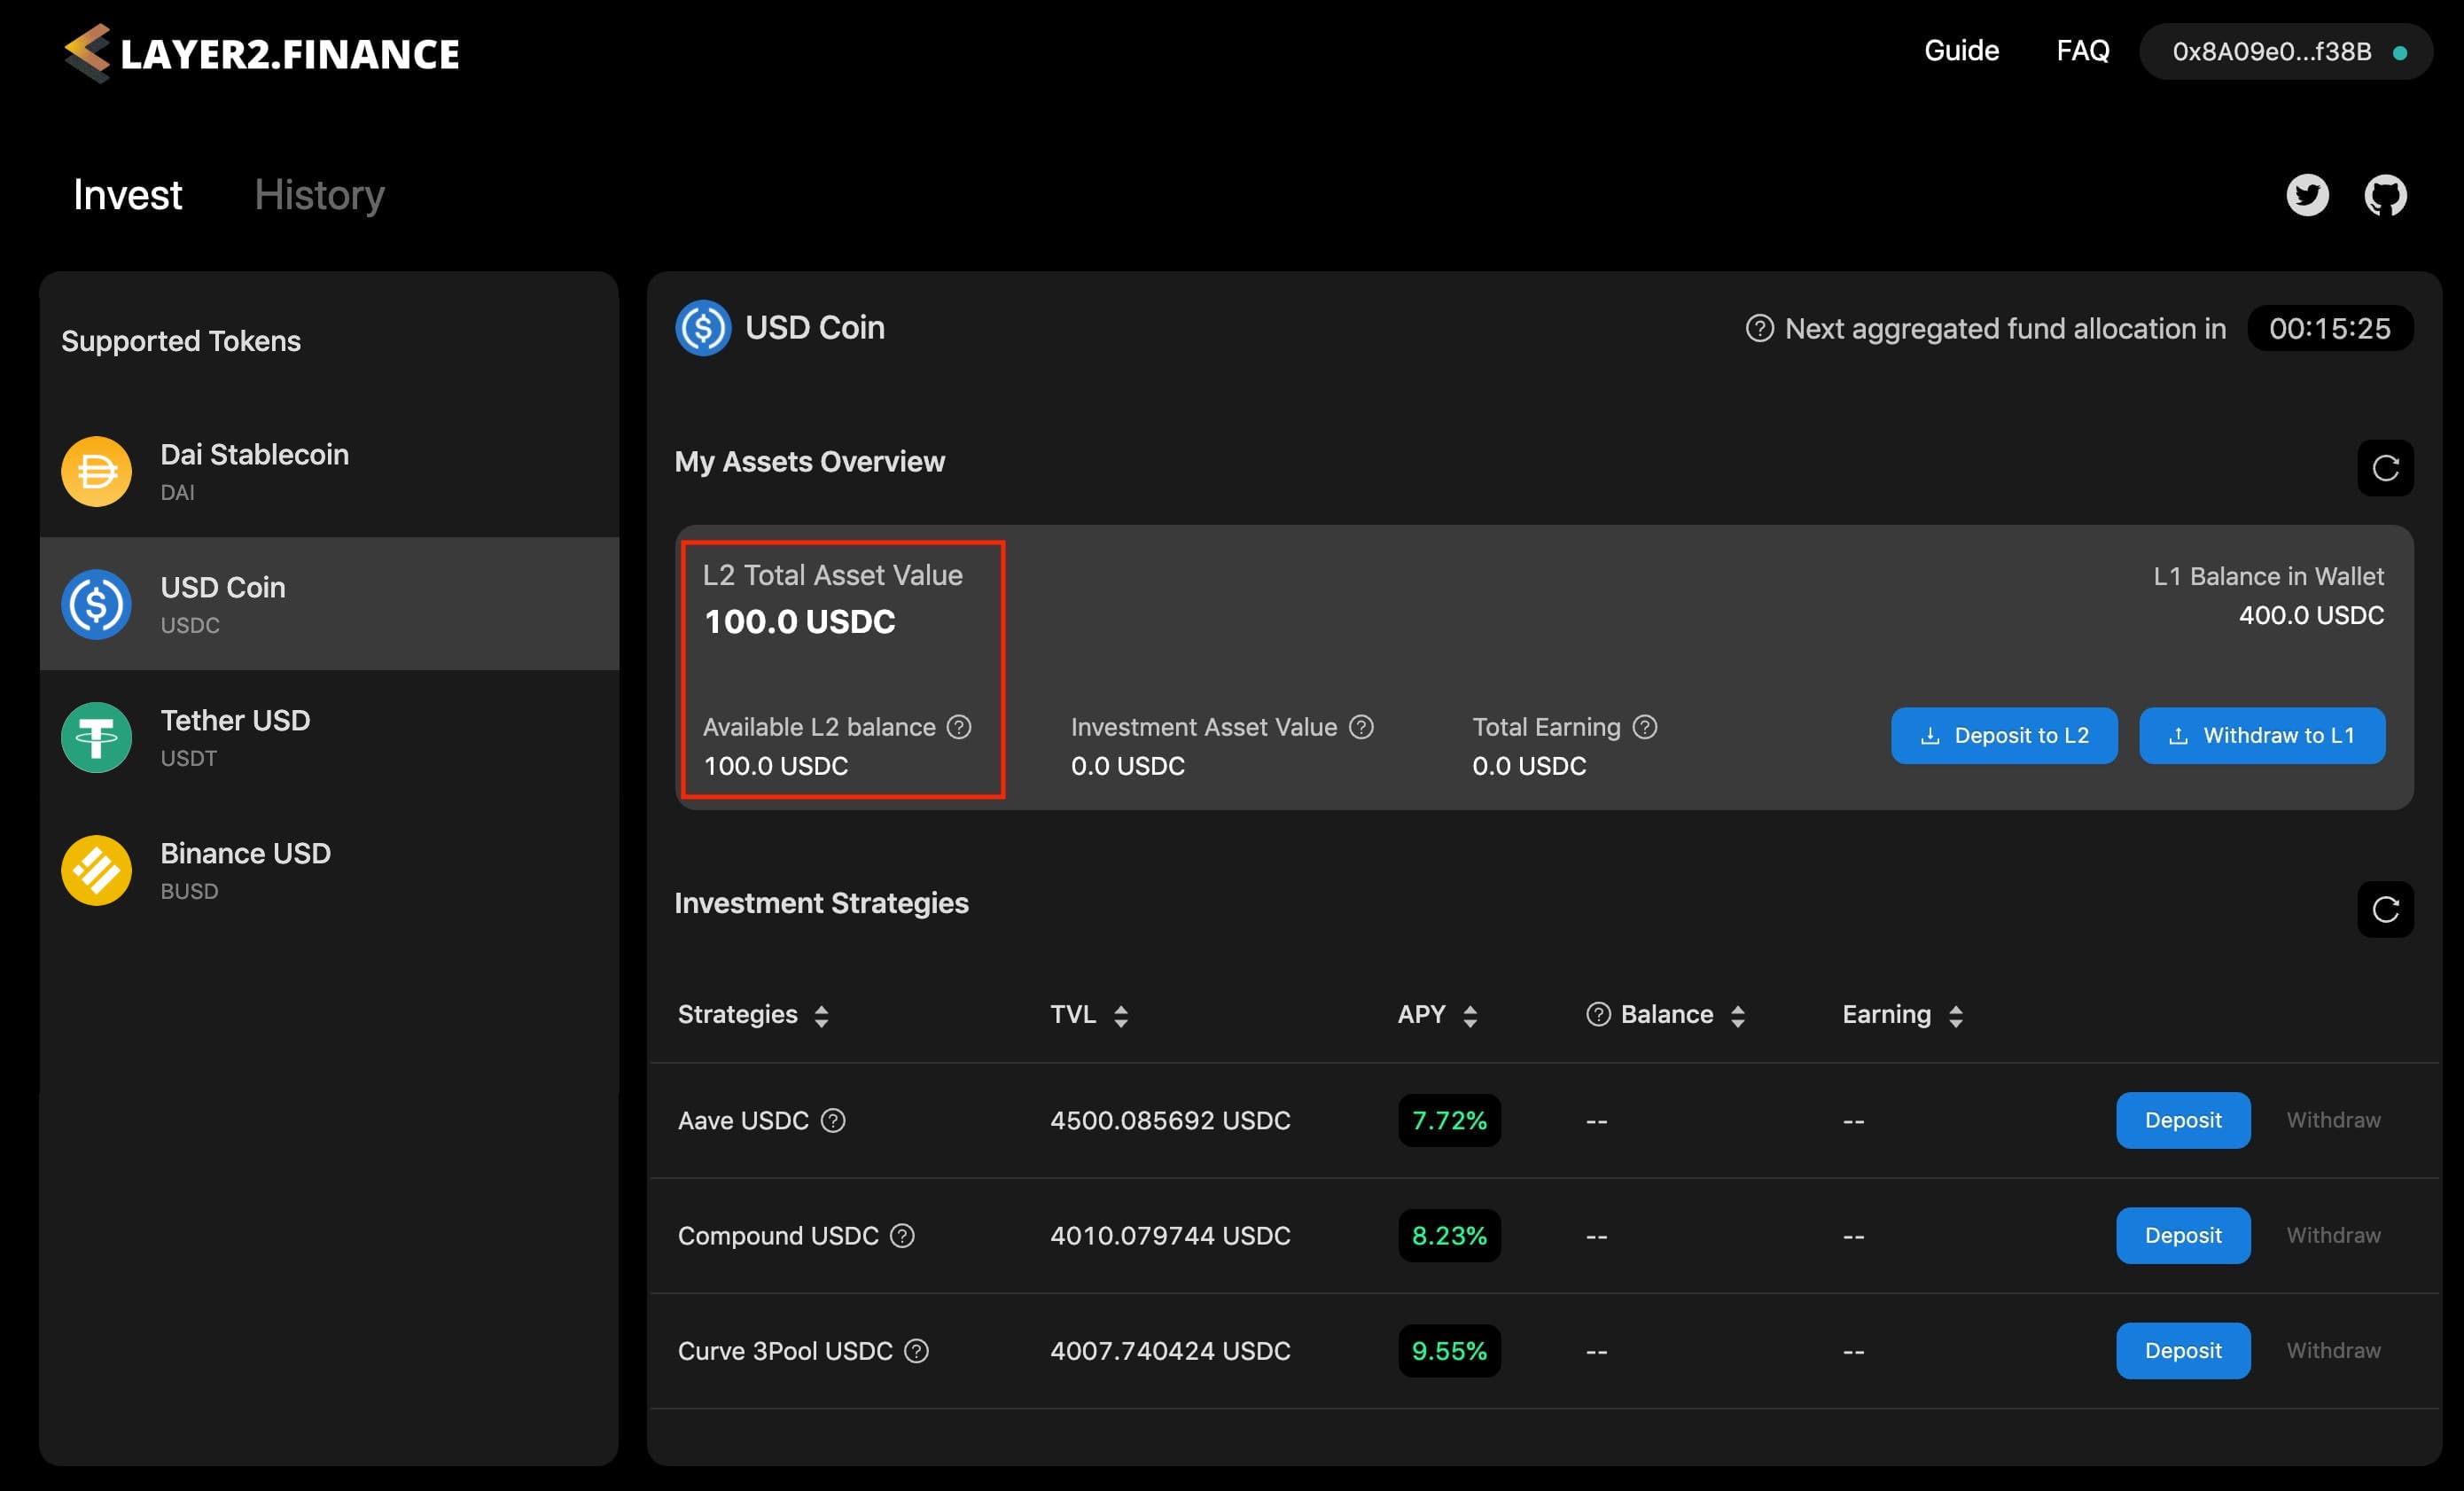
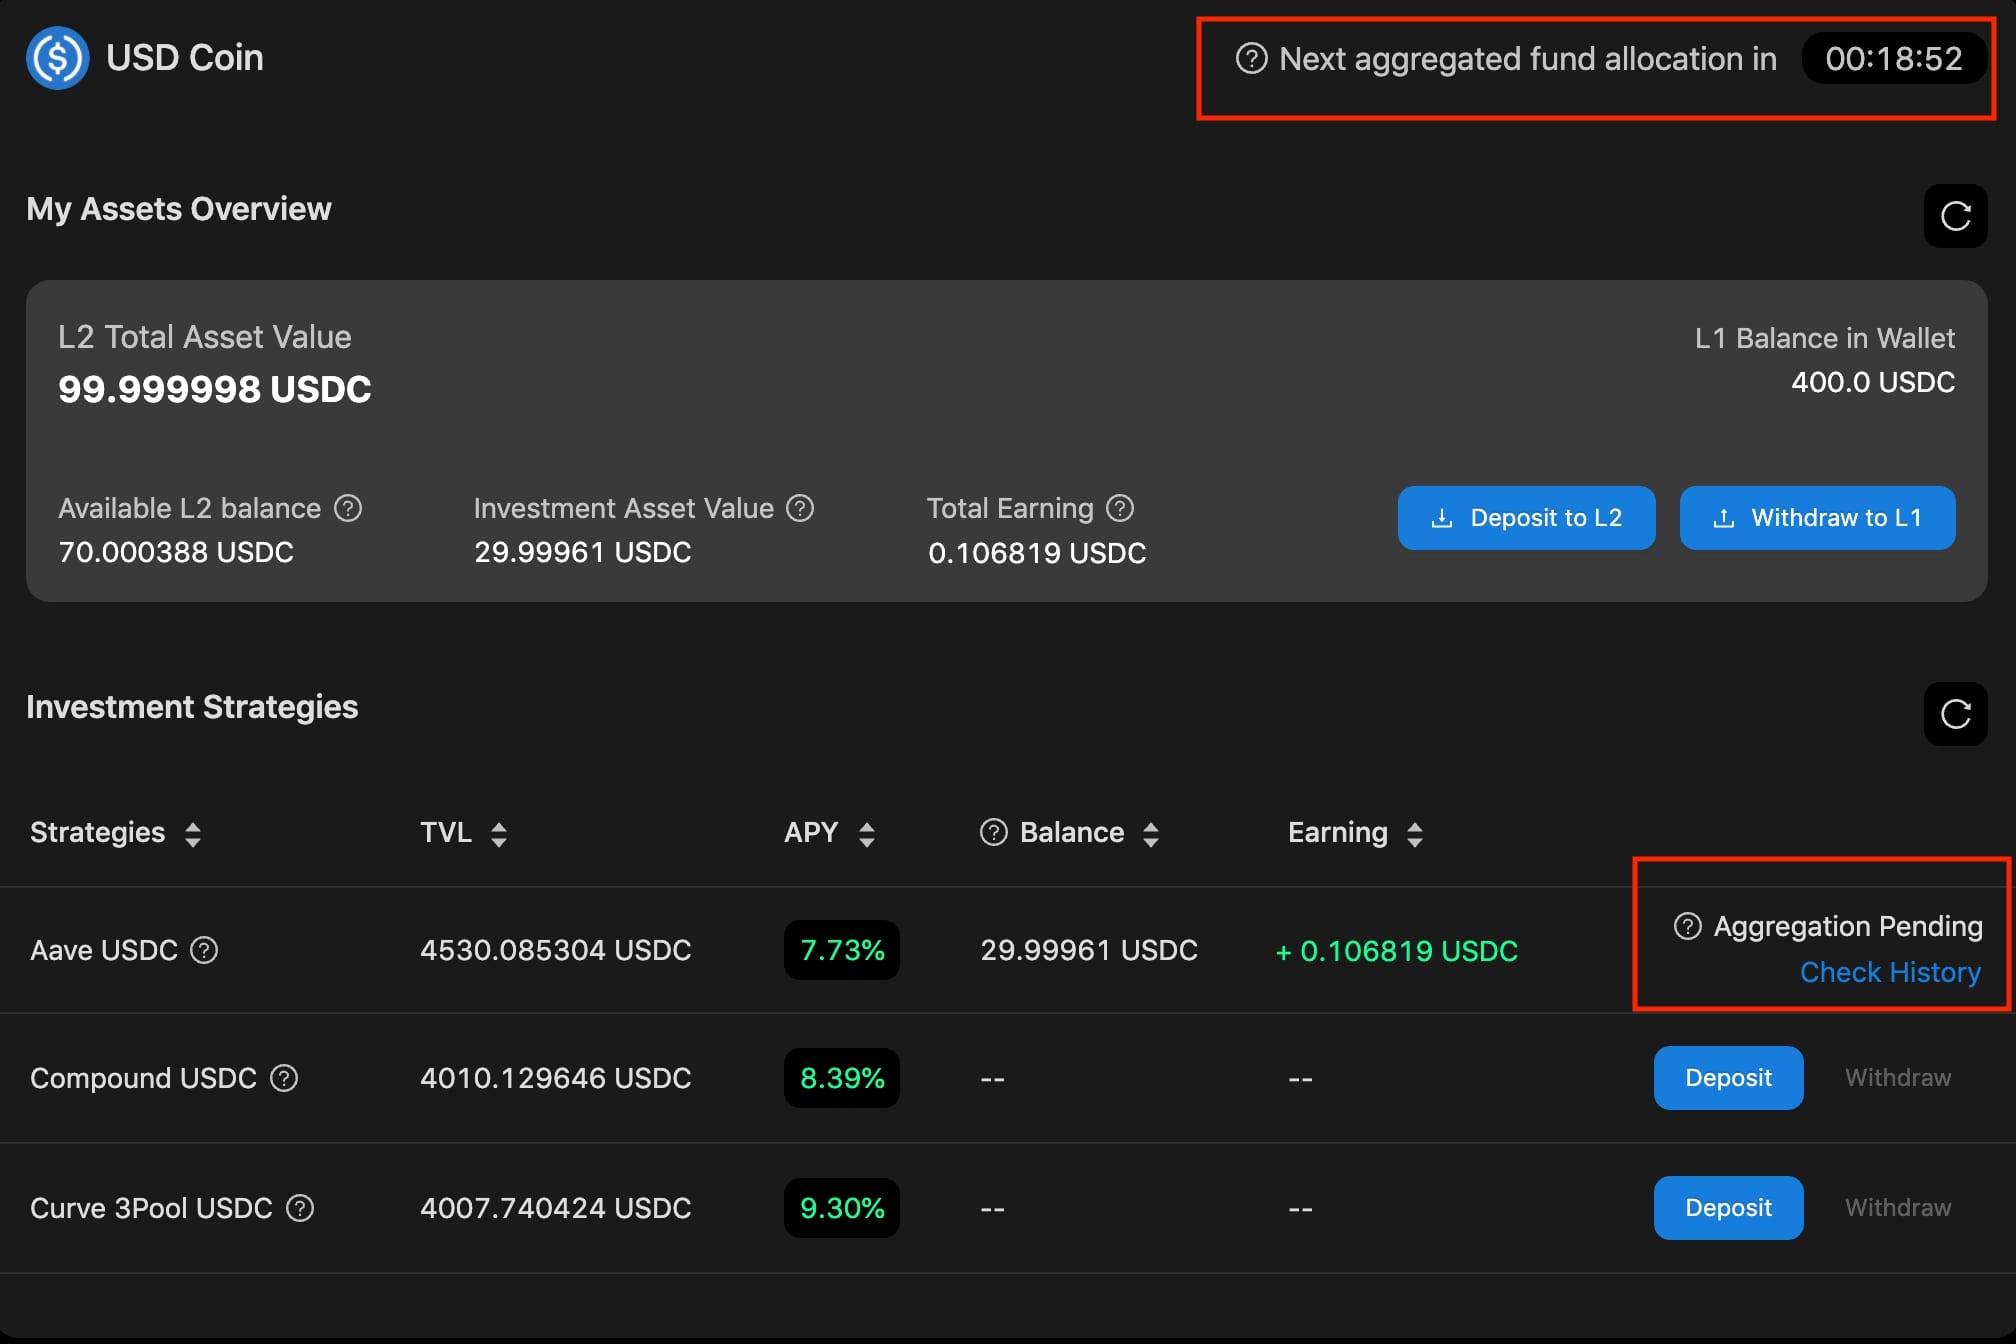
In order to transfer some USDC from your L1 wallet to L2 wallet, select the “USDC” tab. Then you will see an overview of the USDC assets in your L2 wallet on the top of the right panel (of course, most of the values are 0 right now):
- L2 Balance: the available USDC balance in your L2 wallet that can be allocated to a DeFi strategy or withdrawn back to your L1 wallet.
- Investment Assets Value: the total estimated asset value underlying the DeFi strategies you have invested with USDC.
- Total Earnings: the total yields you obtained in the strategies you have invested with USDC (updated every 12 hours).
- L2 Total Assets Value: the total USDC value hosted in your L2 wallet (including both available L2 balance and Investment Asset Value).

Now let’s deposit some funds to your L2 wallet by following the below steps:
- Click the “Deposit to L2” button

You will see a popup that reminds you to approve the USDC token.
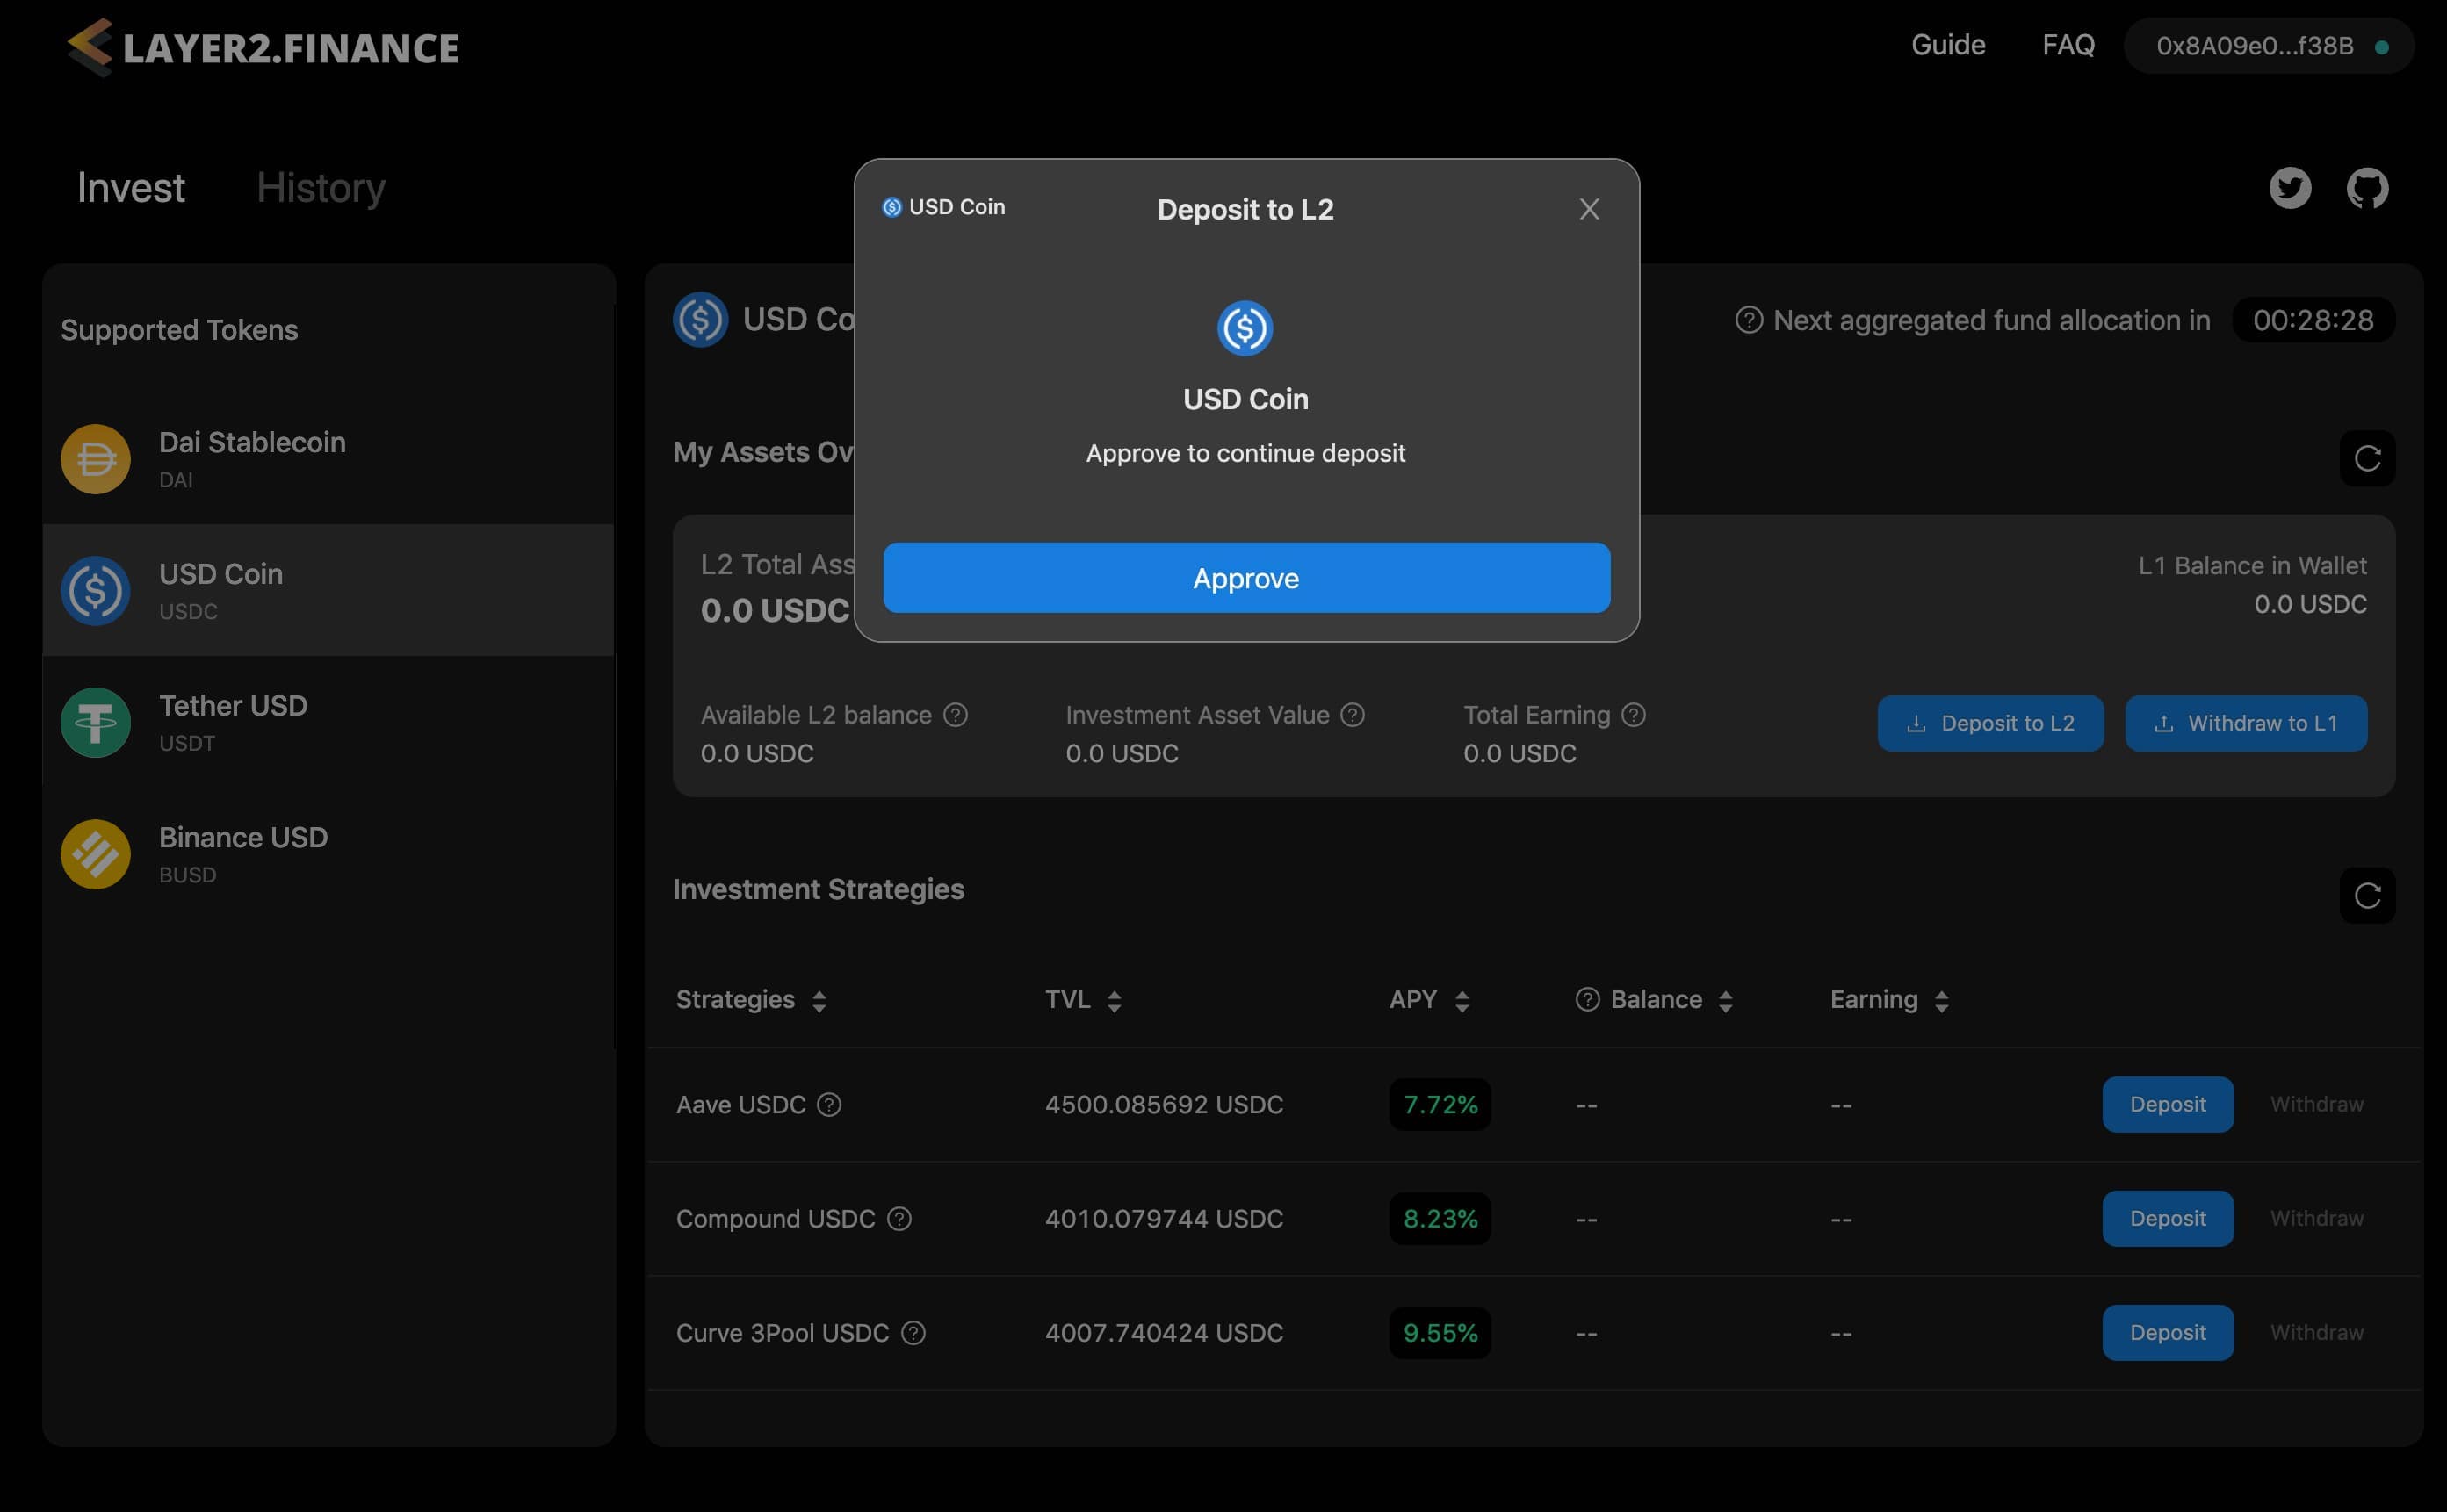
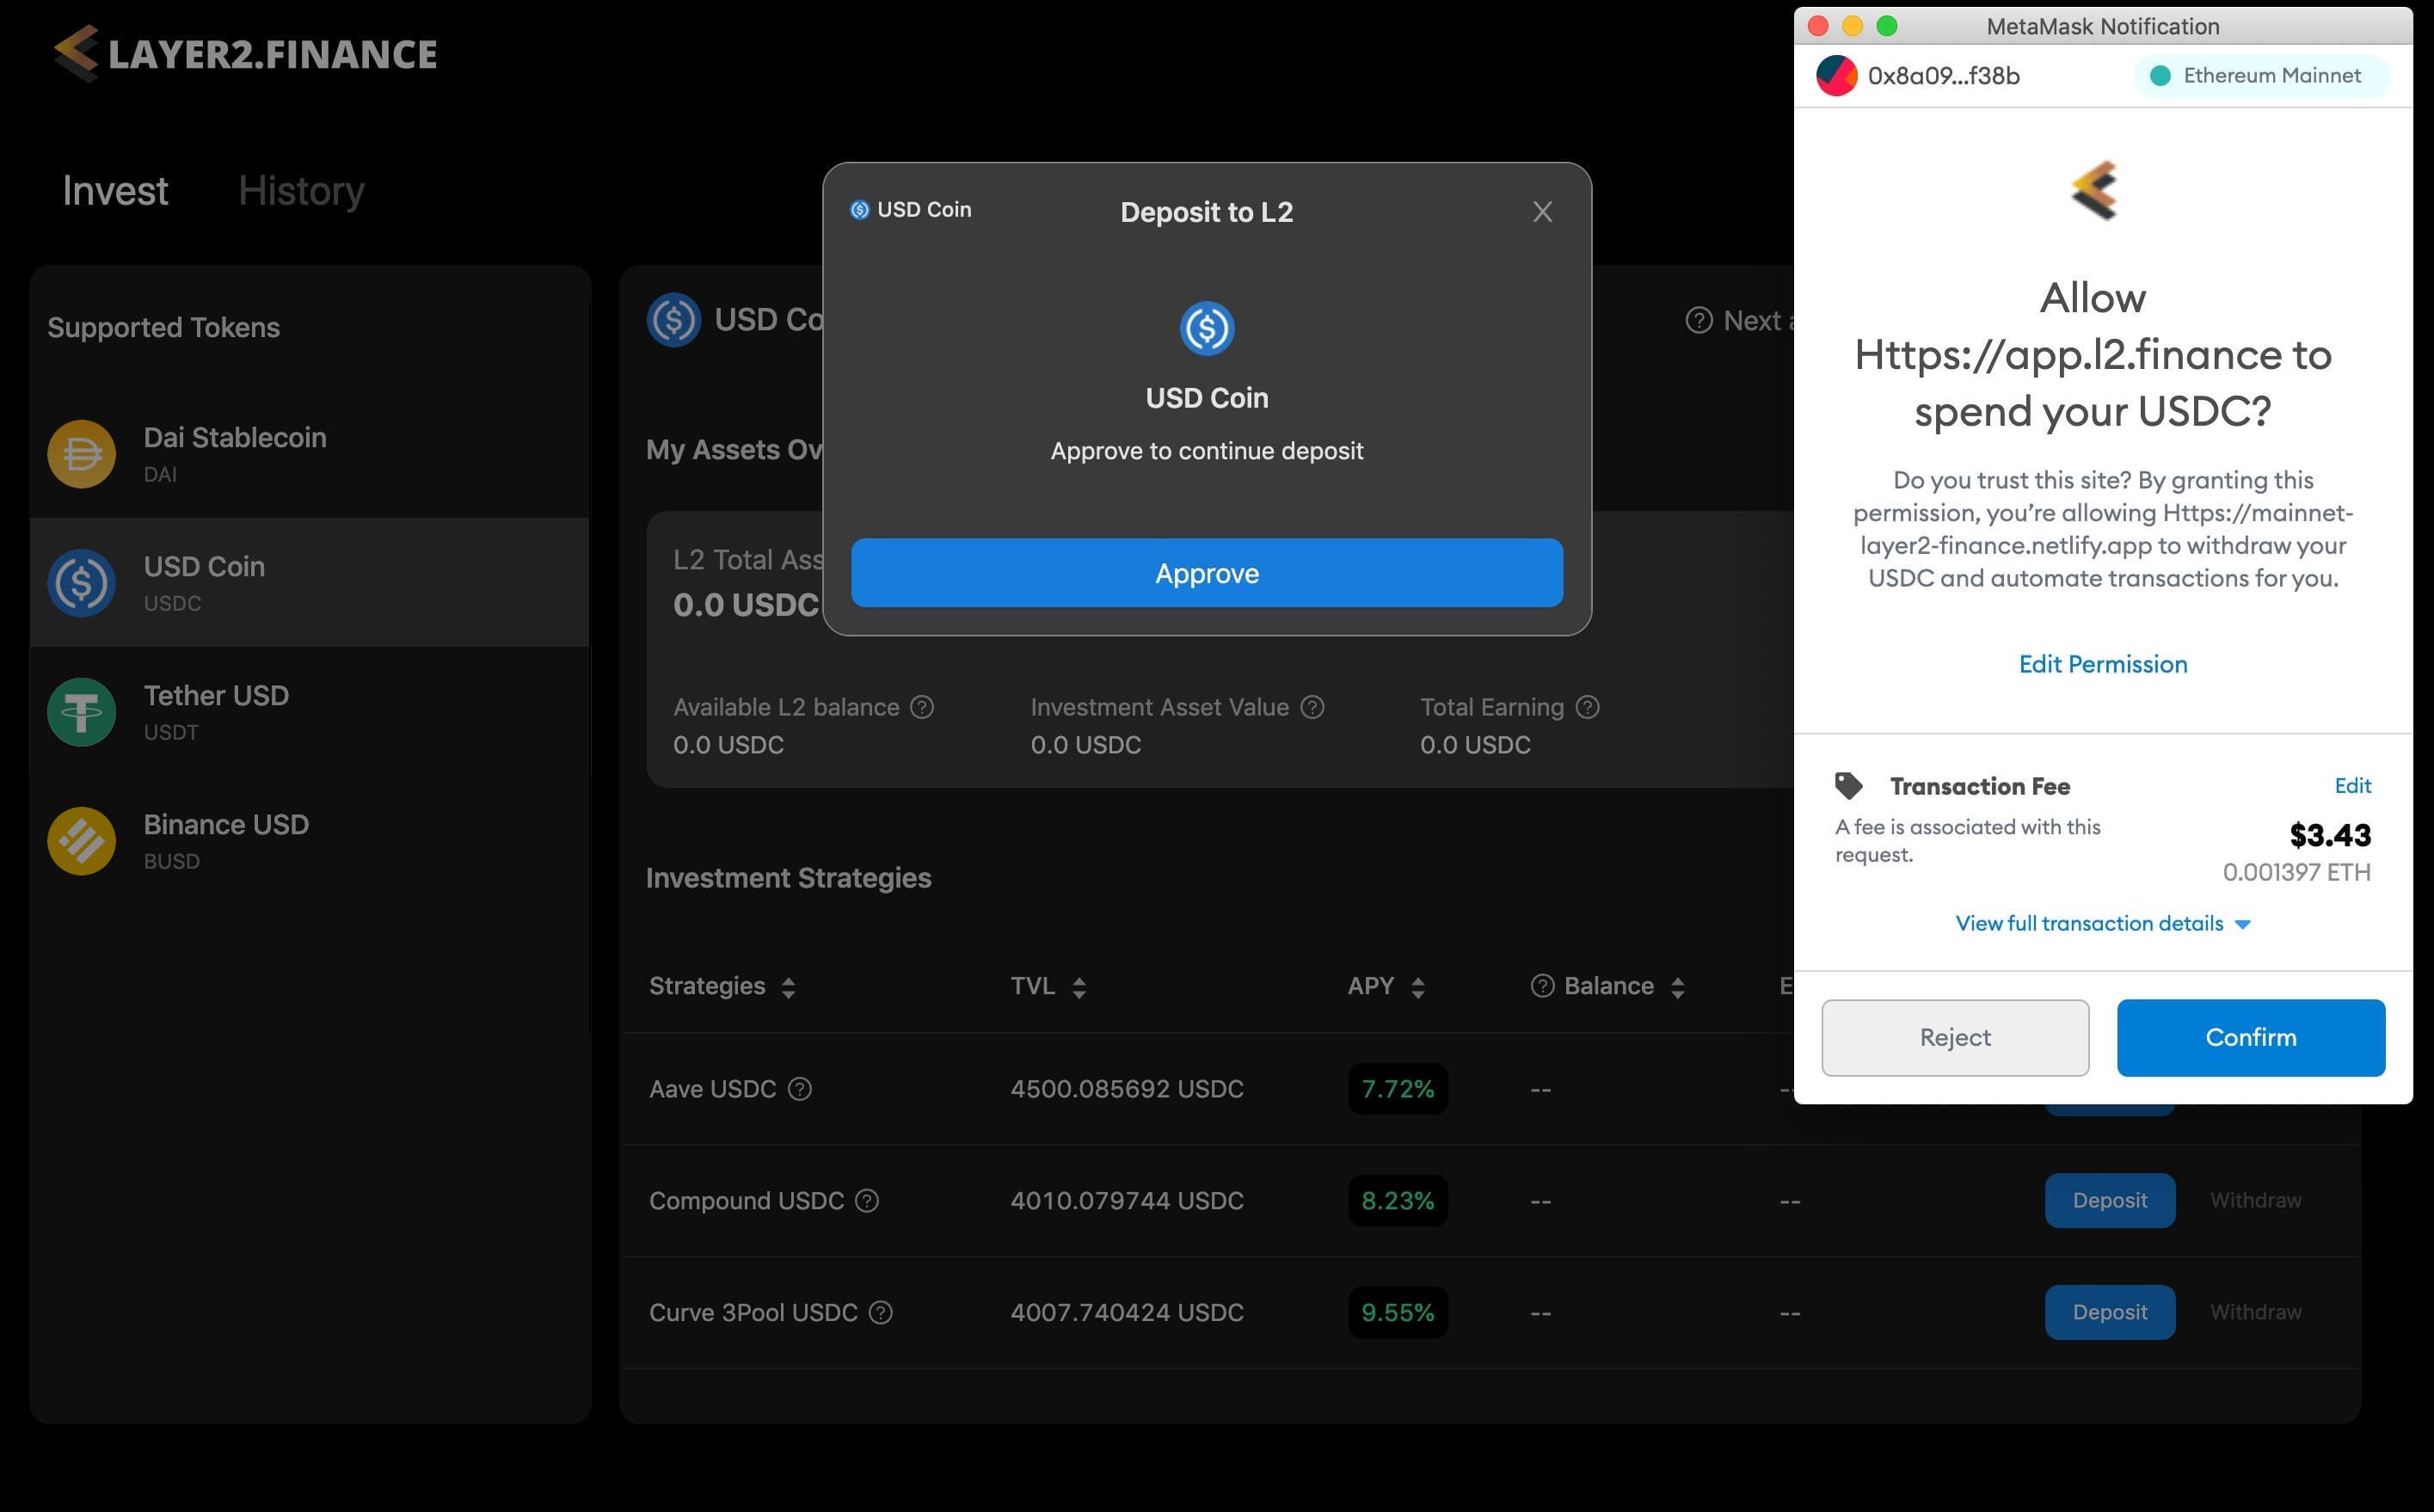
- Click “Approve” on the popup, you will be prompted to confirm the “approve” transaction in your MetaMask wallet.
- NOTE: Approving ERC-20 token is an on-chain transaction that costs some gas fee. Please make sure you have enough ETH in your L1 wallet to cover the gas fee.
- NOTE: The “approve” operation is required only once when you transfer an ERC-20 token from your L1 wallet to L2. Any USDC deposit afterwards won’t require the “approve” operation.
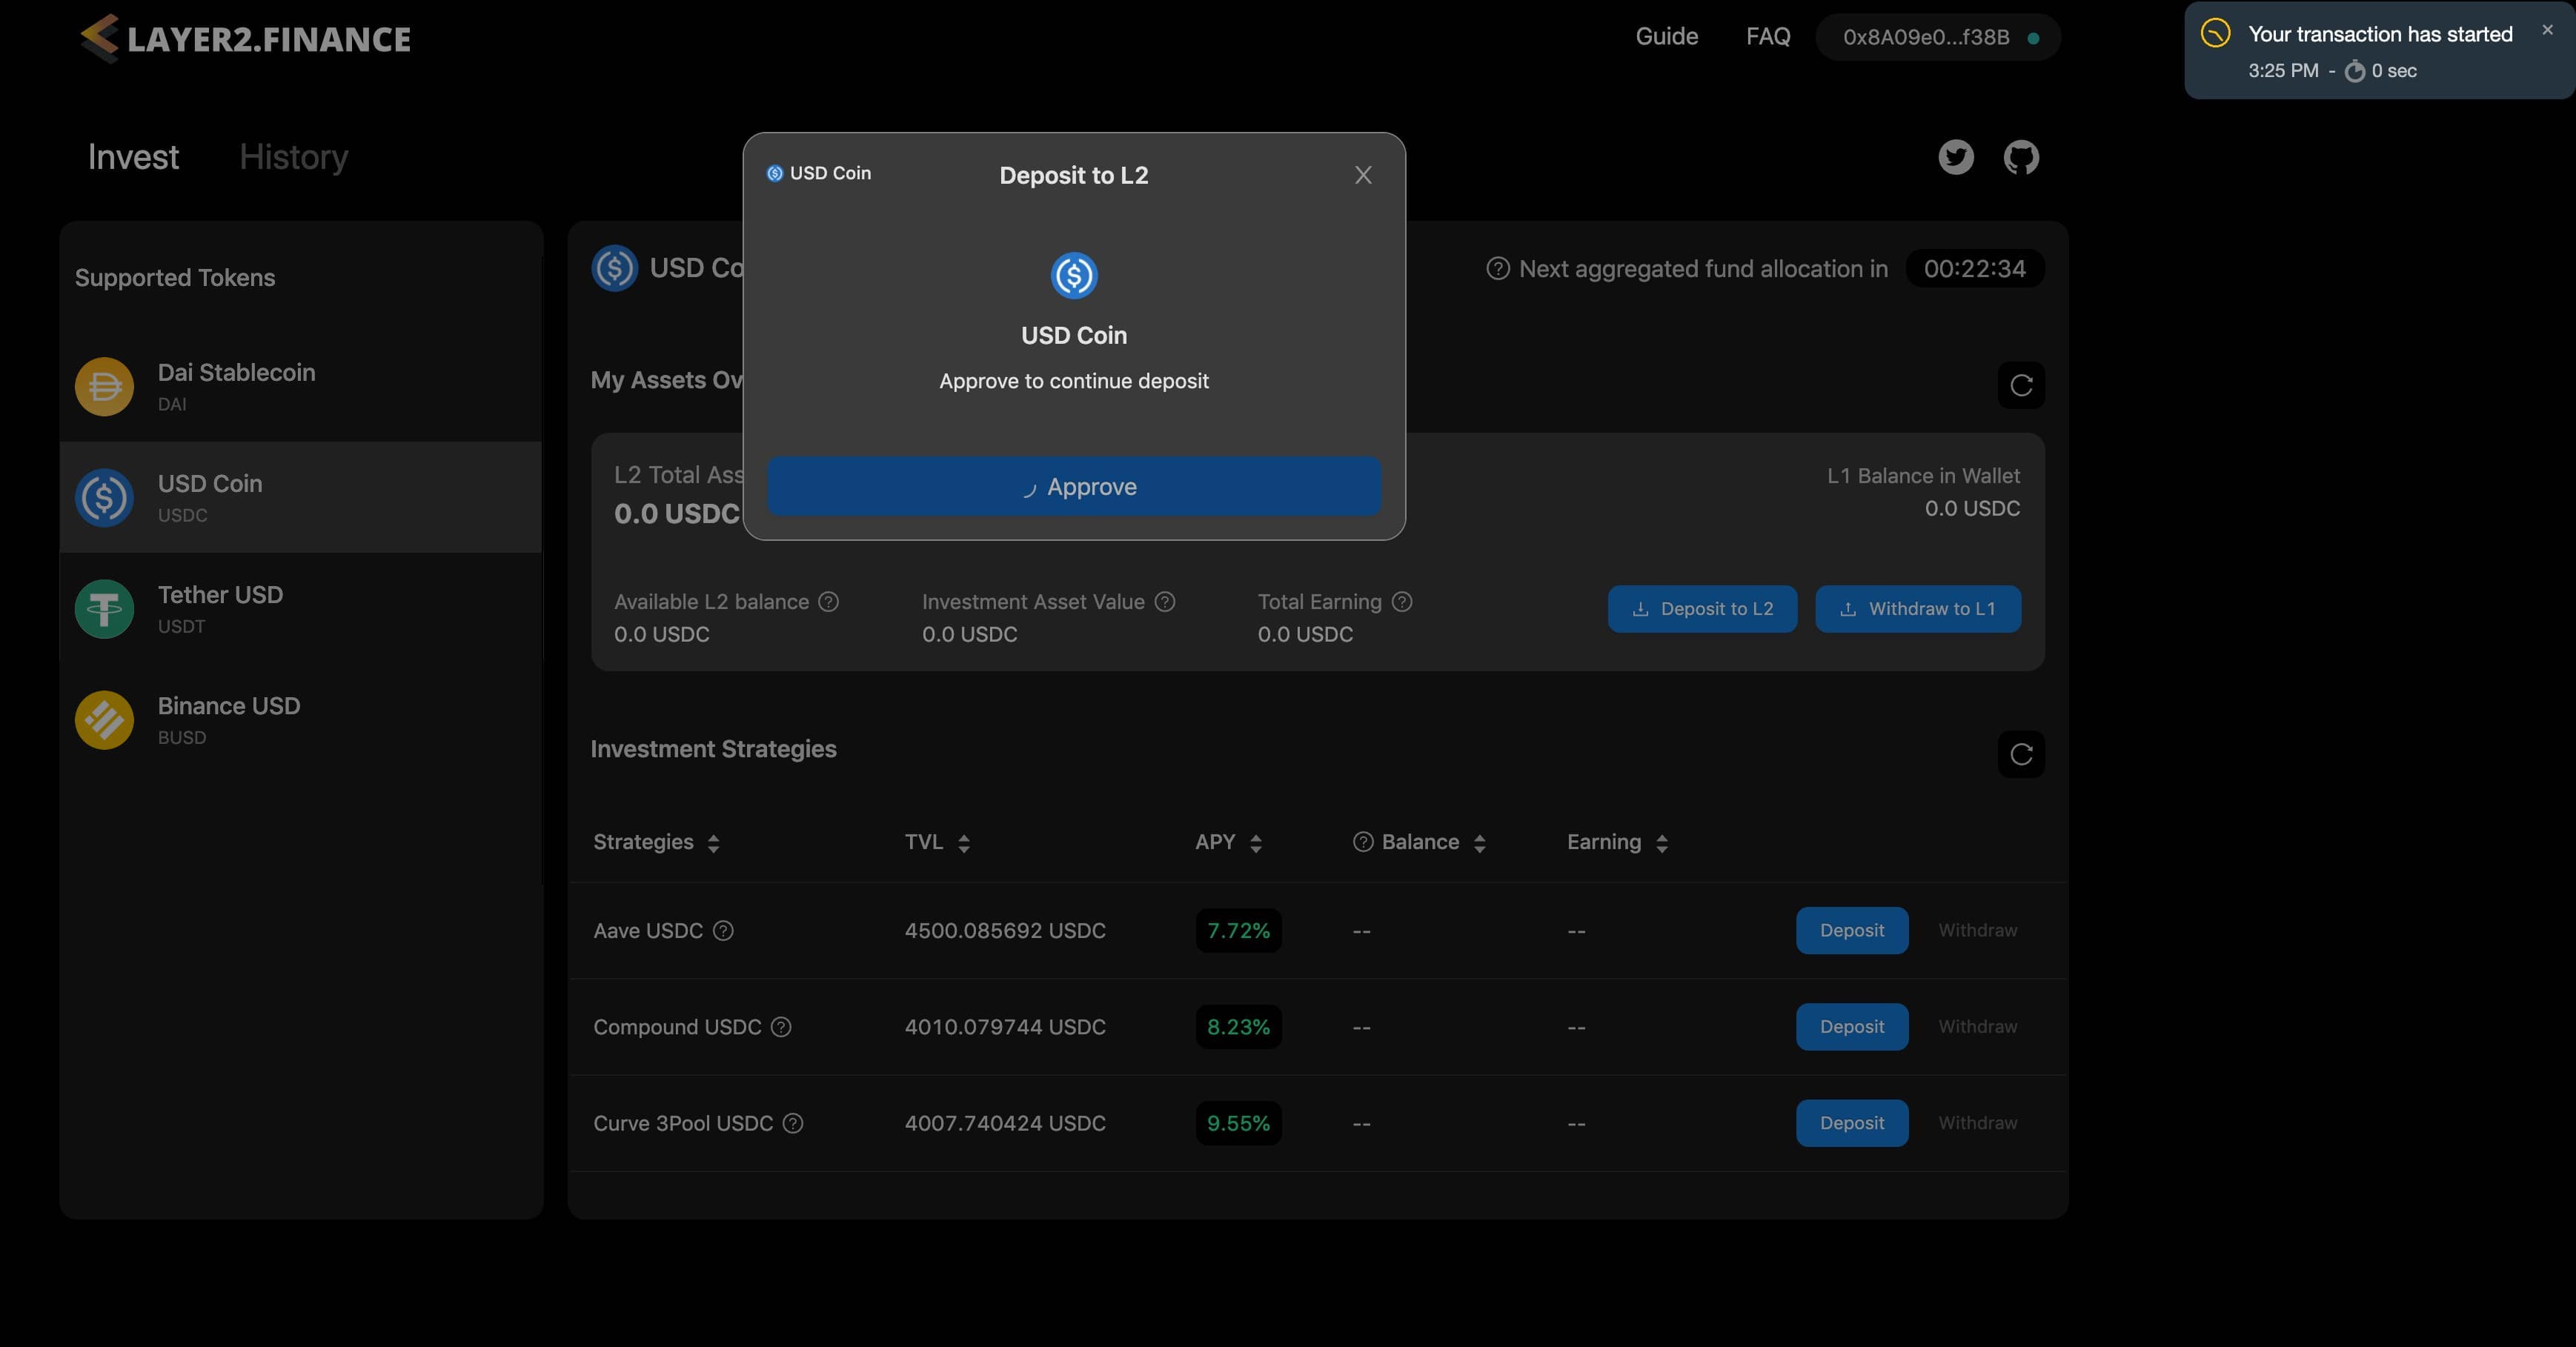
- After confirming the “approve” tx in MetaMask, please wait a few minutes for the “approve” tx to be mined in L1.
- Once the “approve” tx is mined, you will see another popup where you can enter the amount of USDC you would like to transfer from your L1 wallet to L2 wallet.
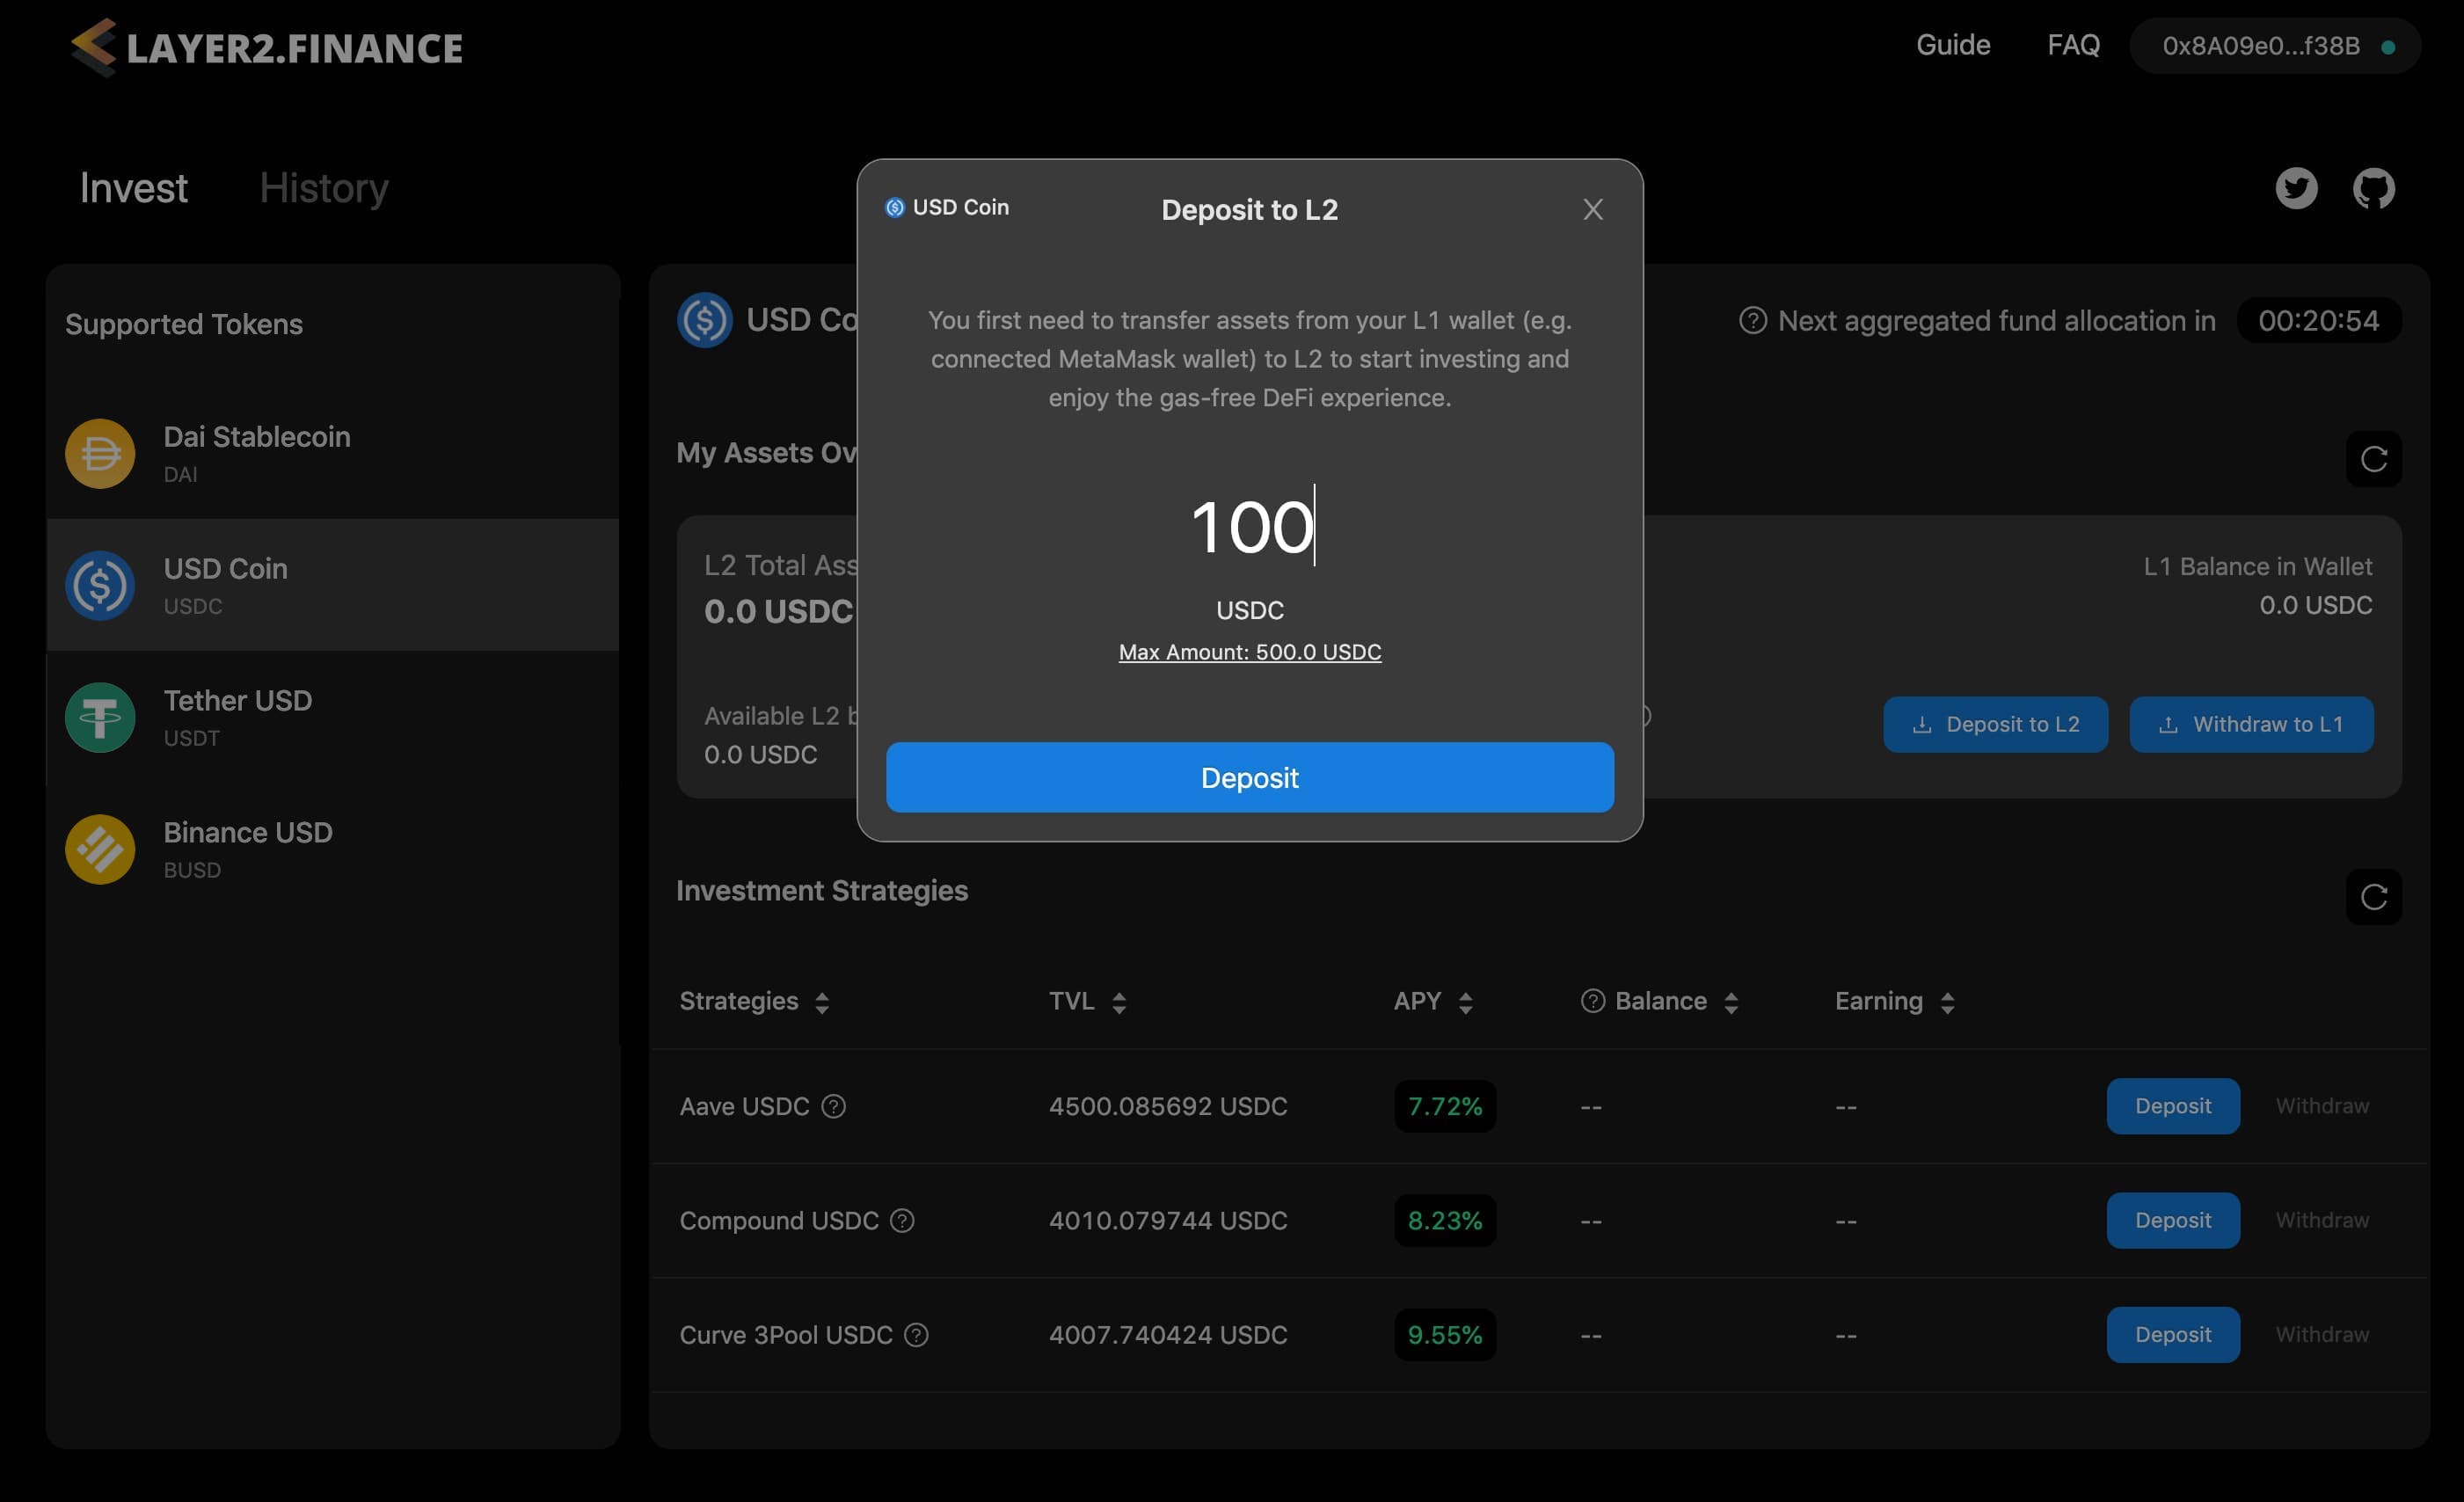
- After entering the deposit amount, click “Deposit” on the popup and you will see a prompt in MetaMask to confirm the transaction.
- NOTE: Transferring funds from your L1 wallet to L2 involves an on-chain transaction that costs some gas fees. Please make sure you have enough ETH in your L1 wallet to cover the gas fee.
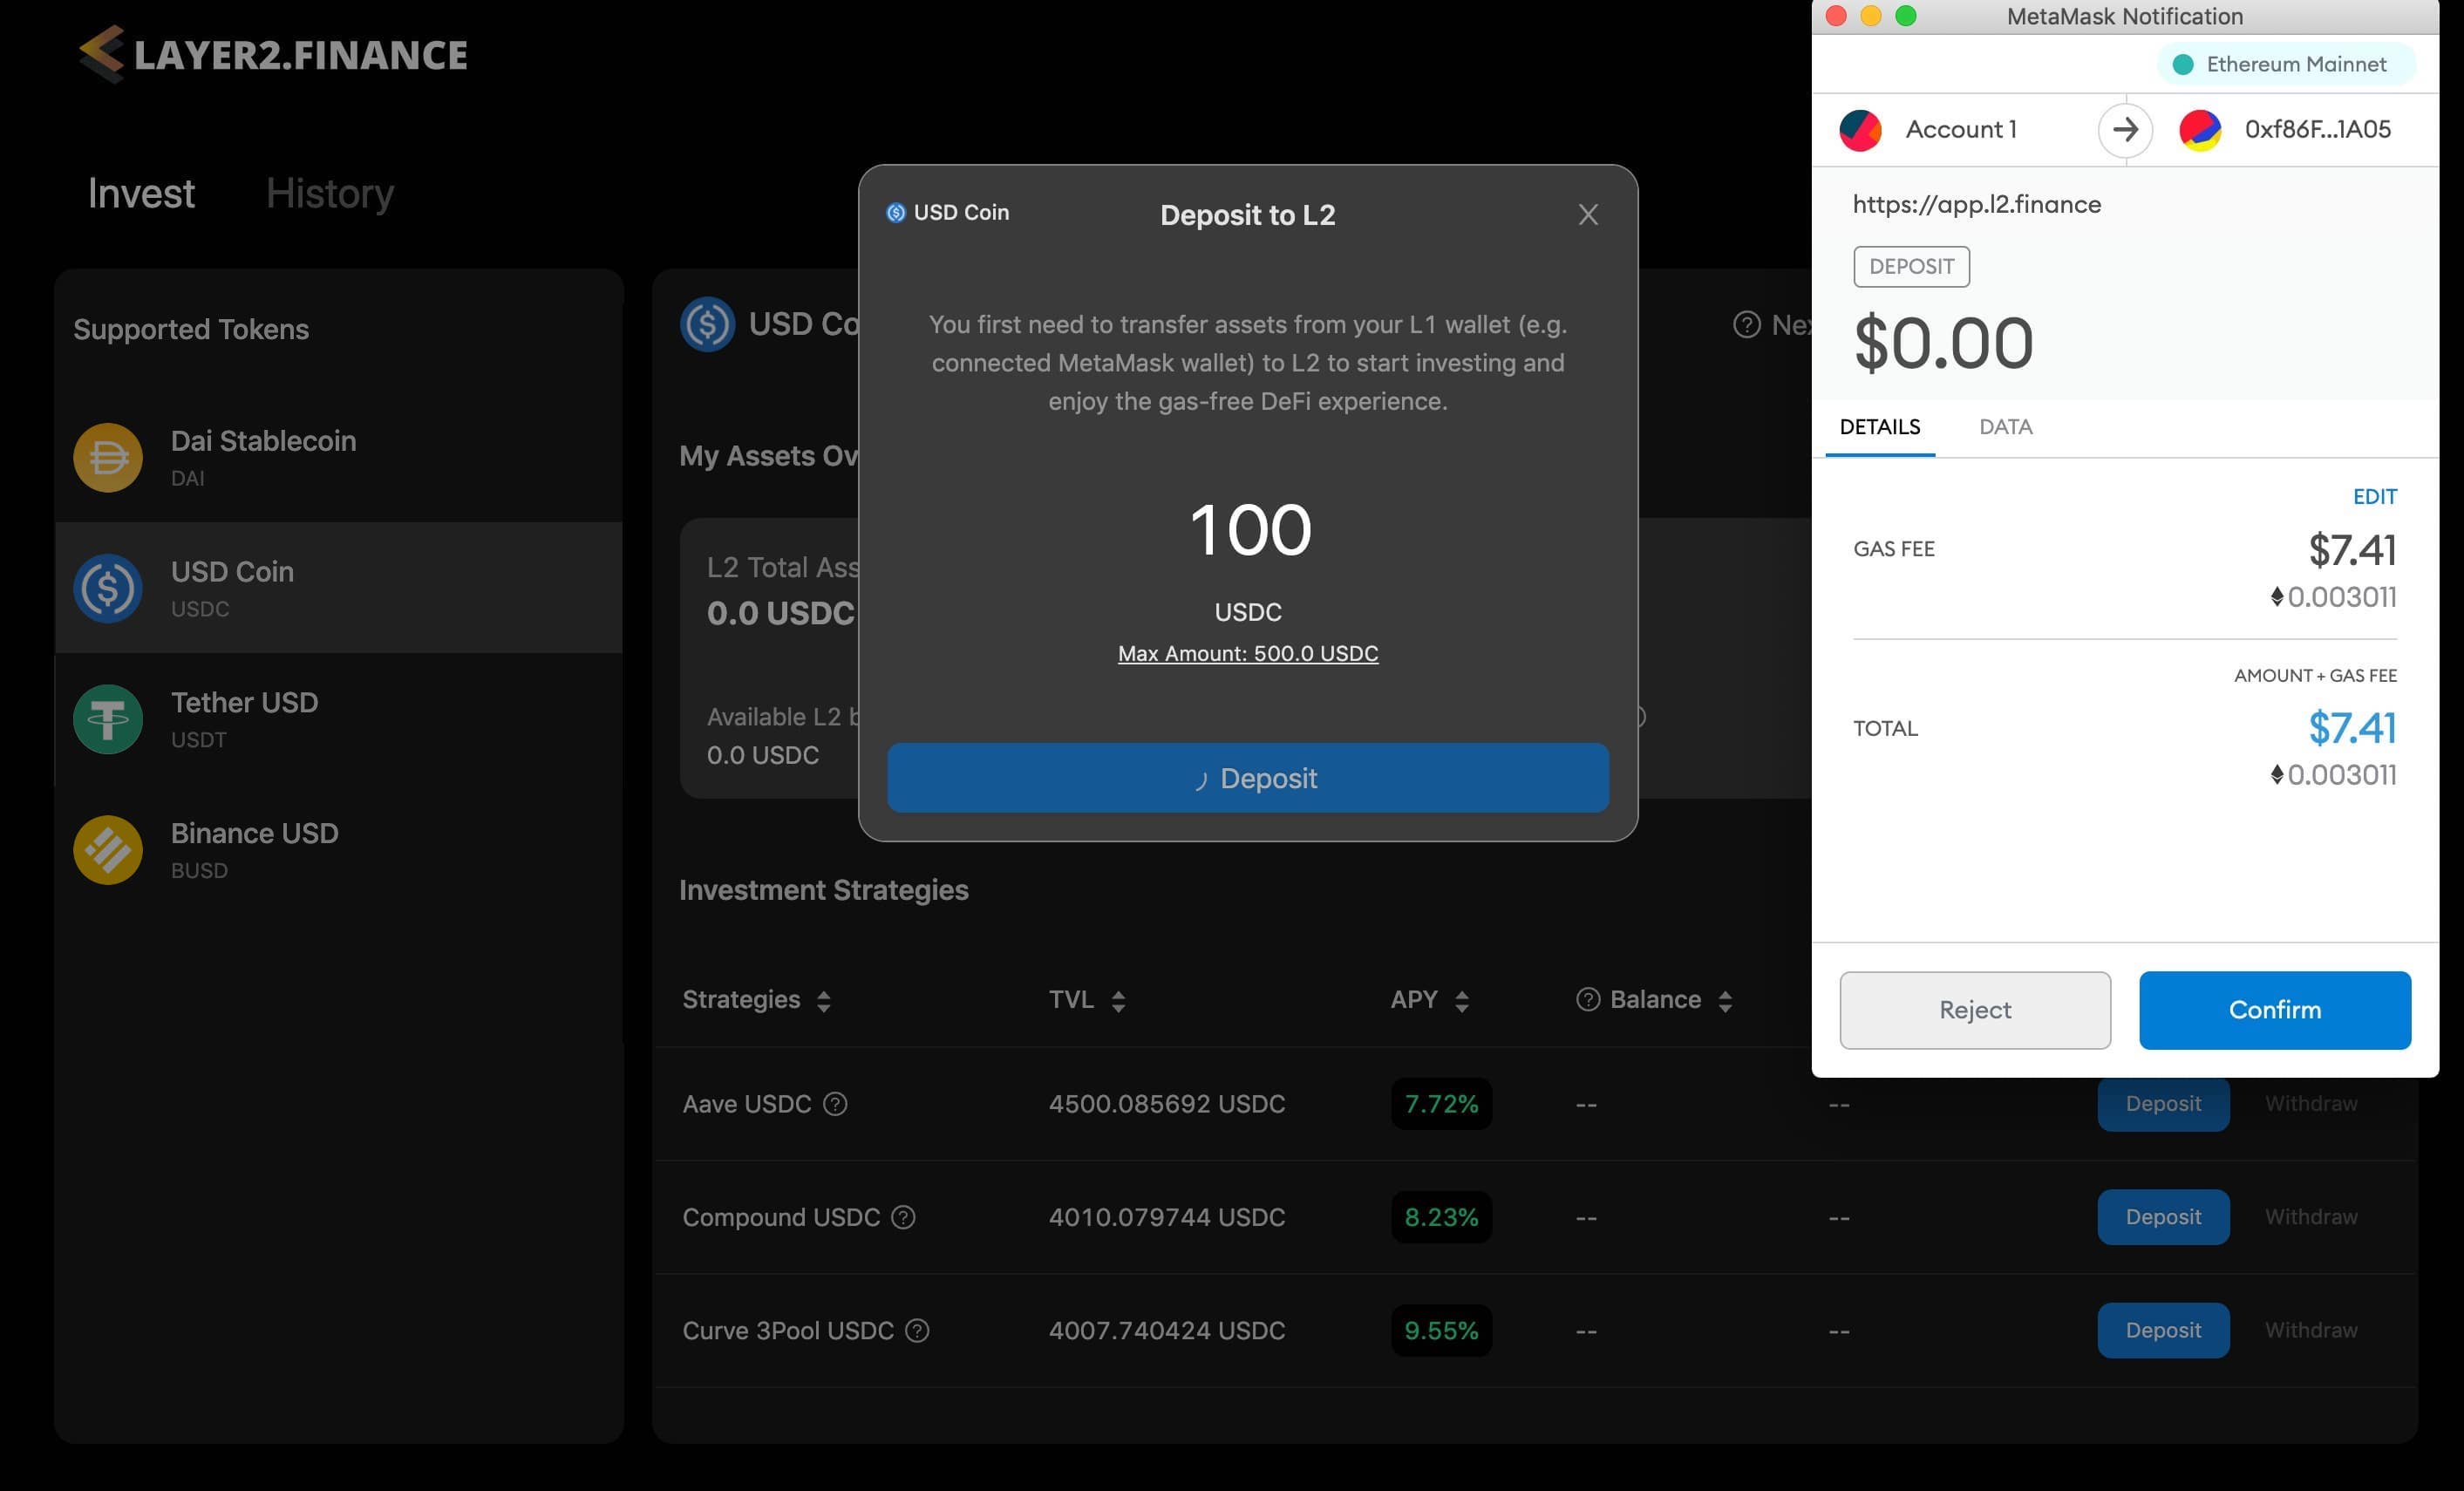
- Once you confirm the transaction in MetaMask, please wait a few minutes for the transaction to be mined.
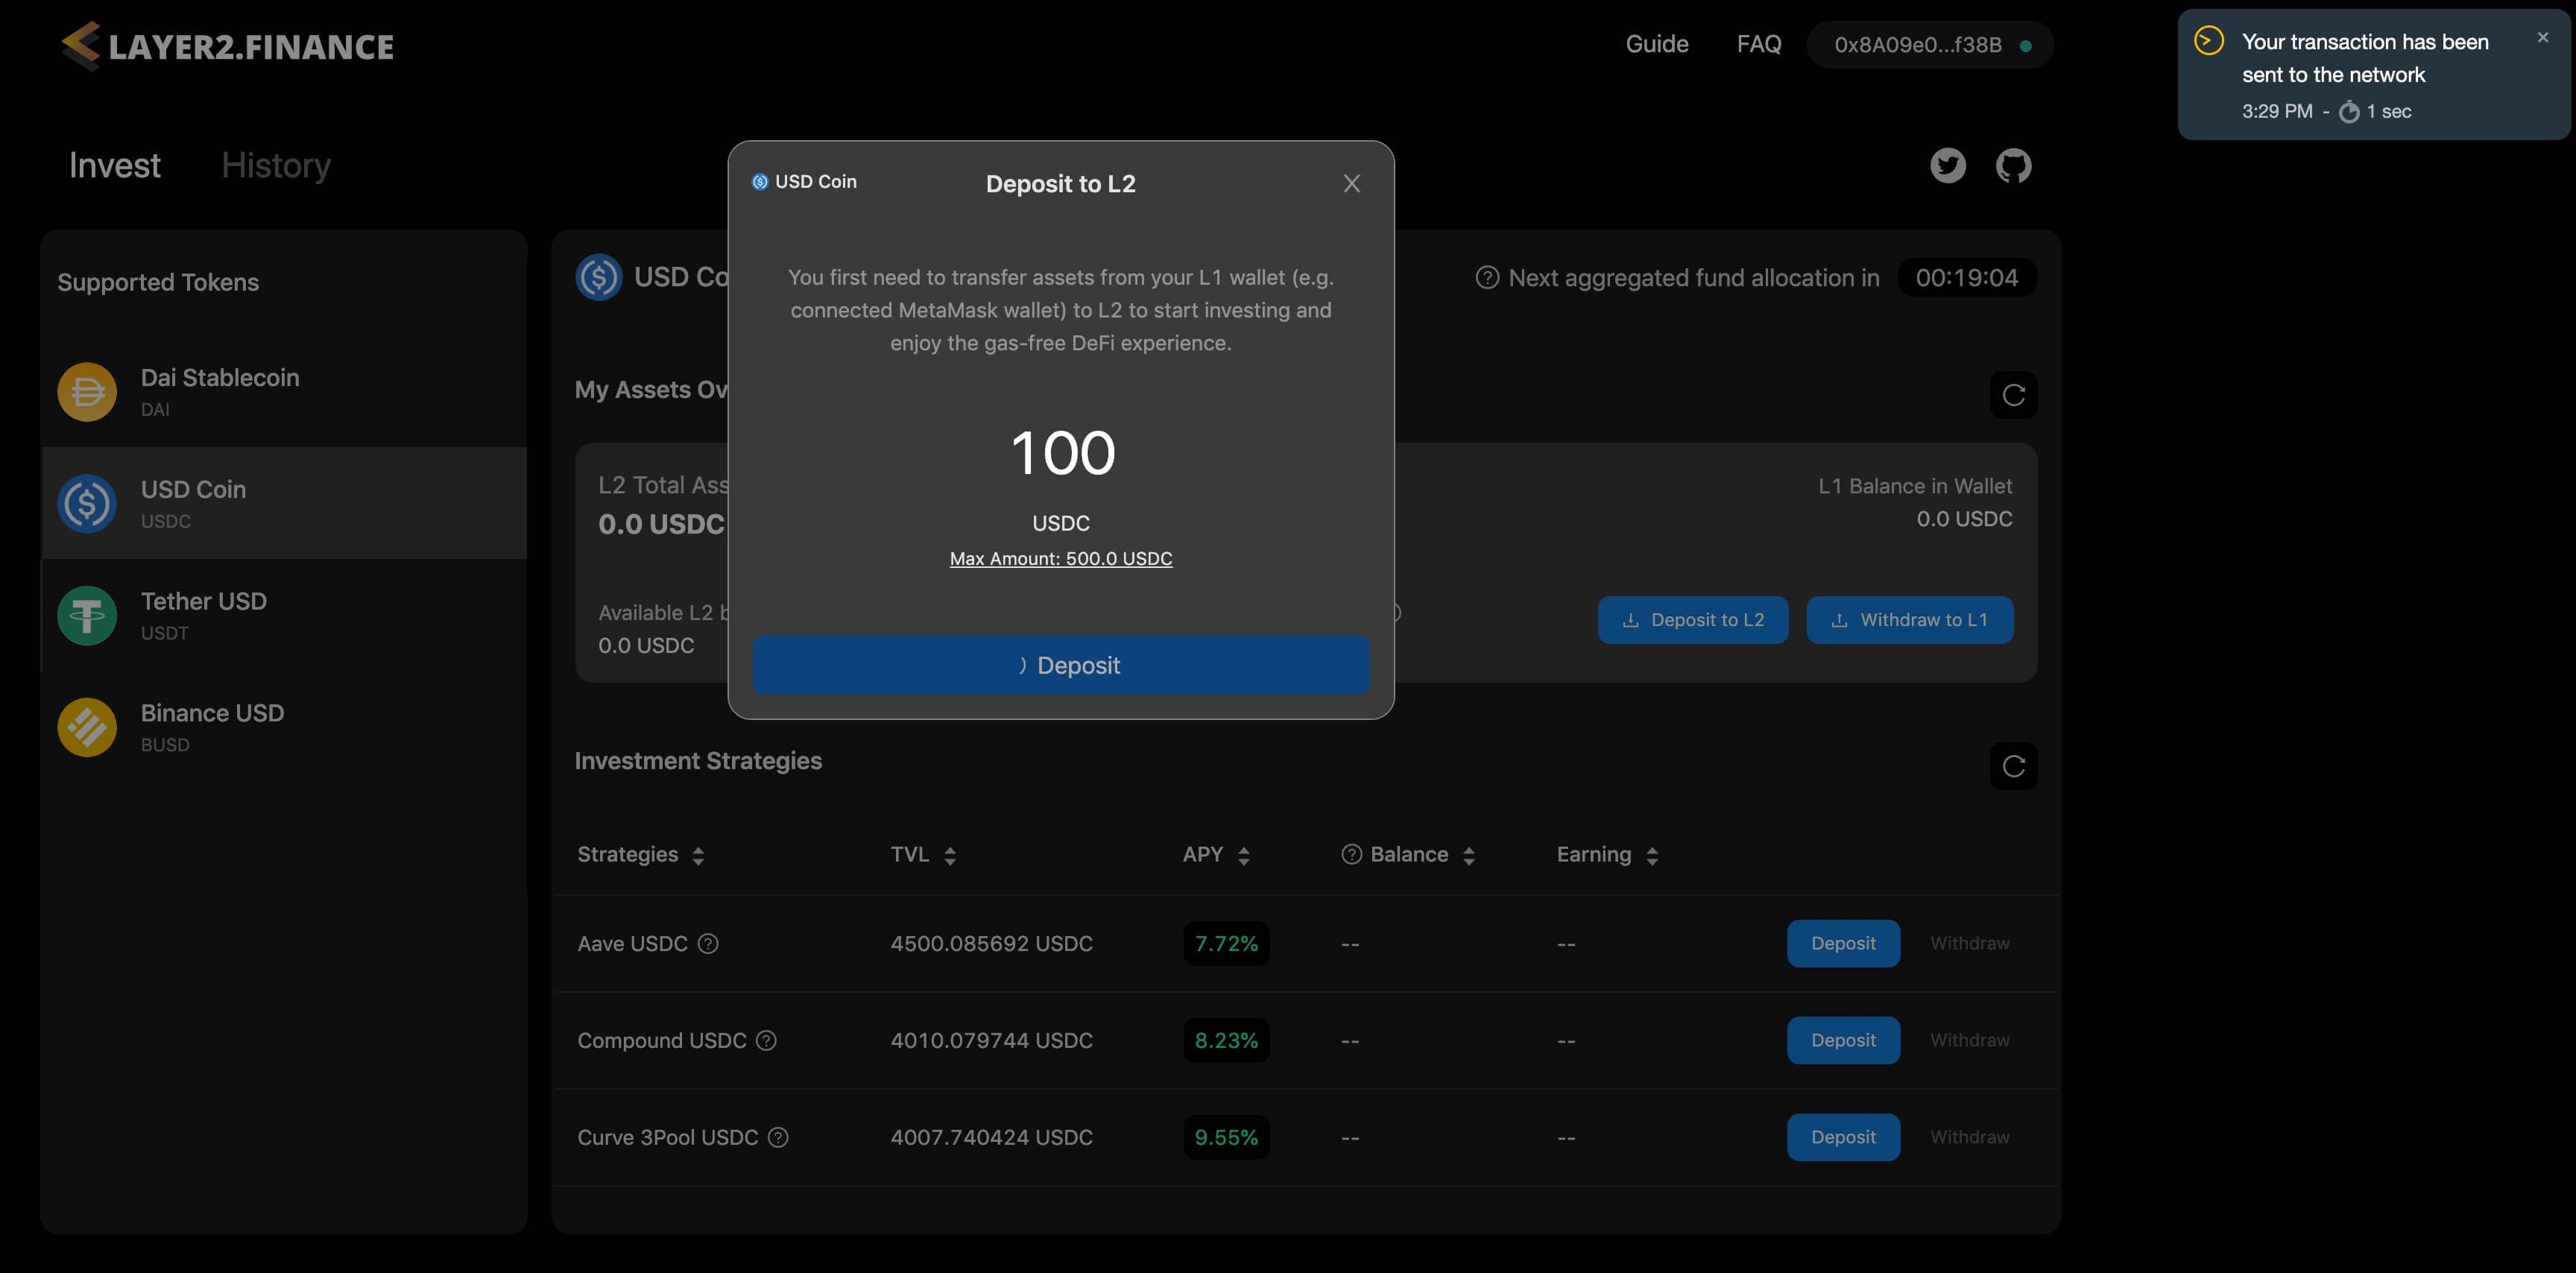
After that, you will see another popup showing that the transaction has been submitted.
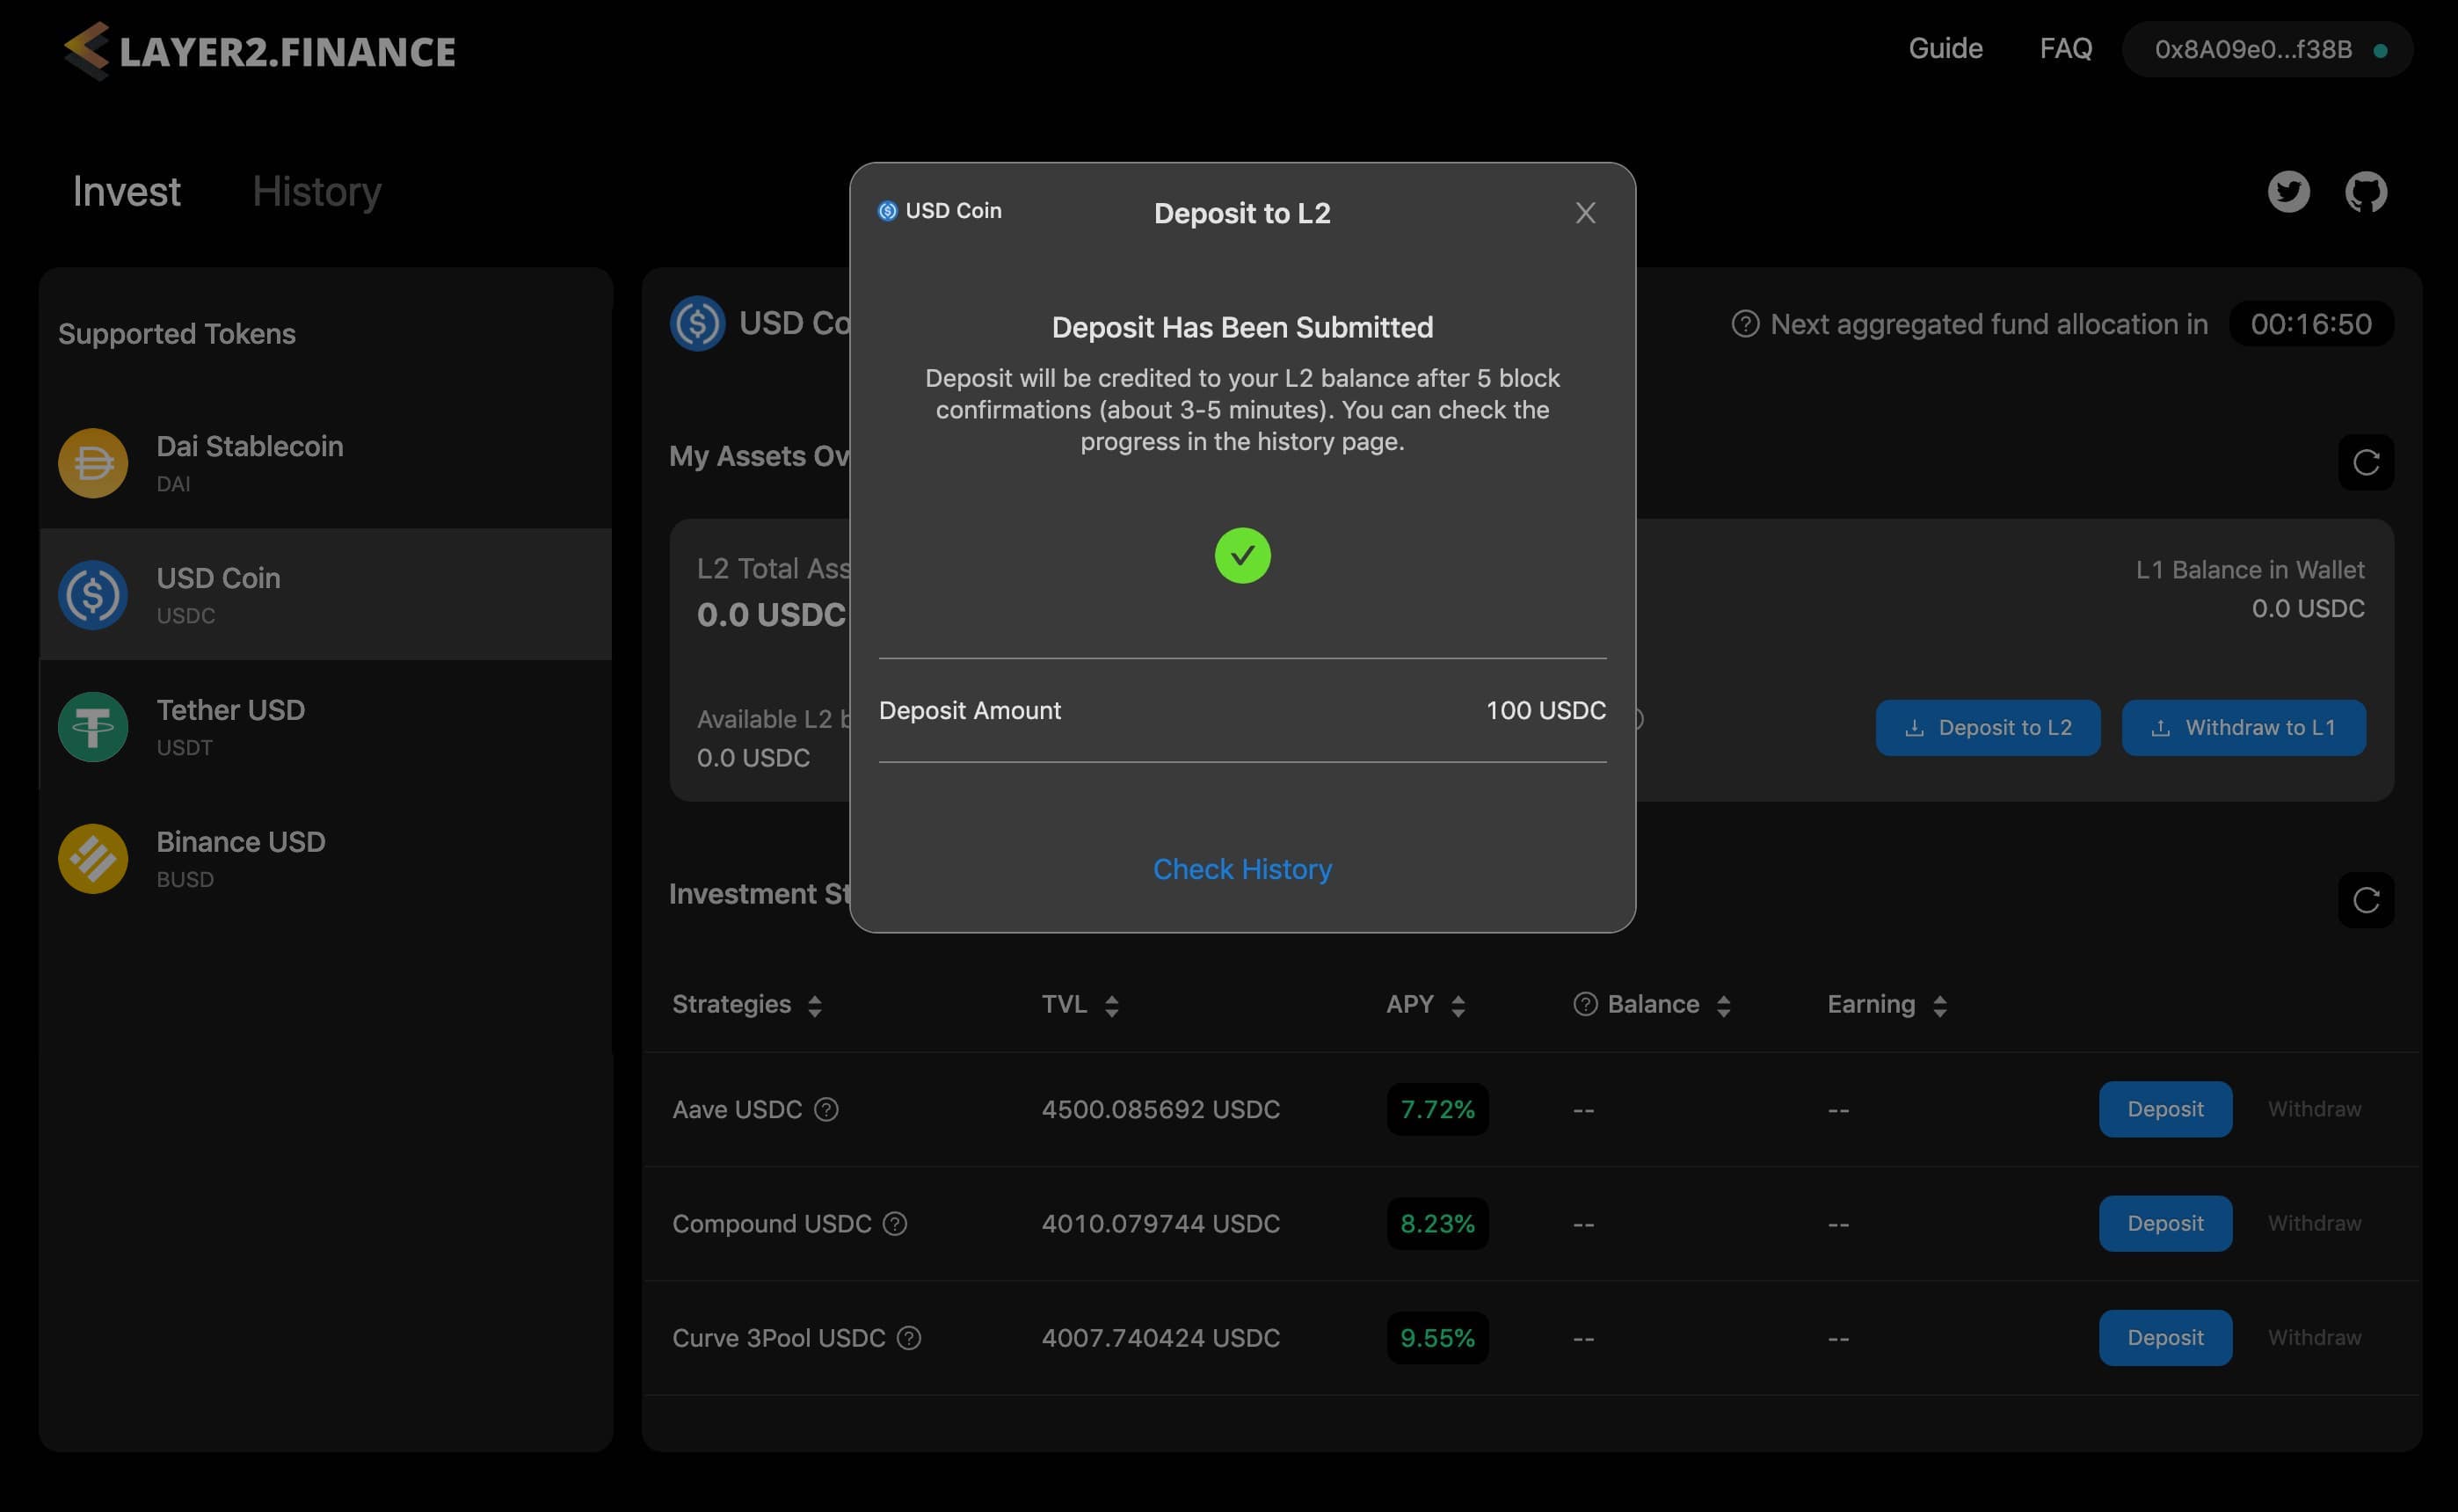
- You can now close the popup and wait for 5 more block confirmations (3-5 minutes) in order for the fund to be credited to your L2 balance. You can always check the transaction status in the history page.

- After the transaction is in the “Completed” status, you should have some L2 balance that is ready to be committed to DeFi strategies and earn yields!
Deposit to a Strategy
Now let’s allocate some L2 balance to a DeFi strategy and start earnings.
- Look through the list of DeFi strategies that accept USDC in the table, including its description, APY and TVL. Pick a strategy you would like to invest. In this tutorial, let’s try the “Aave USDC” strategy that puts USDC to the Aave protocol.
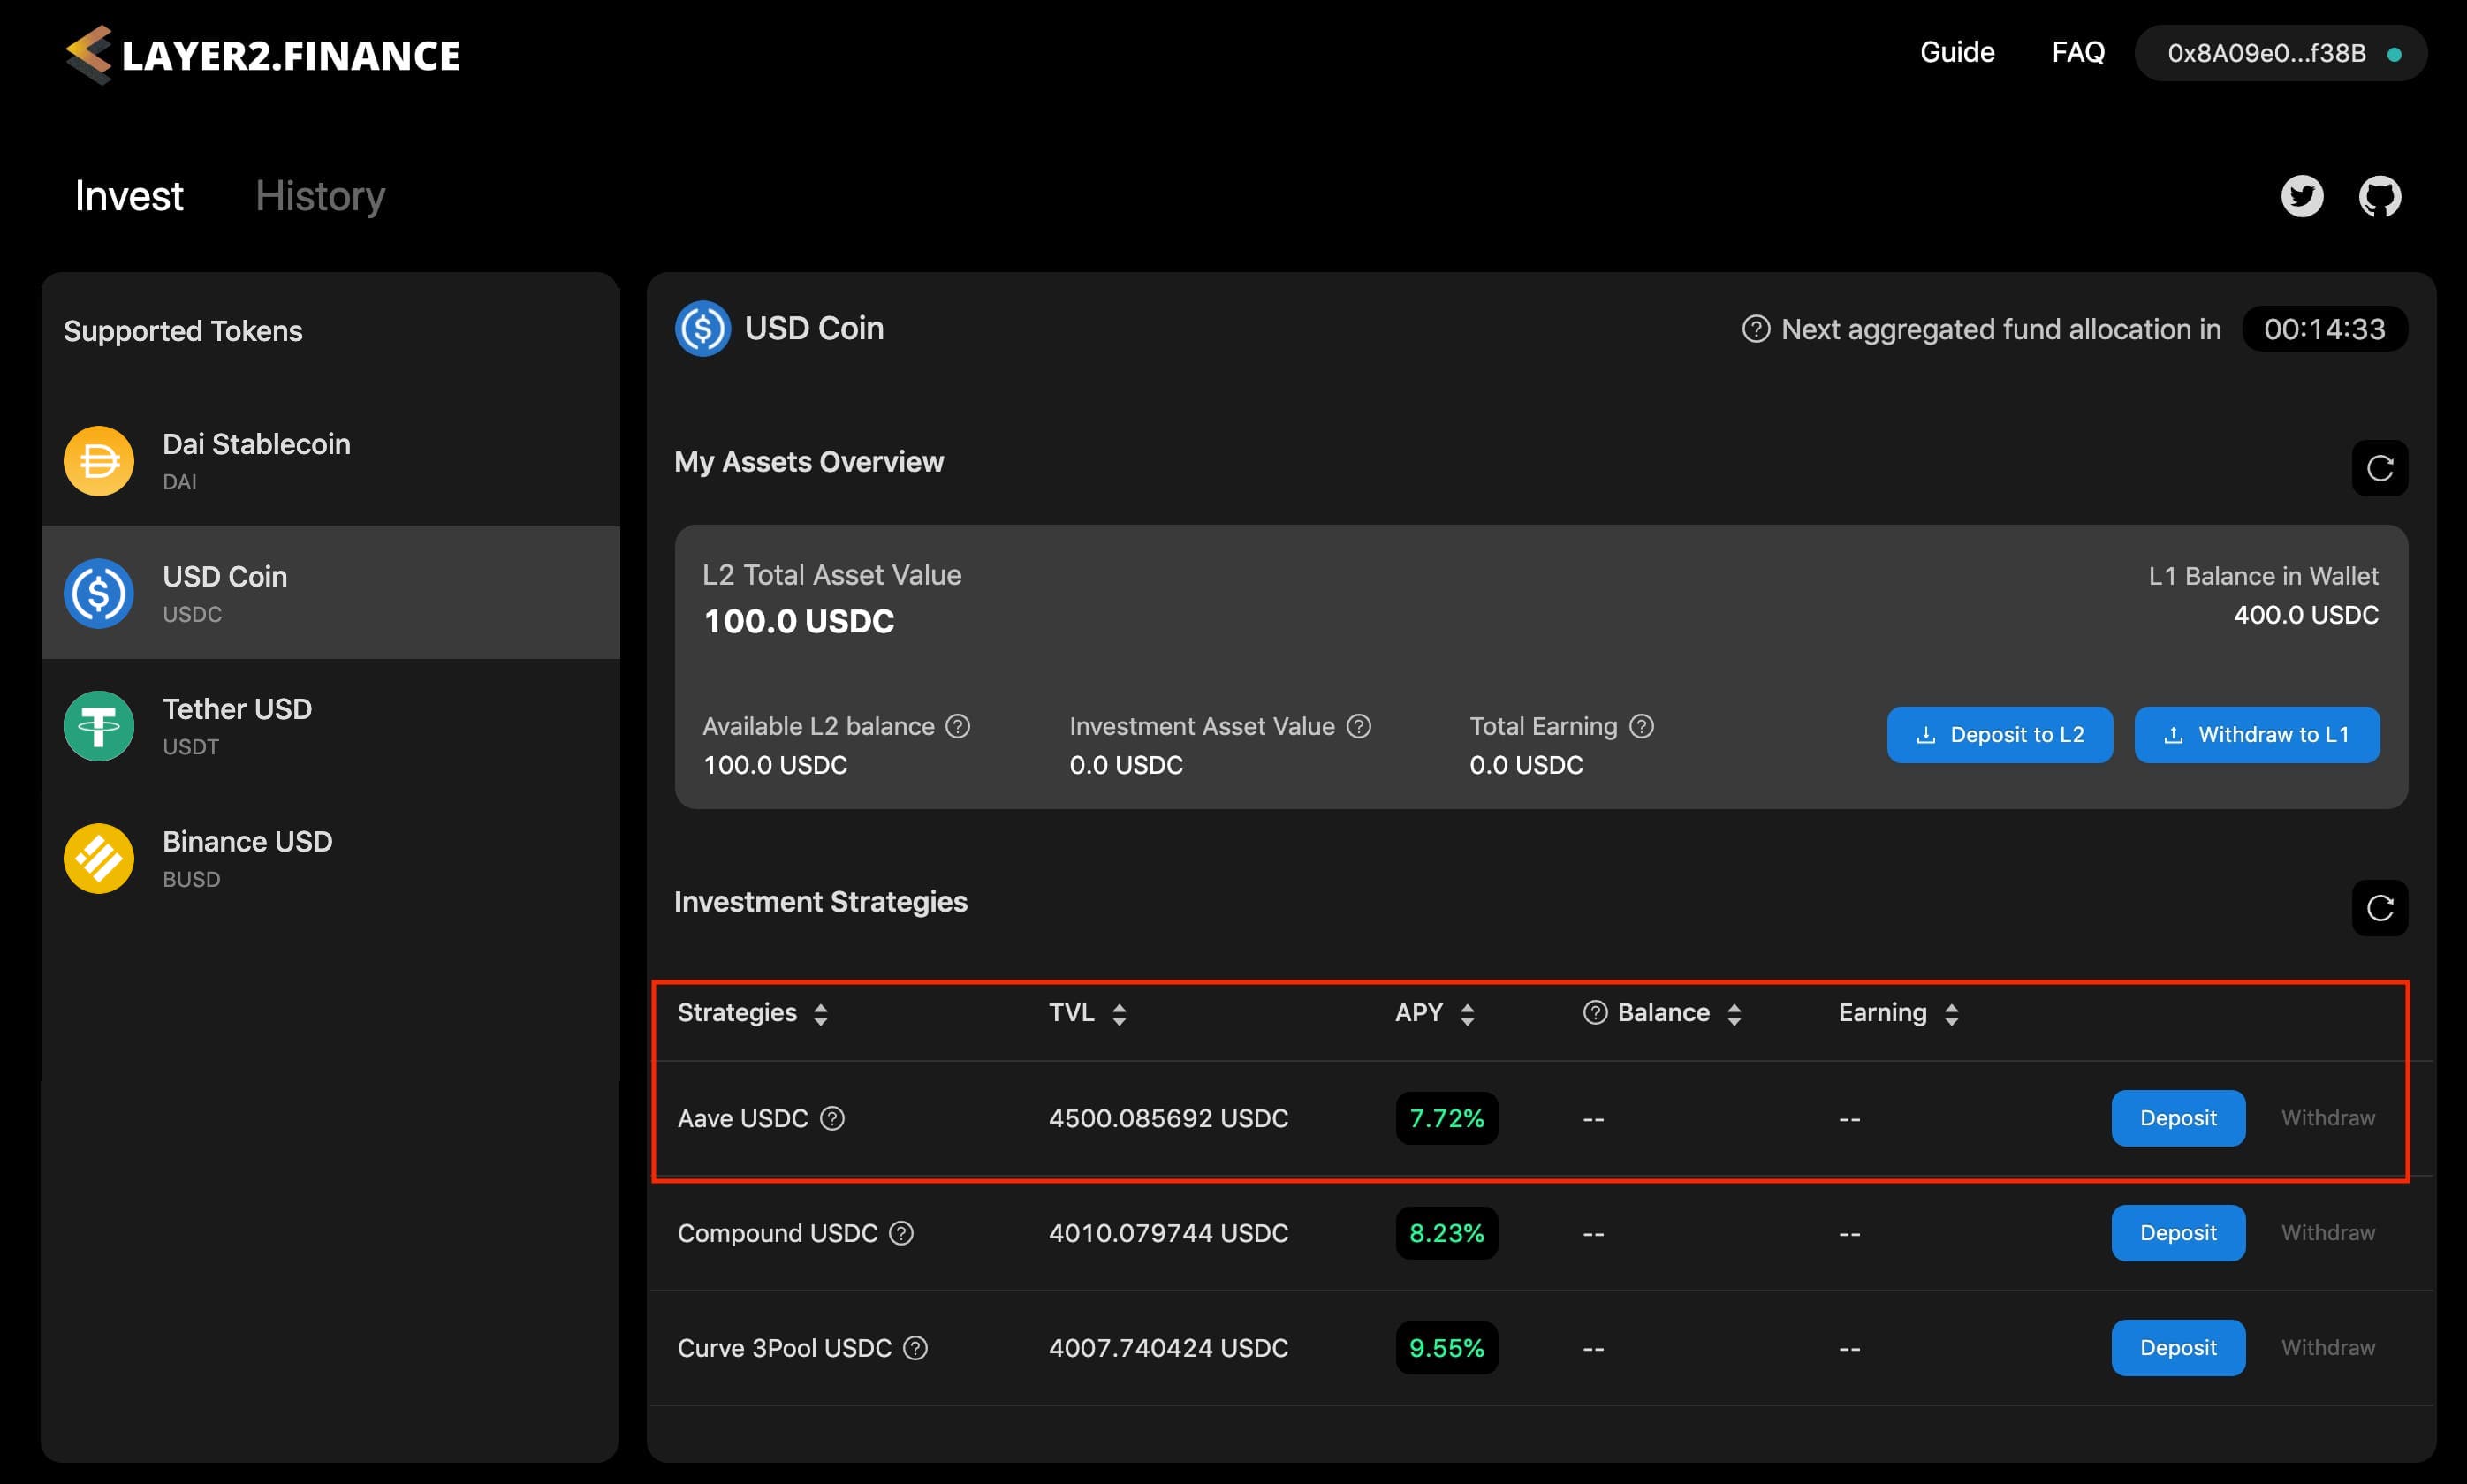
- Click on the “Deposit” button for the strategy.

You will see a popup where you can enter the amount of L2 balance you would like to put into the strategy.
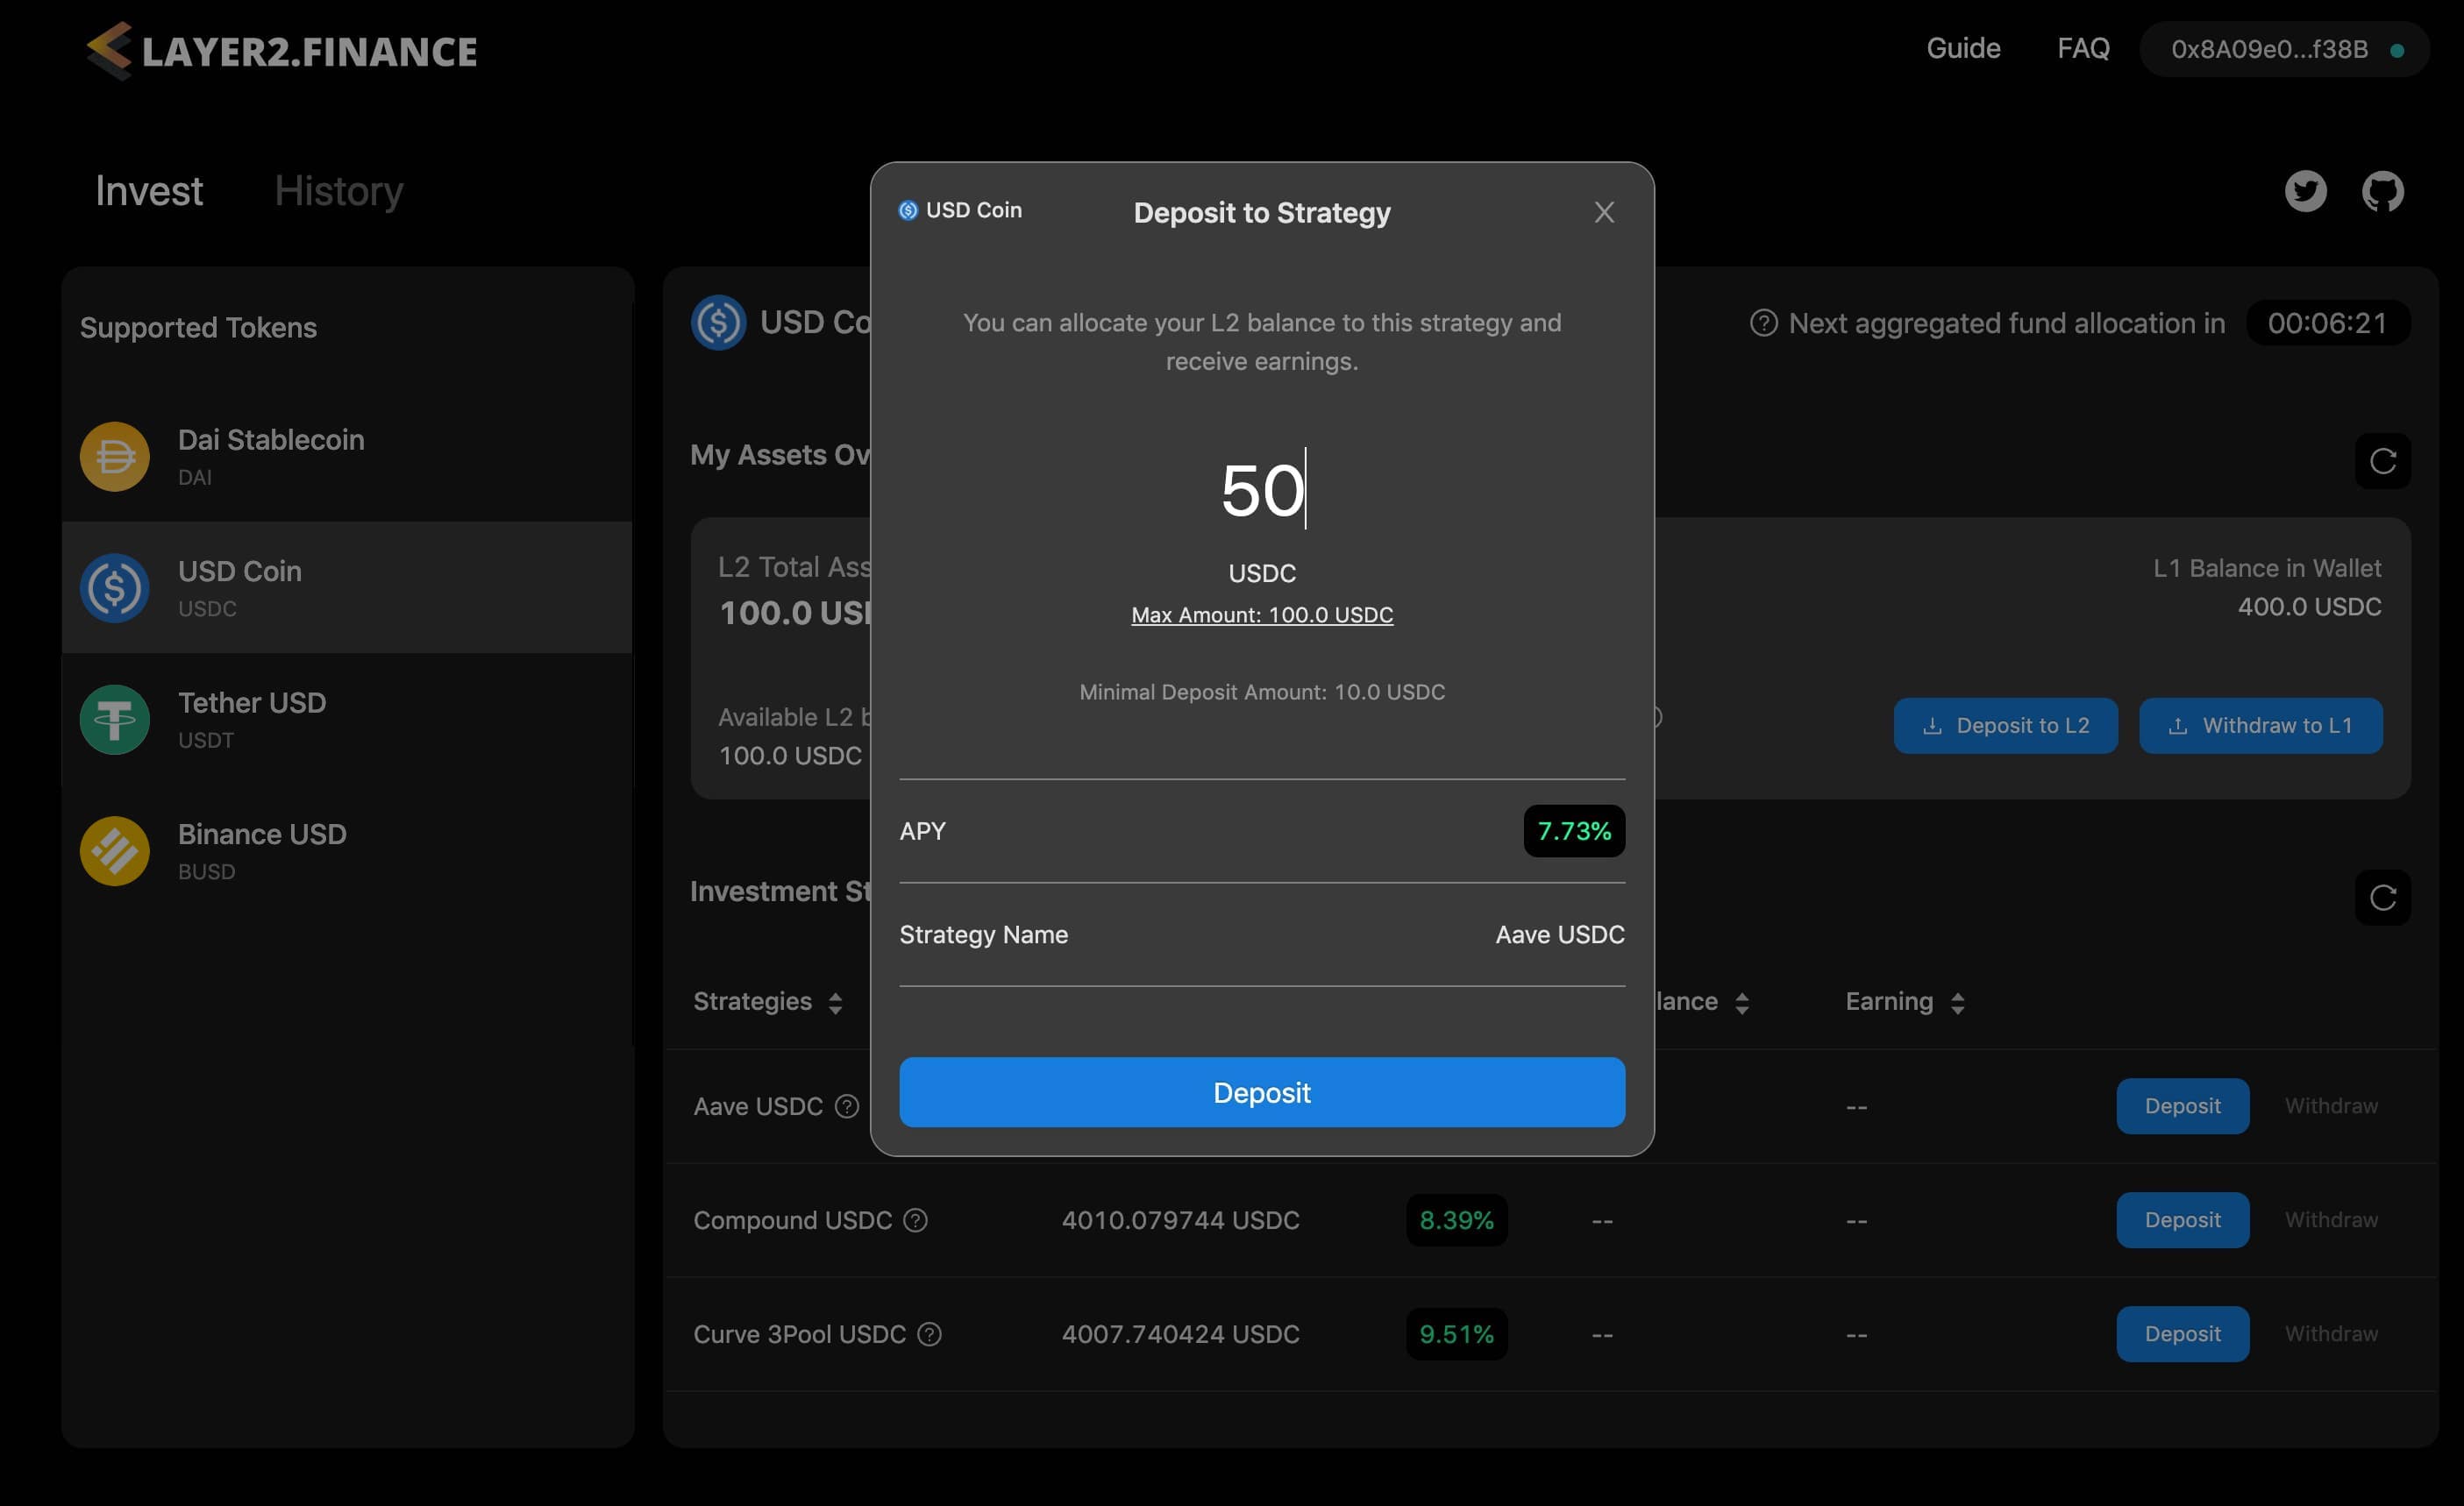
- Click the “Deposit” button on the popup, and you will see a prompt in MetaMask to sign the transaction (no gas fee is needed).

- Once you sign the transaction in MetaMask, you will see another popup showing that the transaction has been submitted.
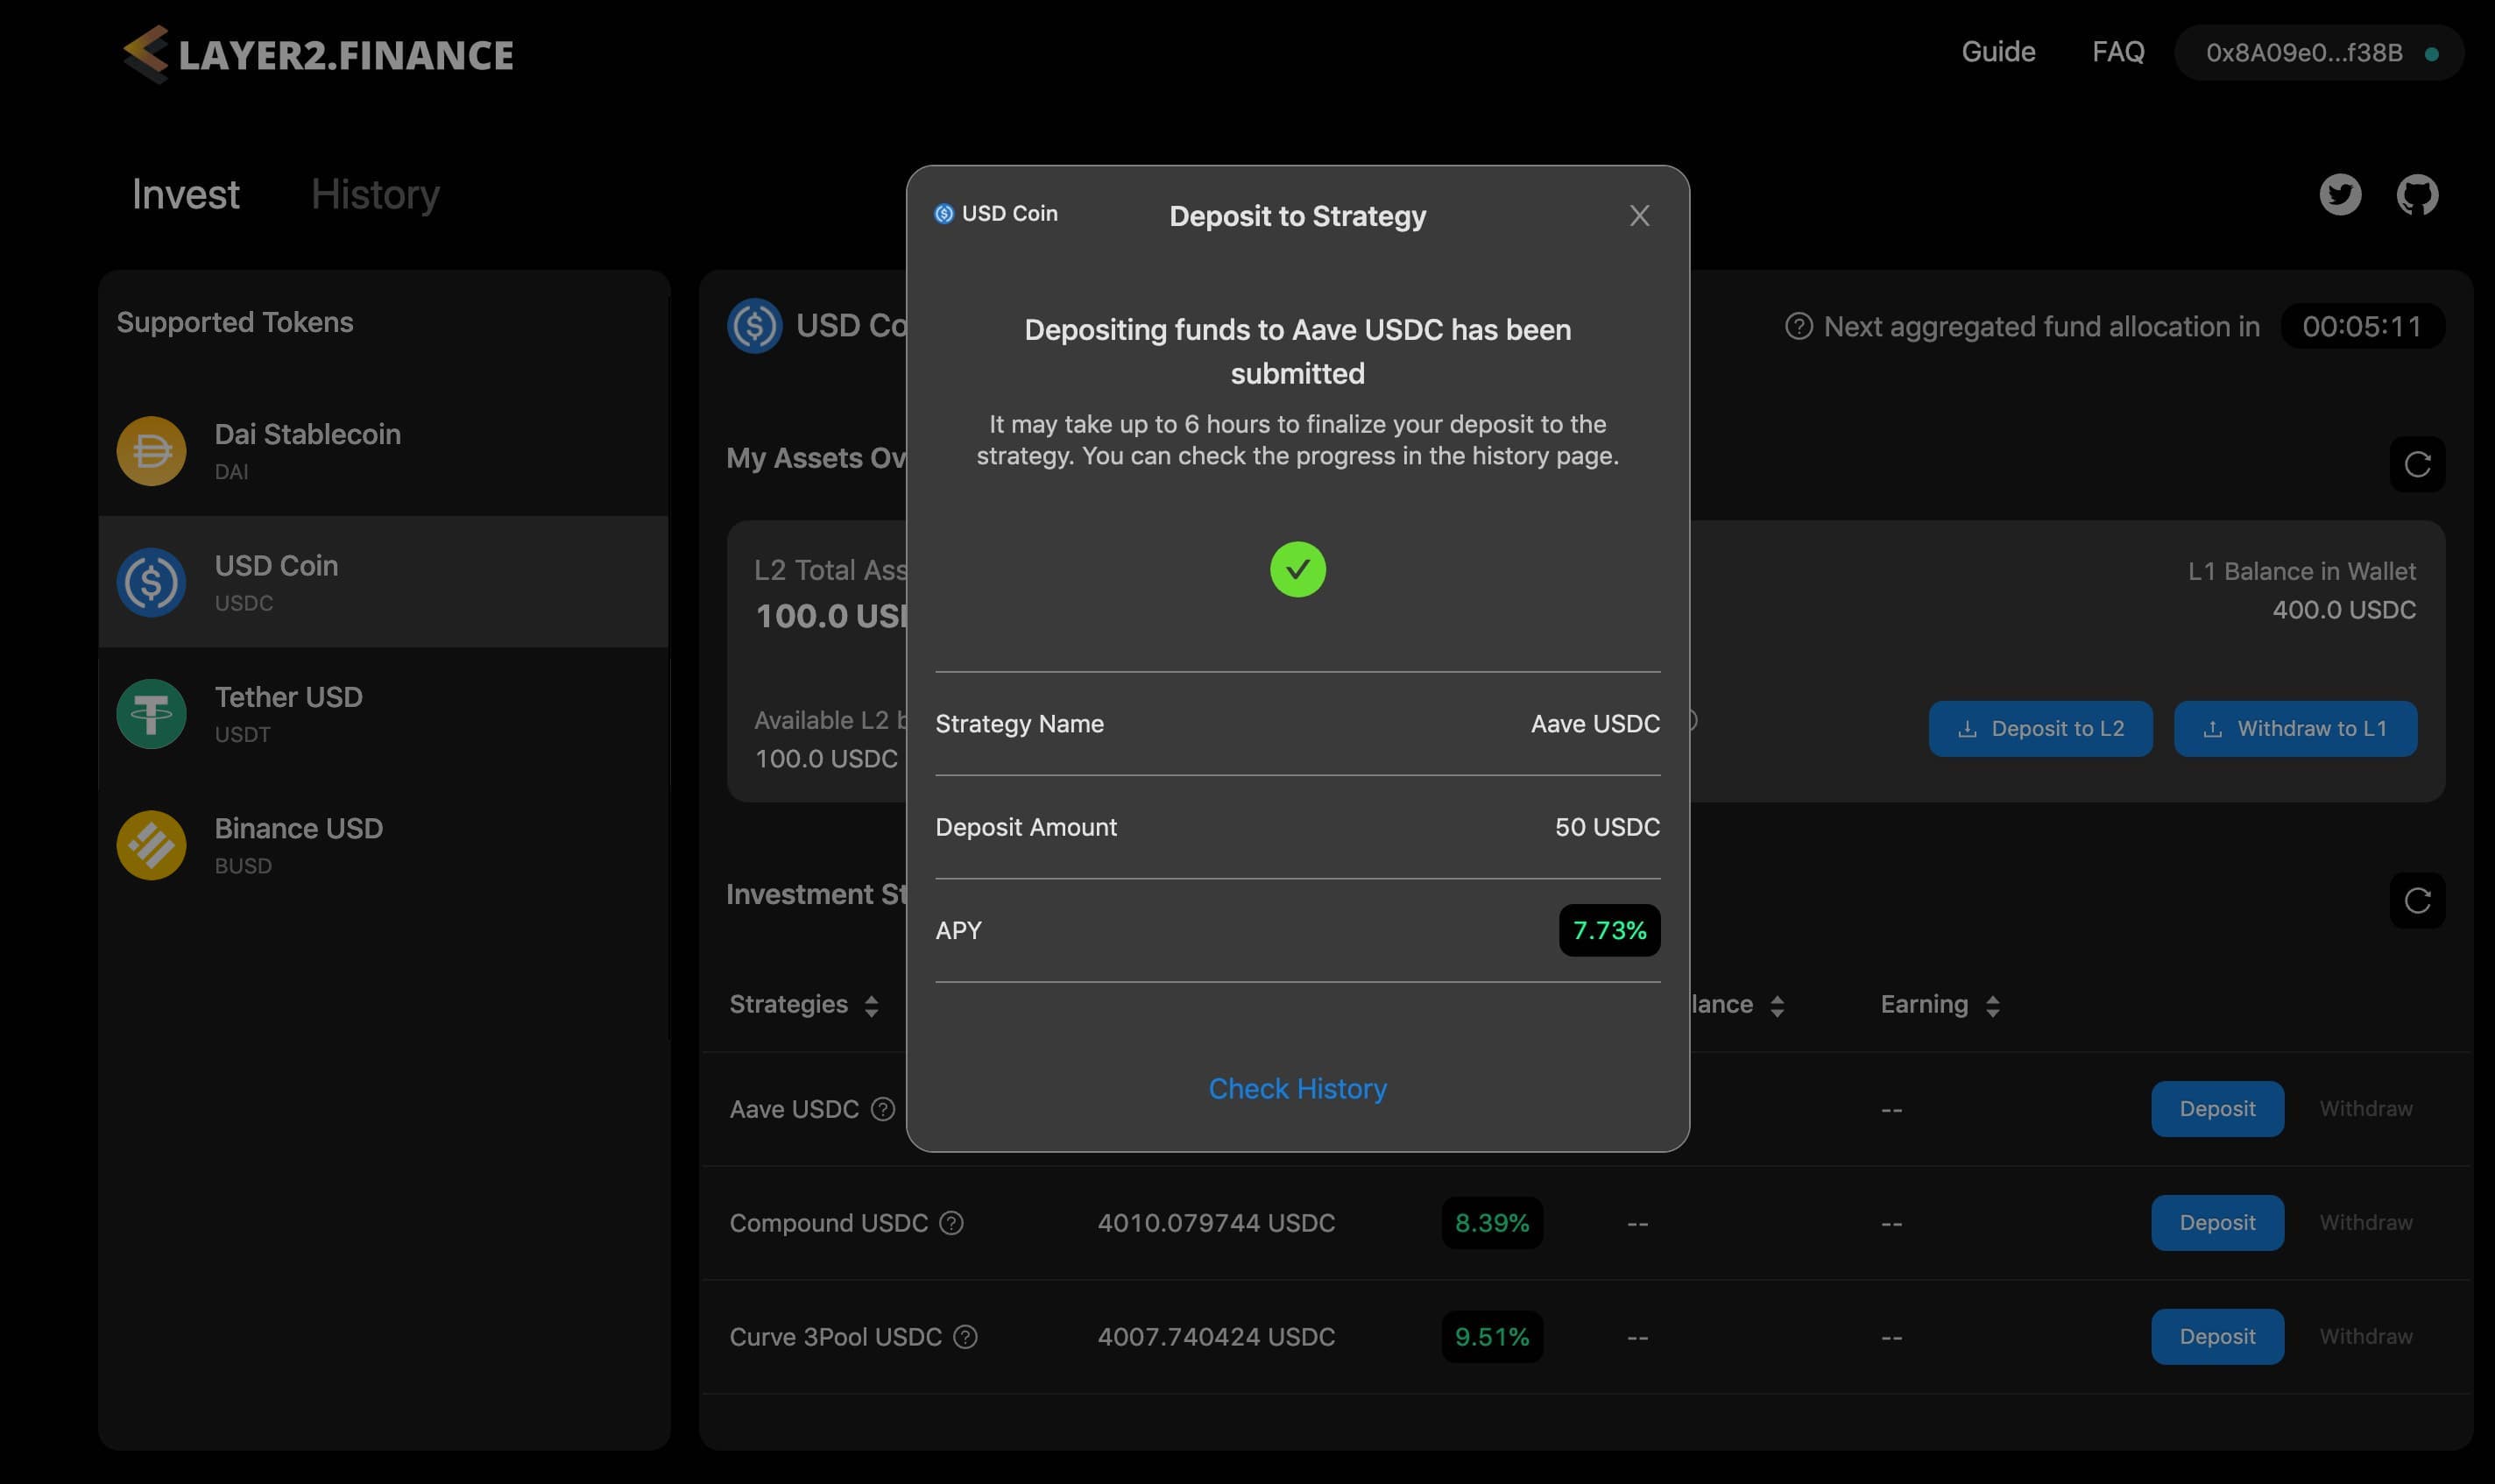
The transaction may take up to 6 hours to finalize as Layer2.Finance aggregates users’ fund allocation intents in batches and you will need to wait for the next batch to happen (see the countdown timer on the Invest page).
You can always check the transaction status on the history page.

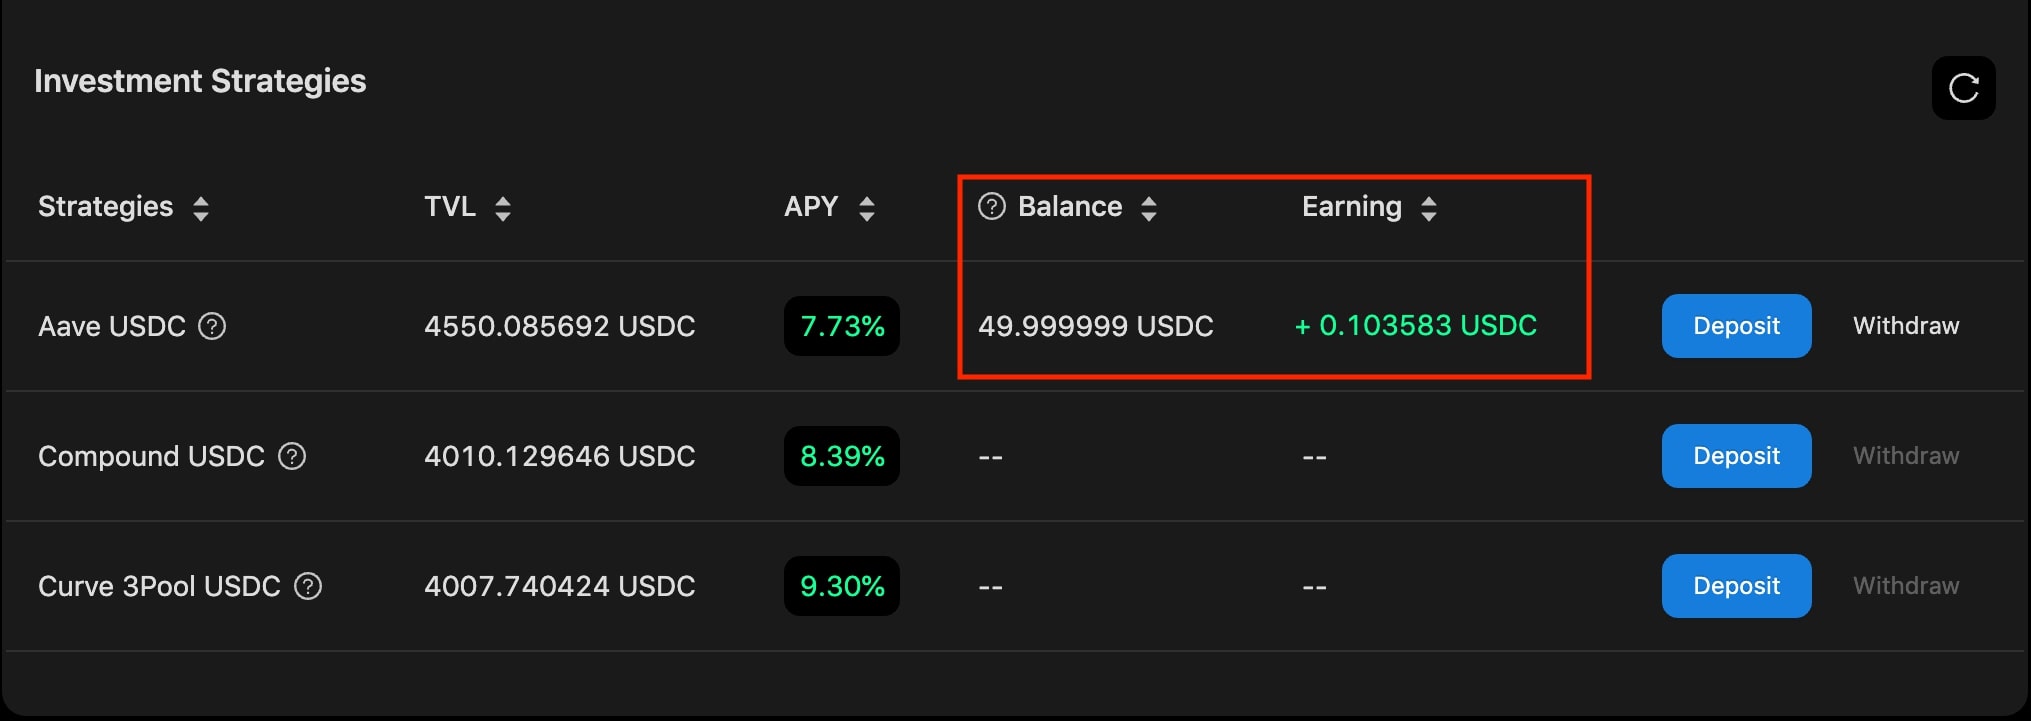
That’s it! You have successfully put funds in the Aave protocol (feel free to allocate your funds to other DeFi strategies, without any gas fee). You can view your balance and earnings for the strategy on the table (refresh the table if needed).
Withdraw from a Strategy
When you need to withdraw funds from a strategy, follow the below steps.
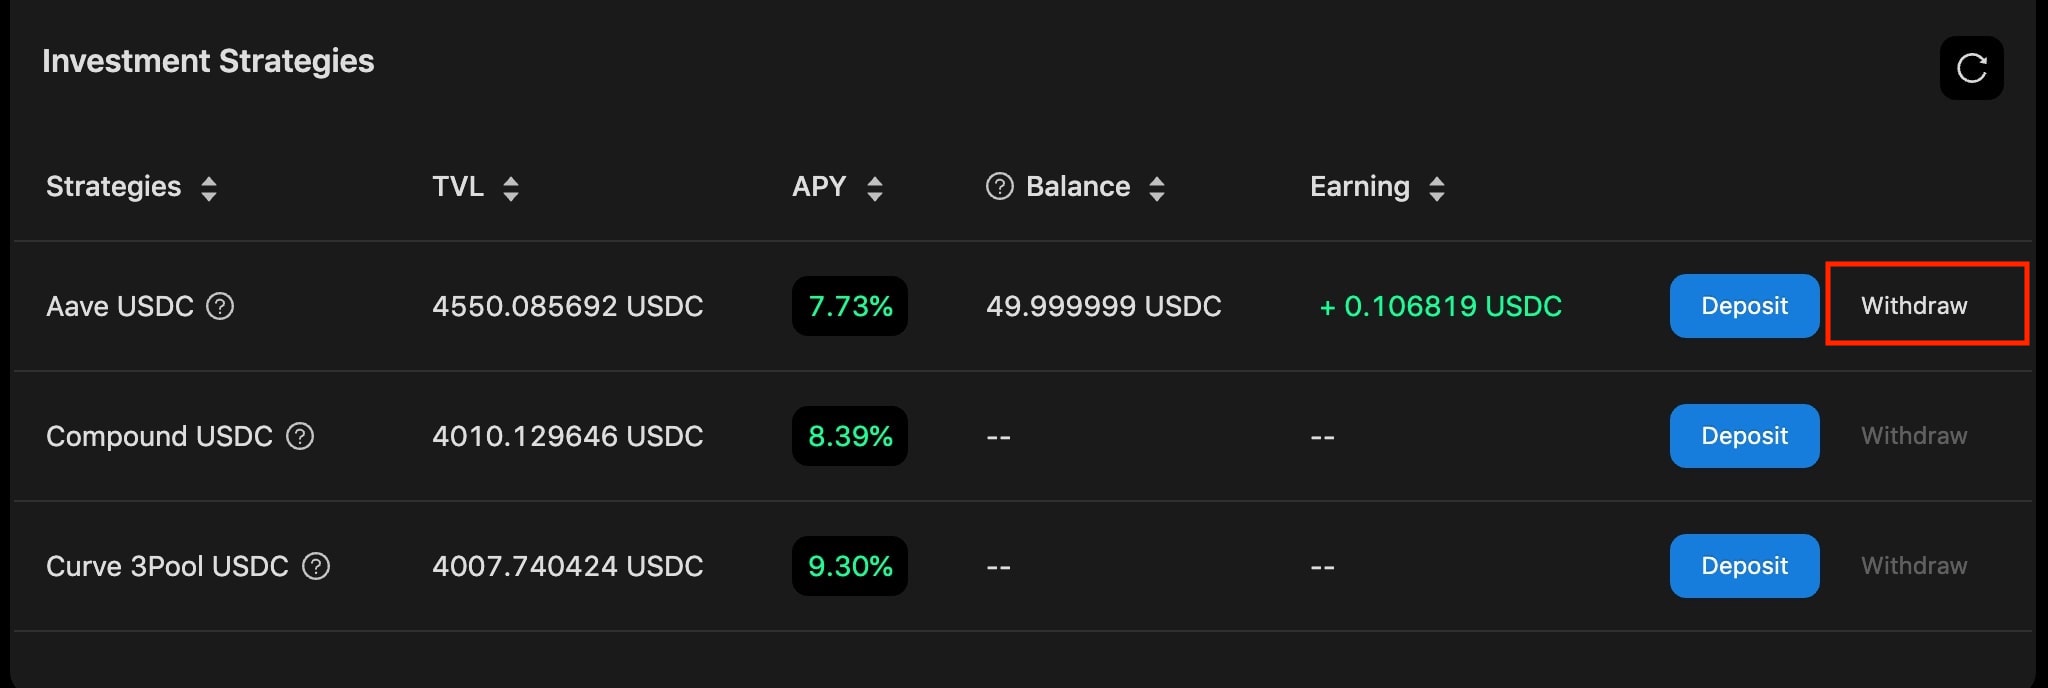
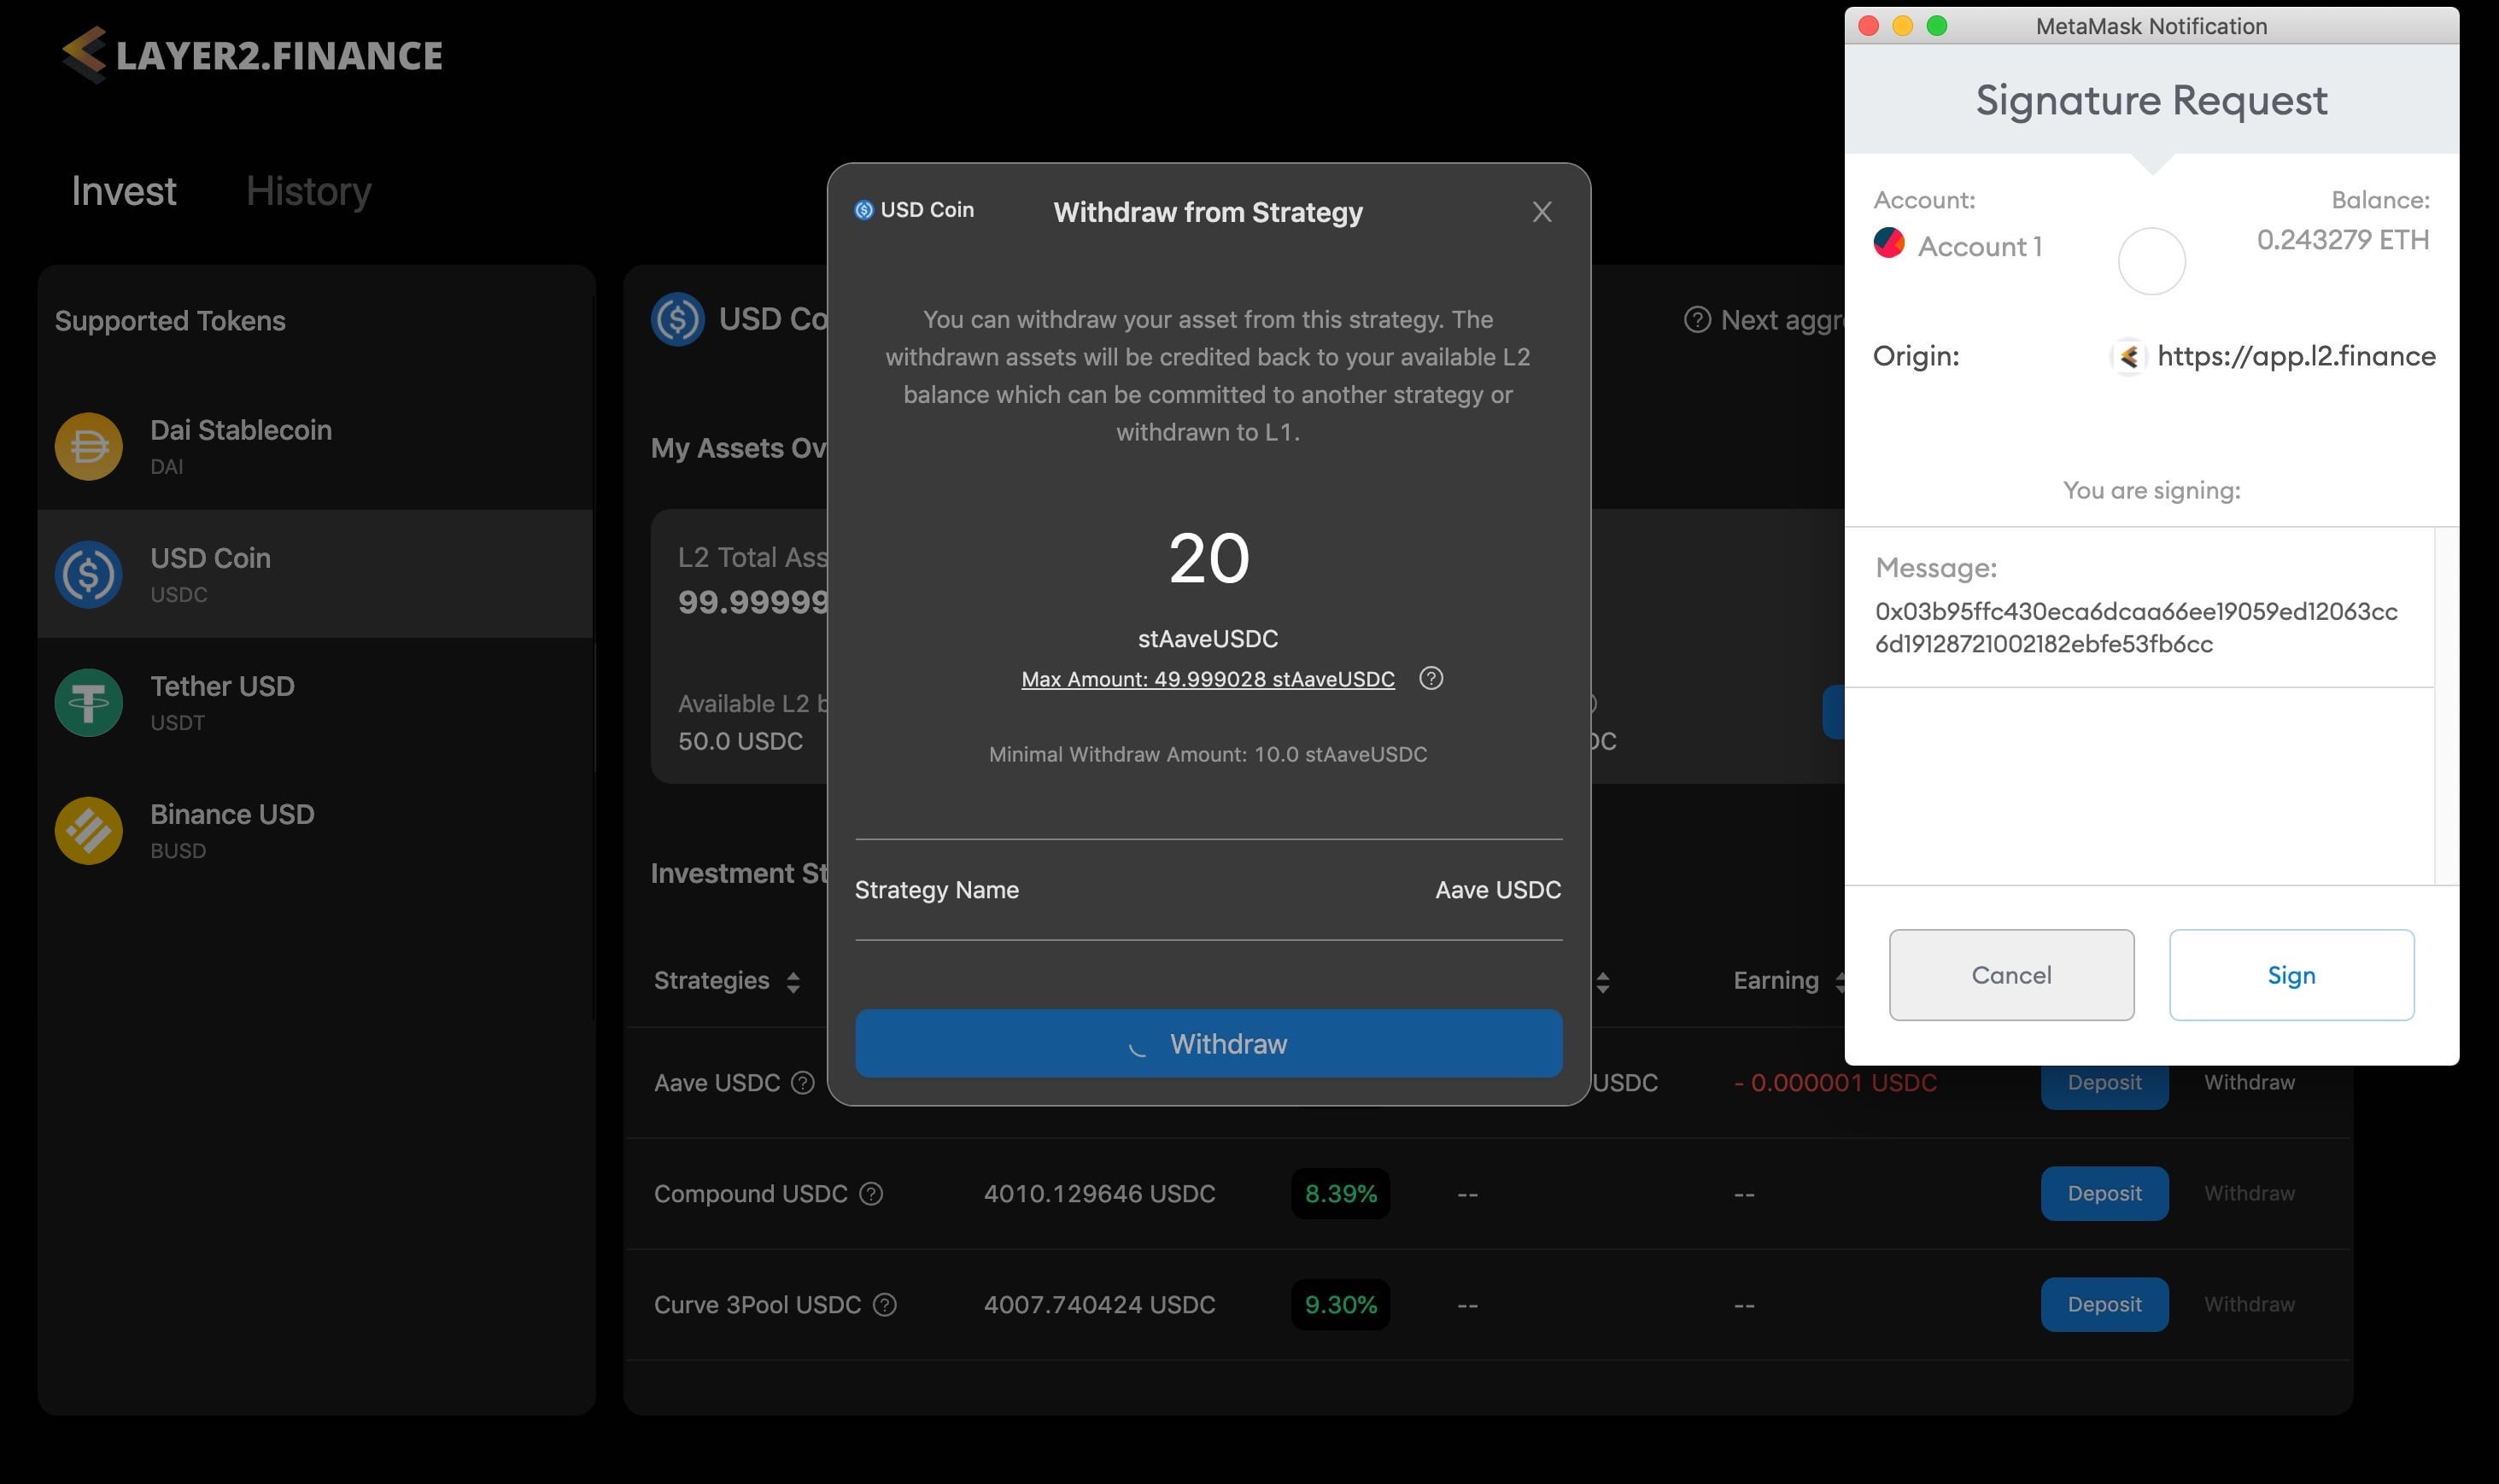
- Click the “Withdraw” button for the strategy you would like to withdraw funds from.
You will see a popup shown up where you can enter the amount of Strategy Token (e.g., the “stAaveUSDC” token) you would like to withdraw.
- Strategy Token is your liquidity token that can be used to redeem the underlying liquidity along with yields back to your available L2 balance. Each strategy has a separate Strategy Token (e.g., “stAaveUSDC” is the strategy token the “Aave USDC” strategy).
- The actual USDC value you will receive in your L2 balance depends on the withdrawn strategy token amount and the price for each strategy token (the price is dynamically adjusted according to the underlying DeFi protocols).
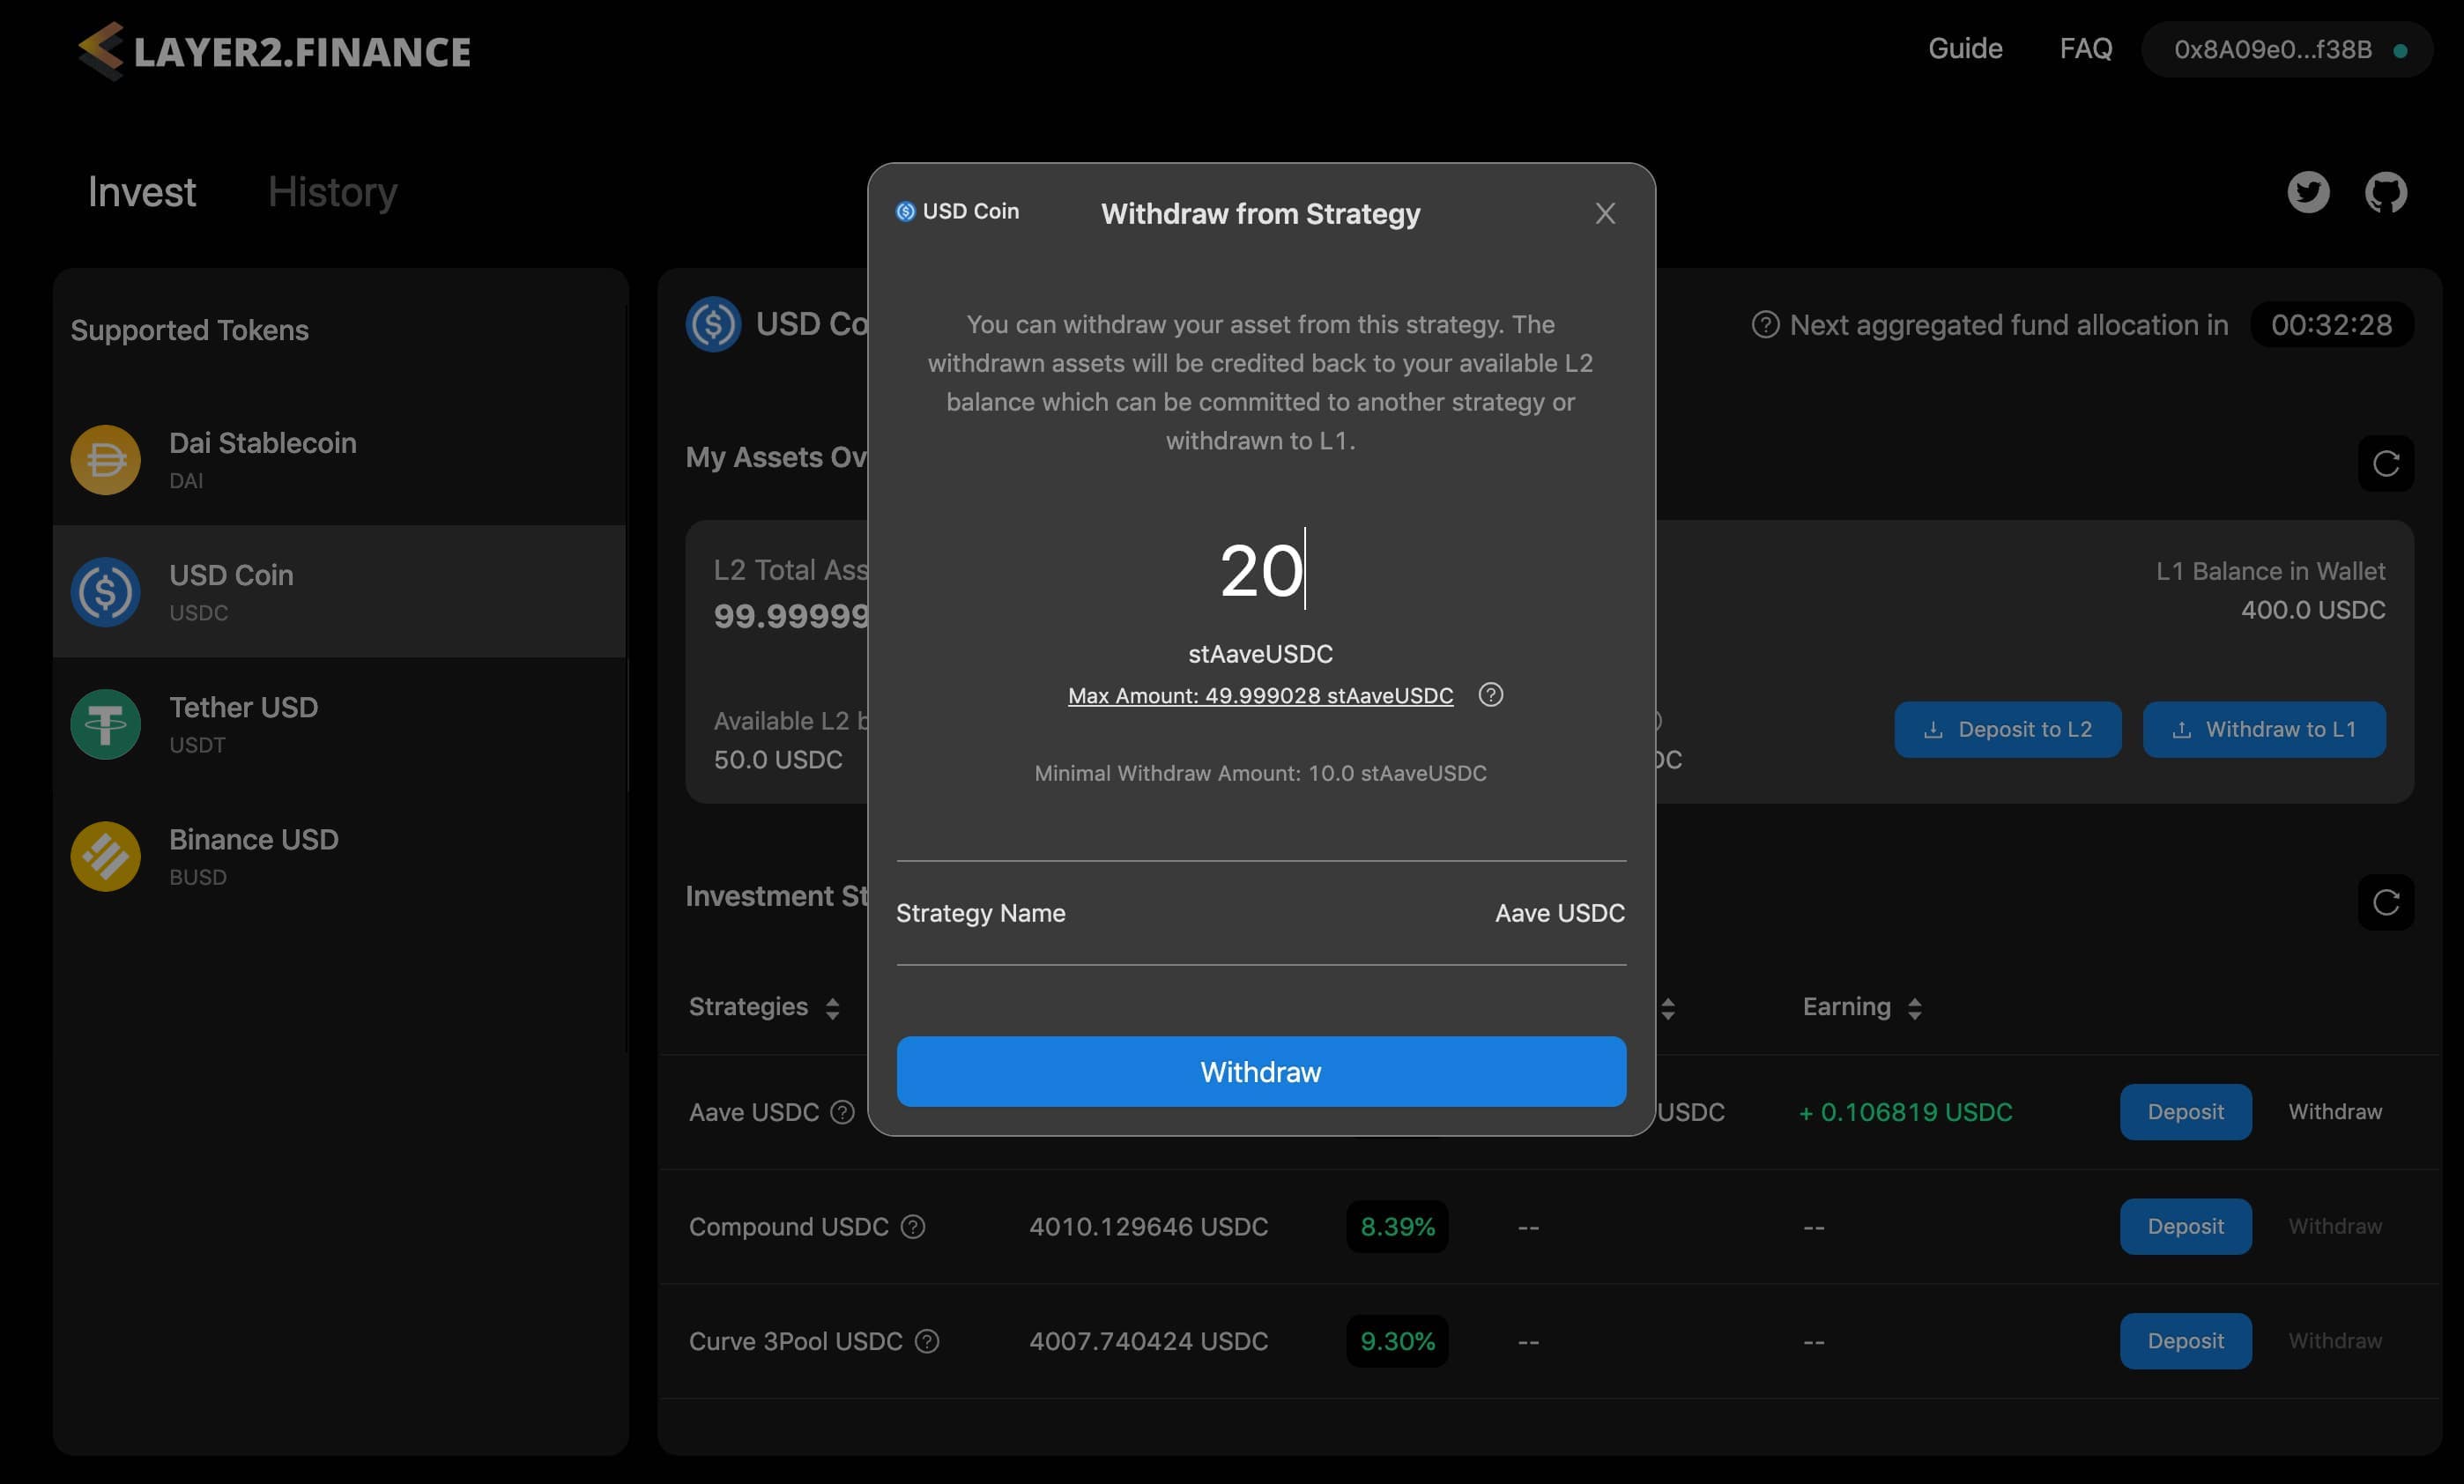
- Click the “Withdraw” button on the popup, and you will see a prompt in MetaMask to sign the transaction (no gas fee is needed).
- Once you sign the transaction in MetaMask, you will see another popup showing that the transaction has been submitted.
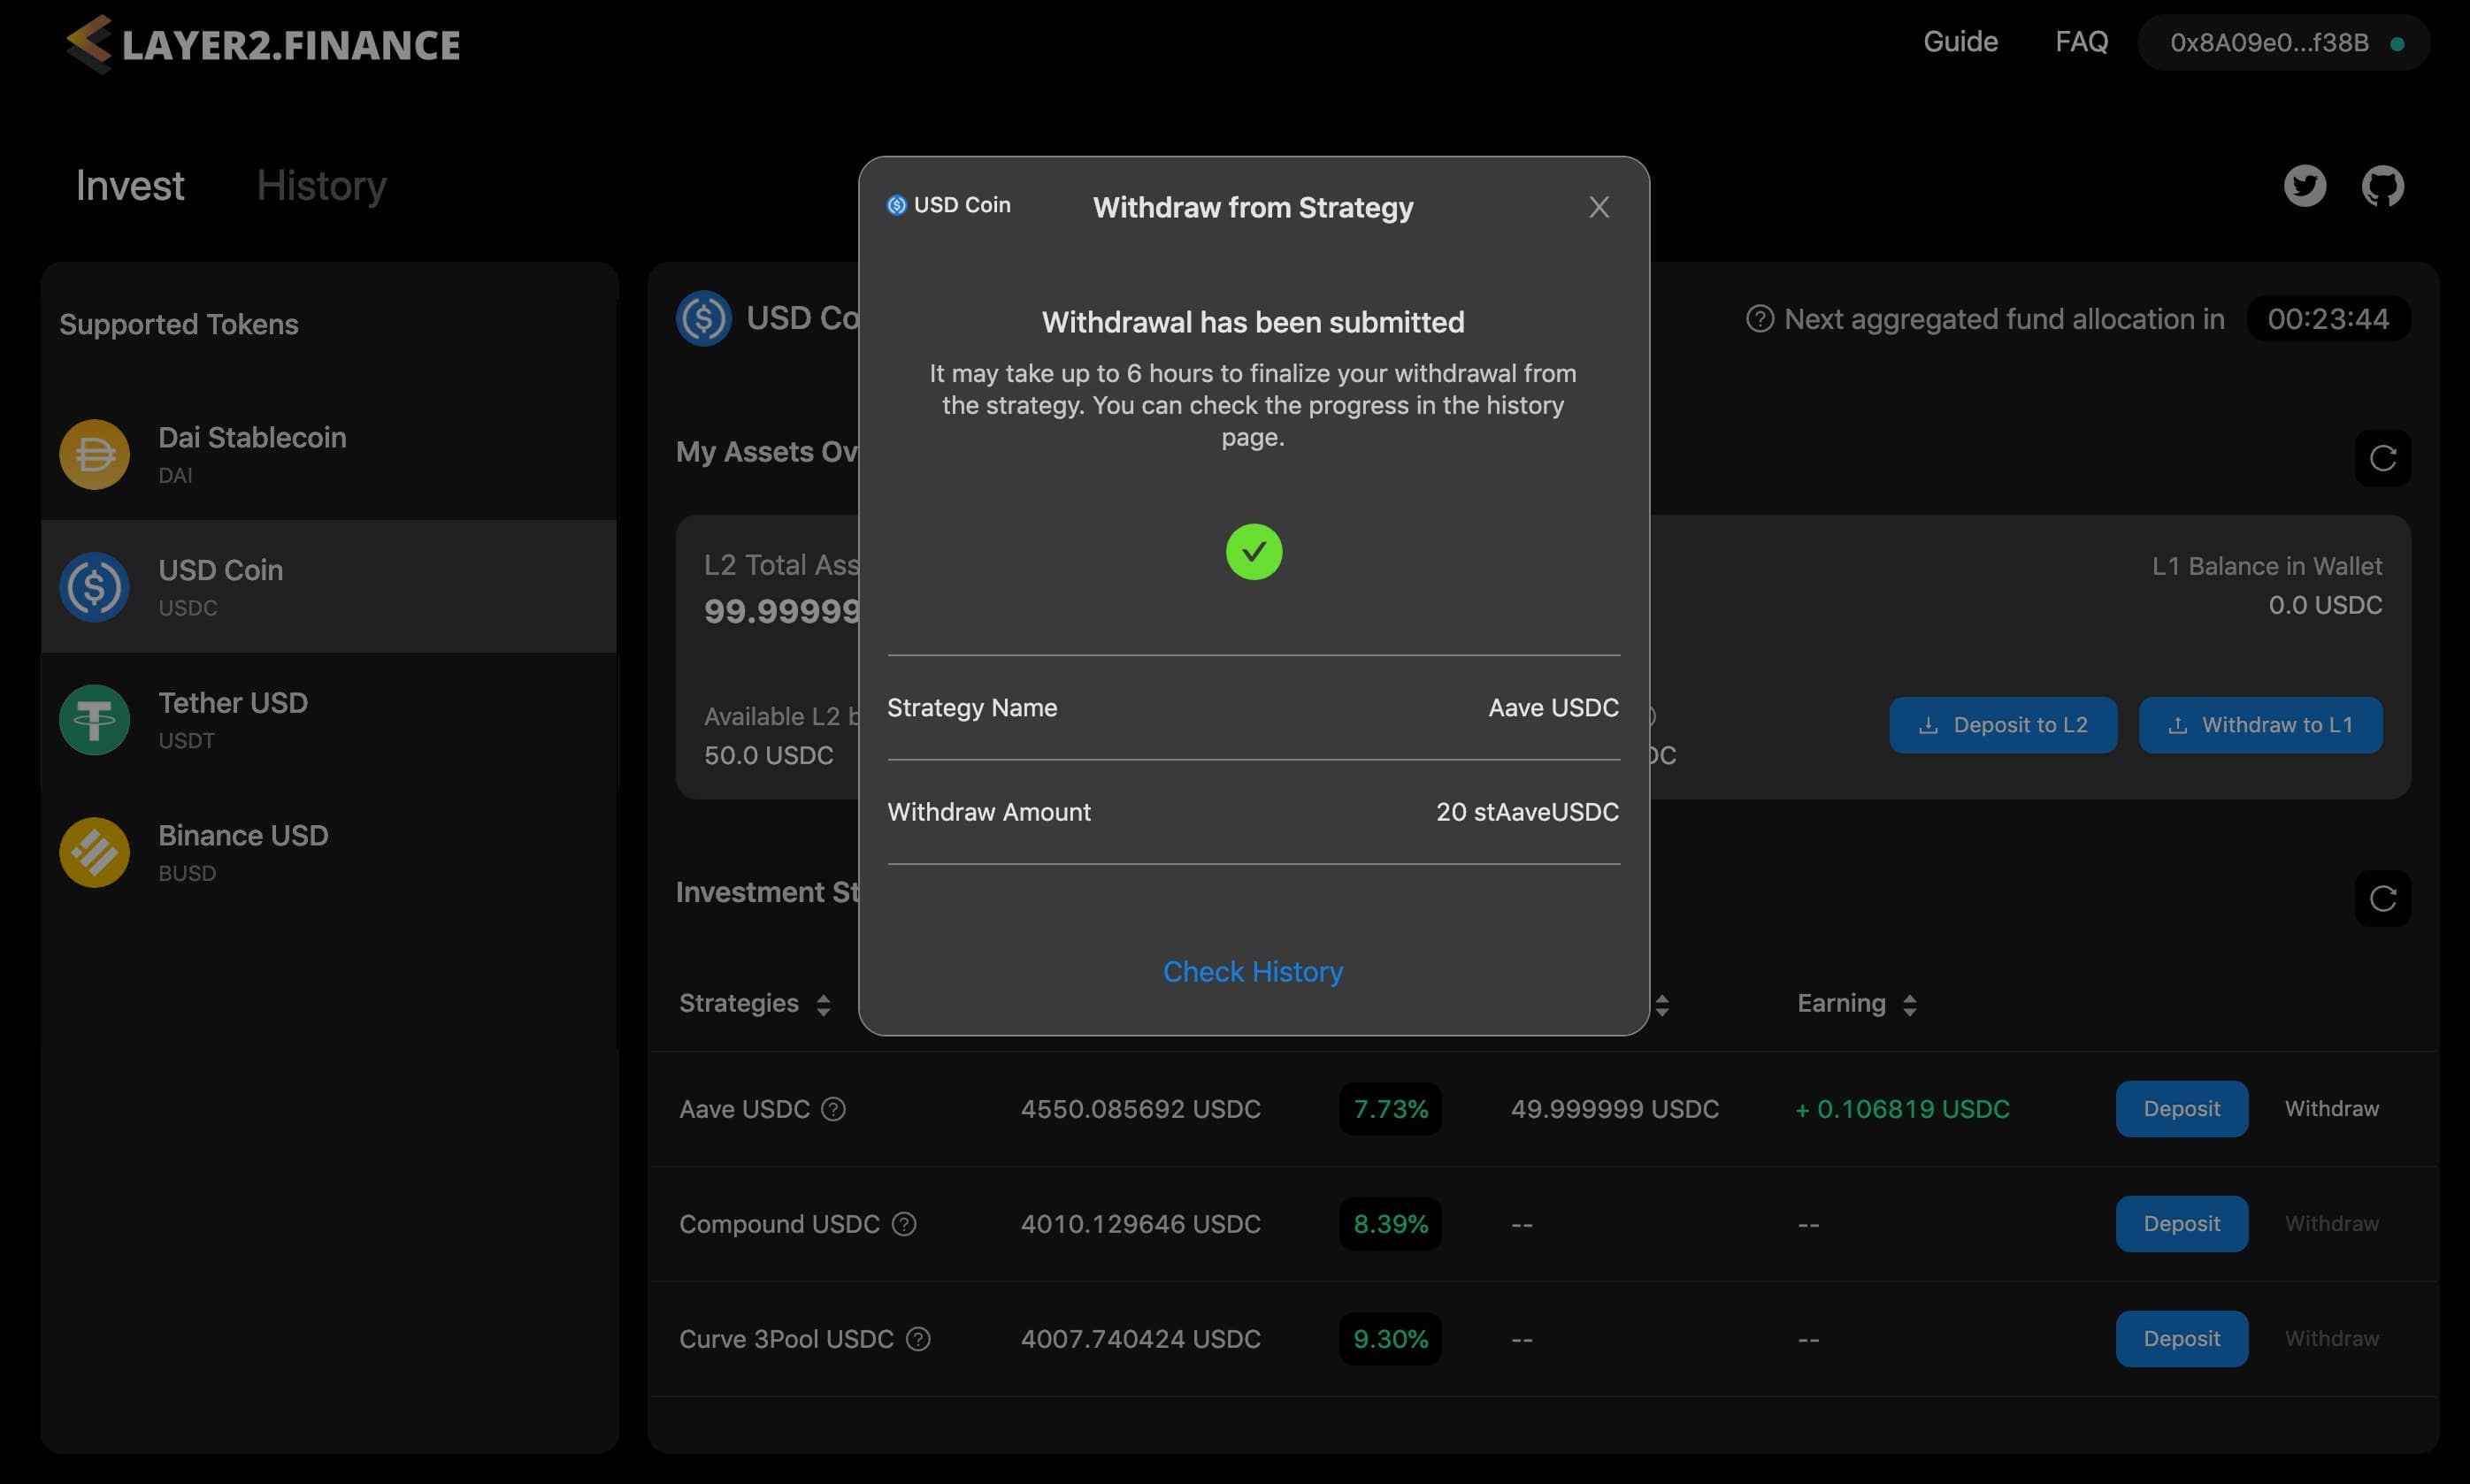
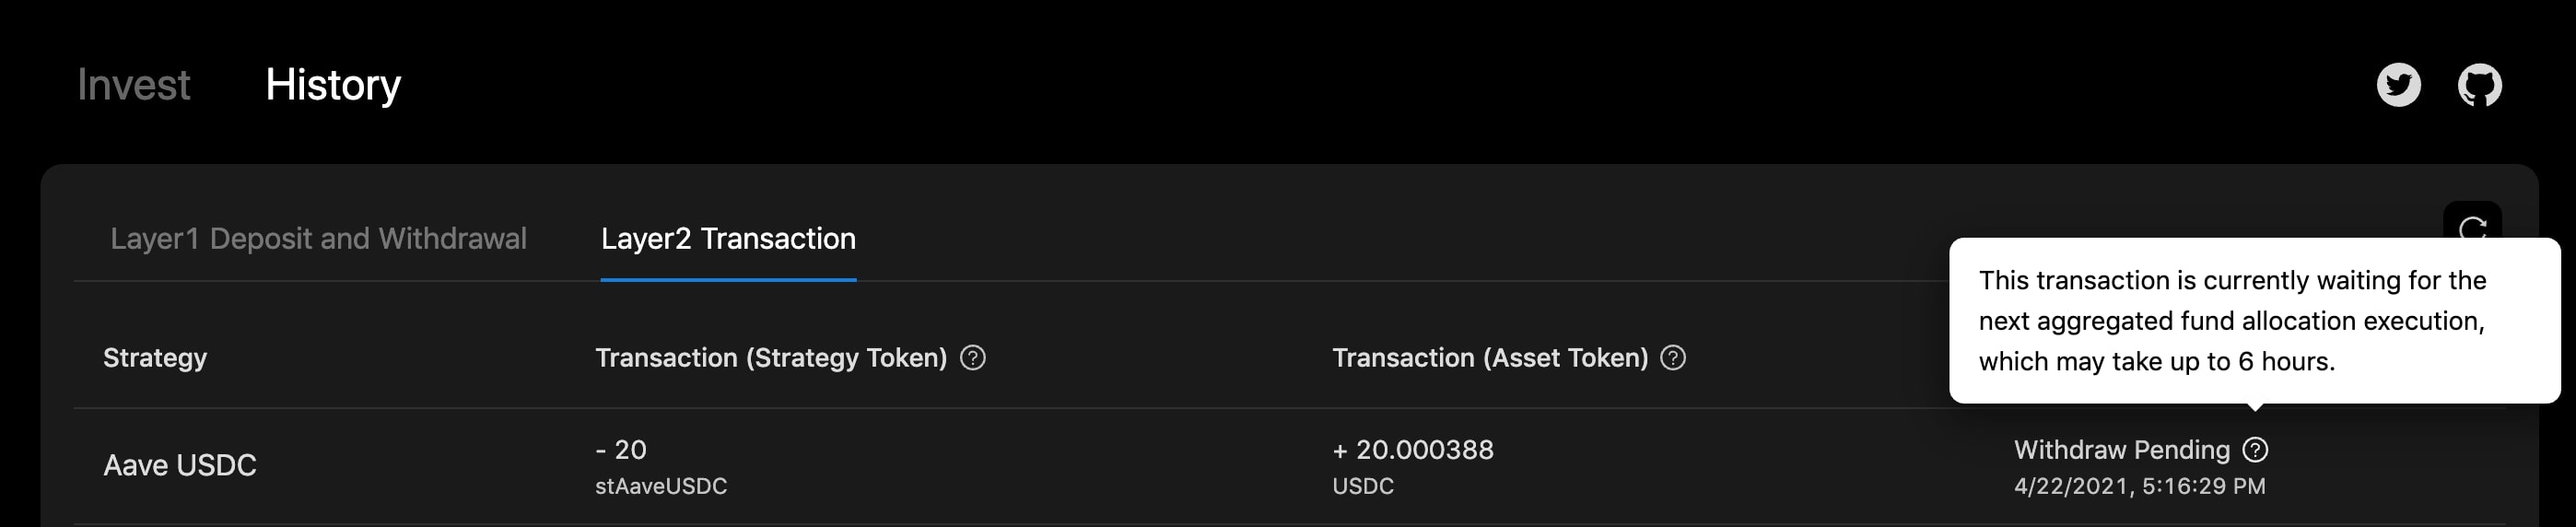
Similar to deposit, the withdrawal transaction may also take up to 6 hours to finalize as you will need to wait for the next batch to happen (see the countdown timer on the Invest page). You can always check the transaction status on the history page. (figure 24-1)
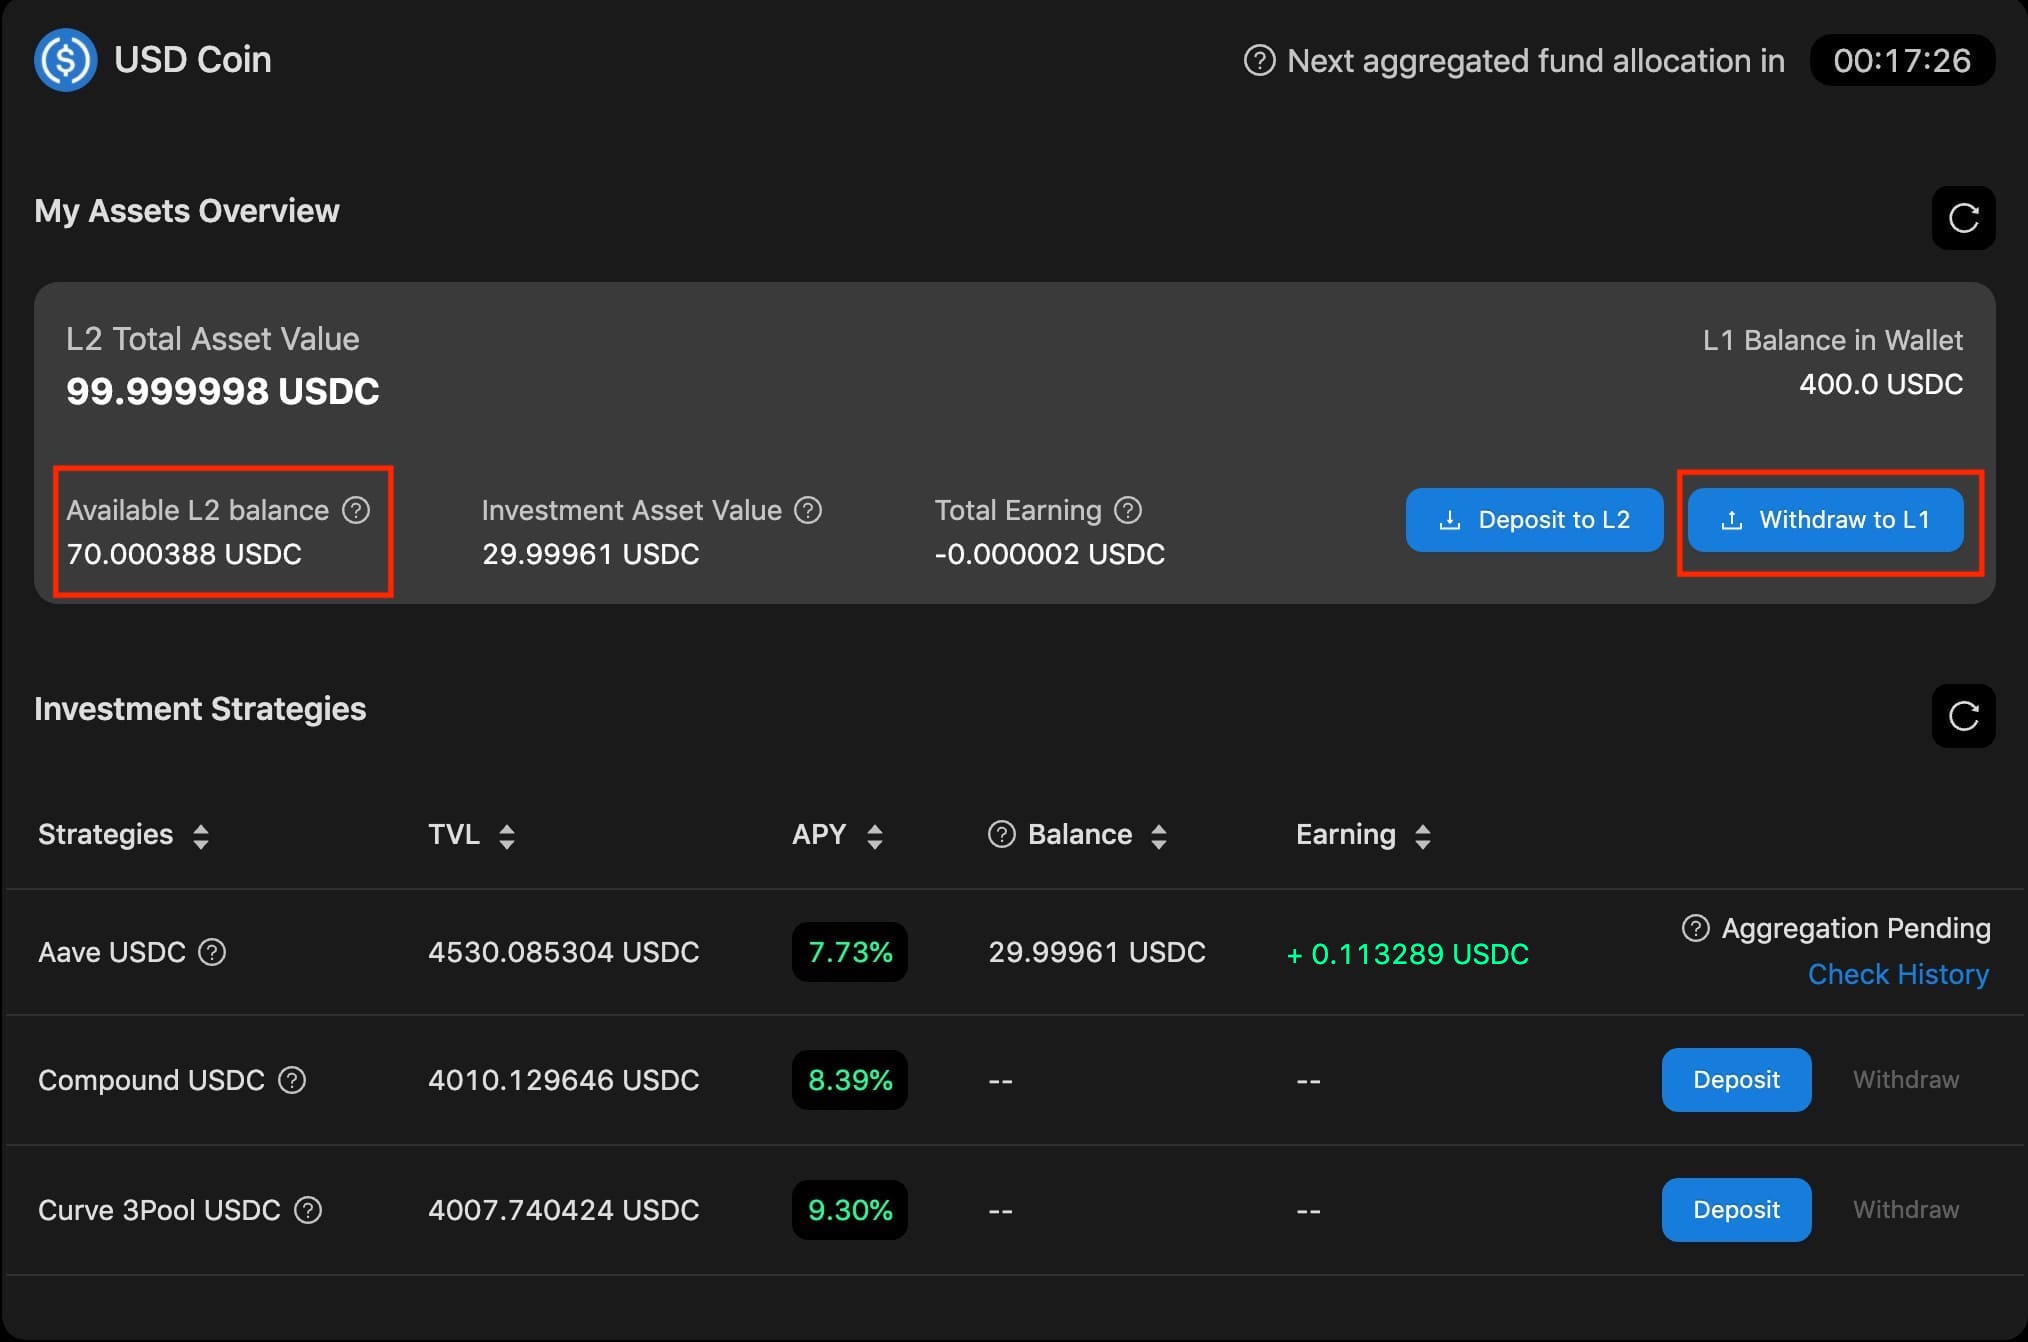
Then you will see your L2 balance updated. You can further reallocate your L2 balance to a new strategy or withdraw back to your L1 wallet.
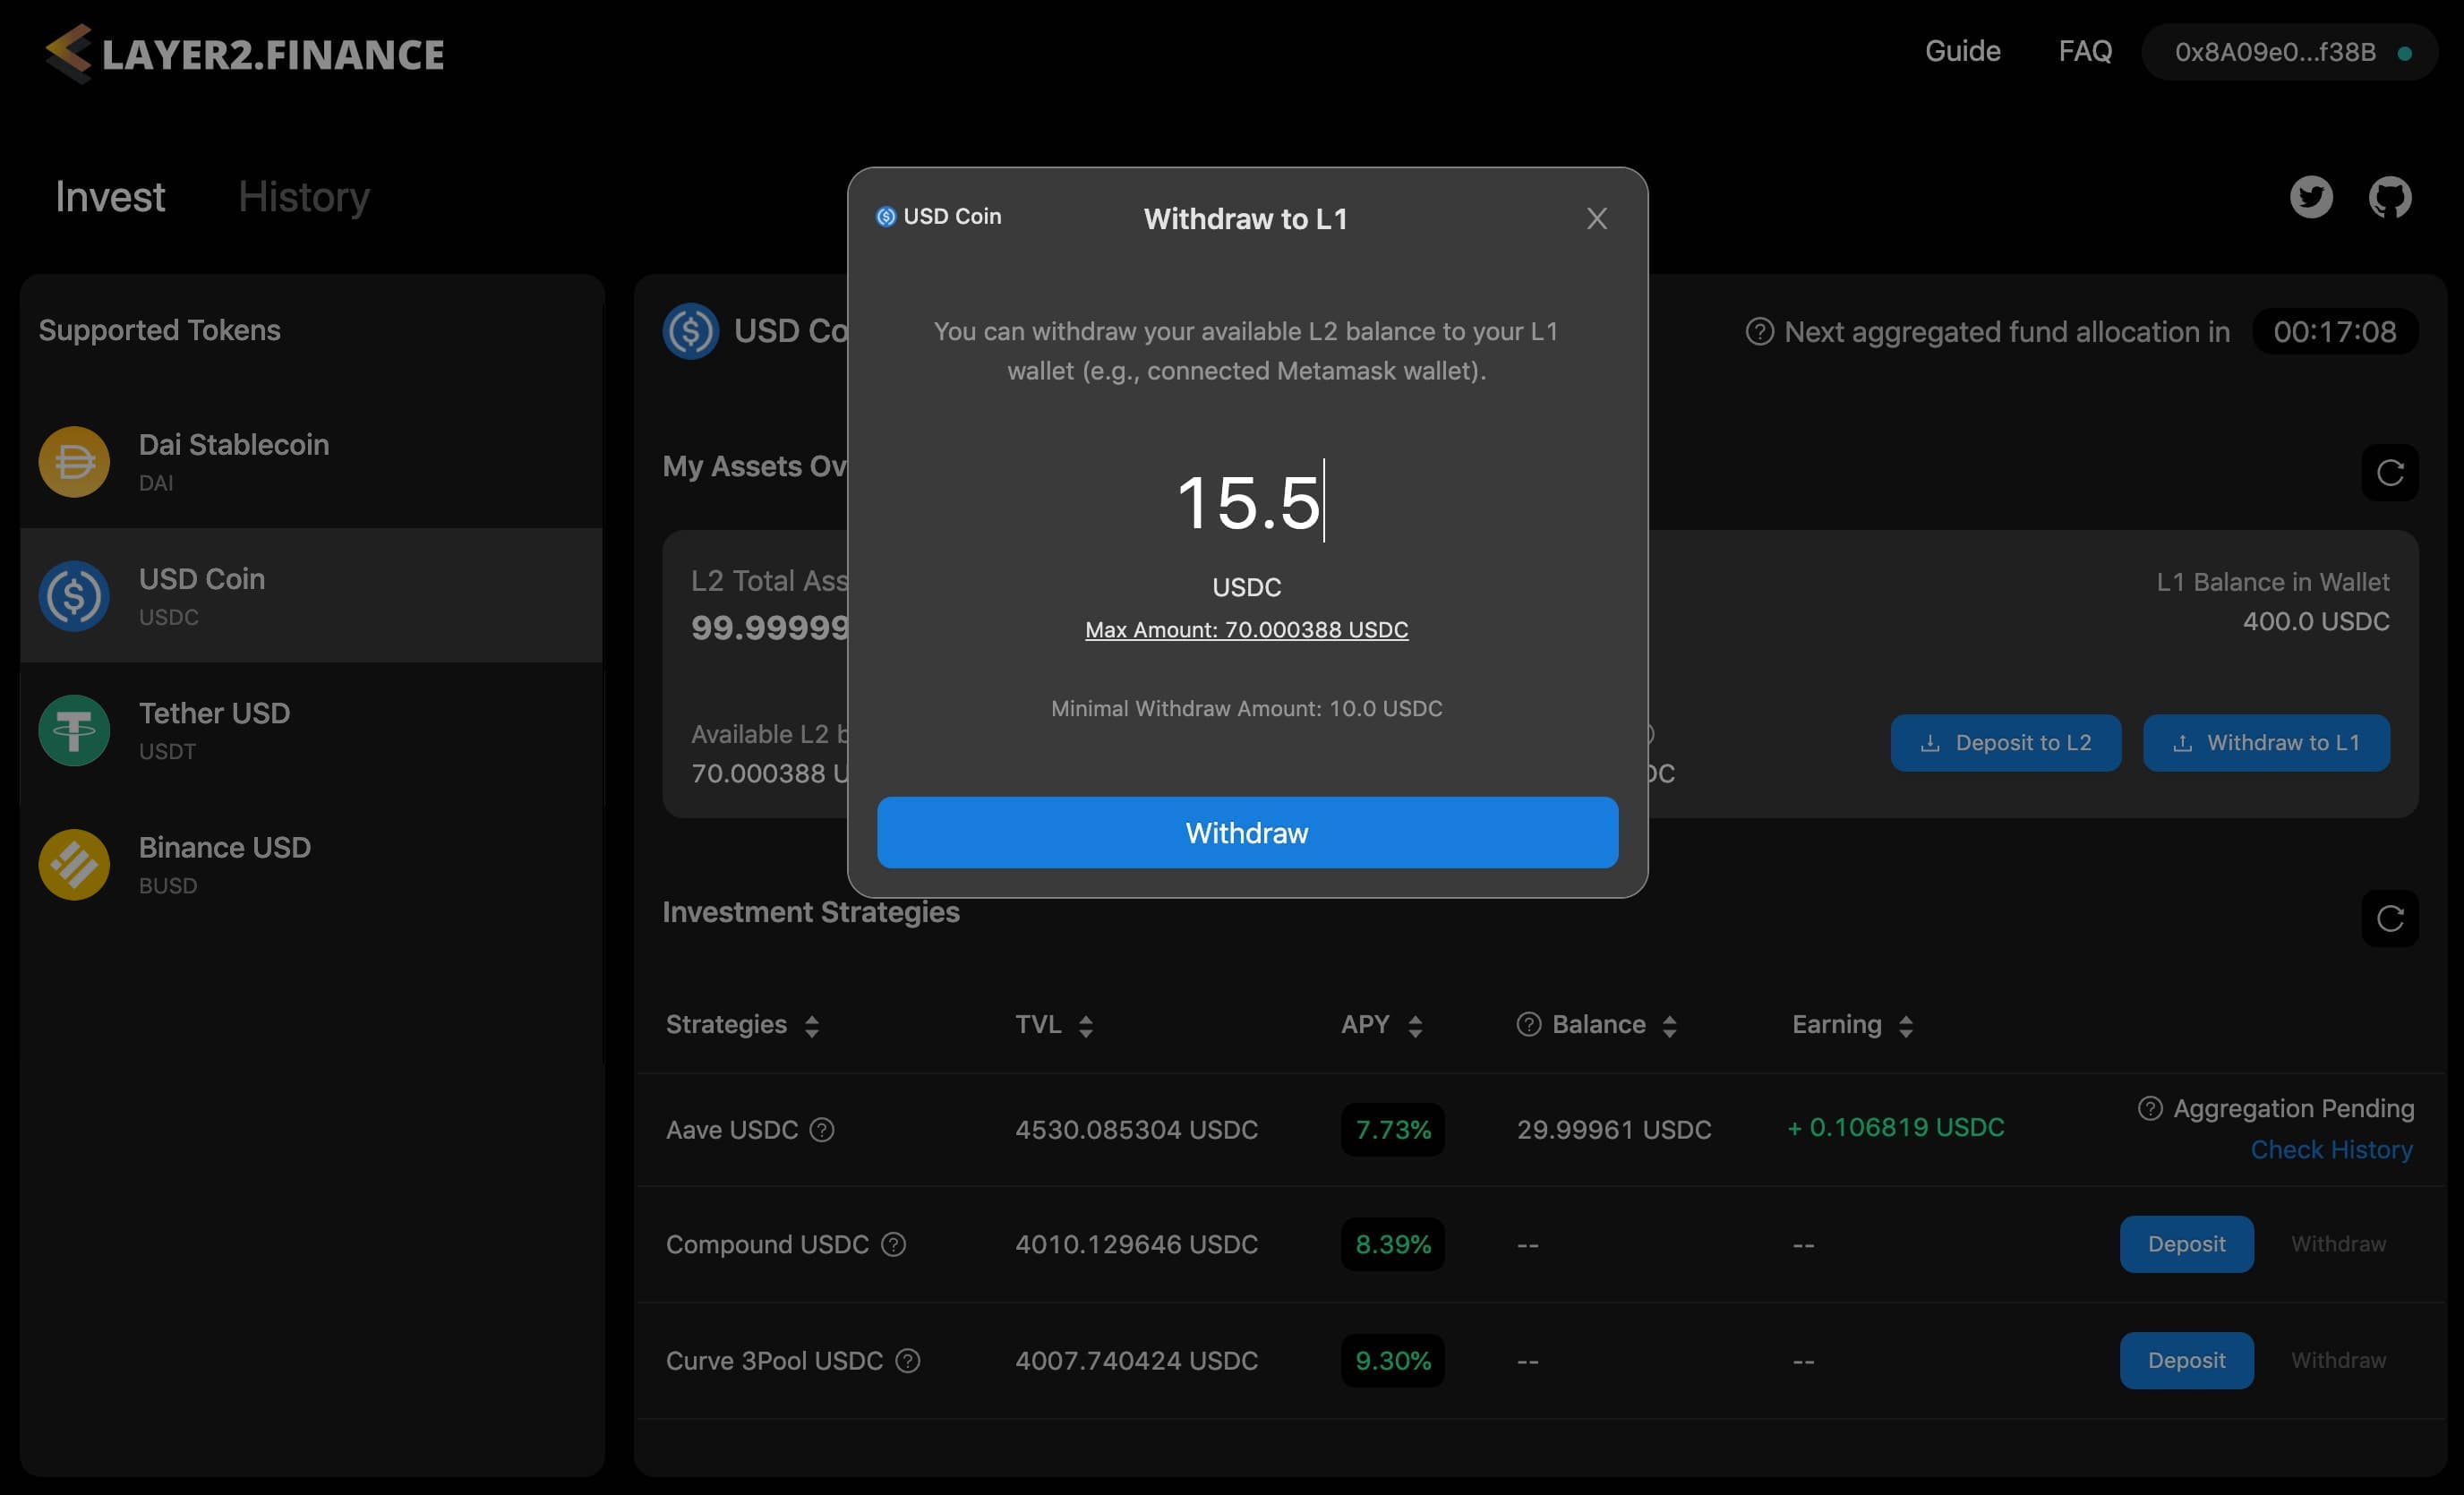
Withdraw funds to L1
The last operation you can do with Layer2.Finance is to withdraw your L2 balance back to your L1 wallet.
NOTE: Only “Available L2 Balance” can be withdrawn to L1 wallet. If you have funds in a strategy, please first withdraw the funds from the strategy to your L2 balance.
- Click on the “Withdraw to L1” button.
You will see a popup where you can enter the amount of tokens you would like to withdraw to your L1 wallet.
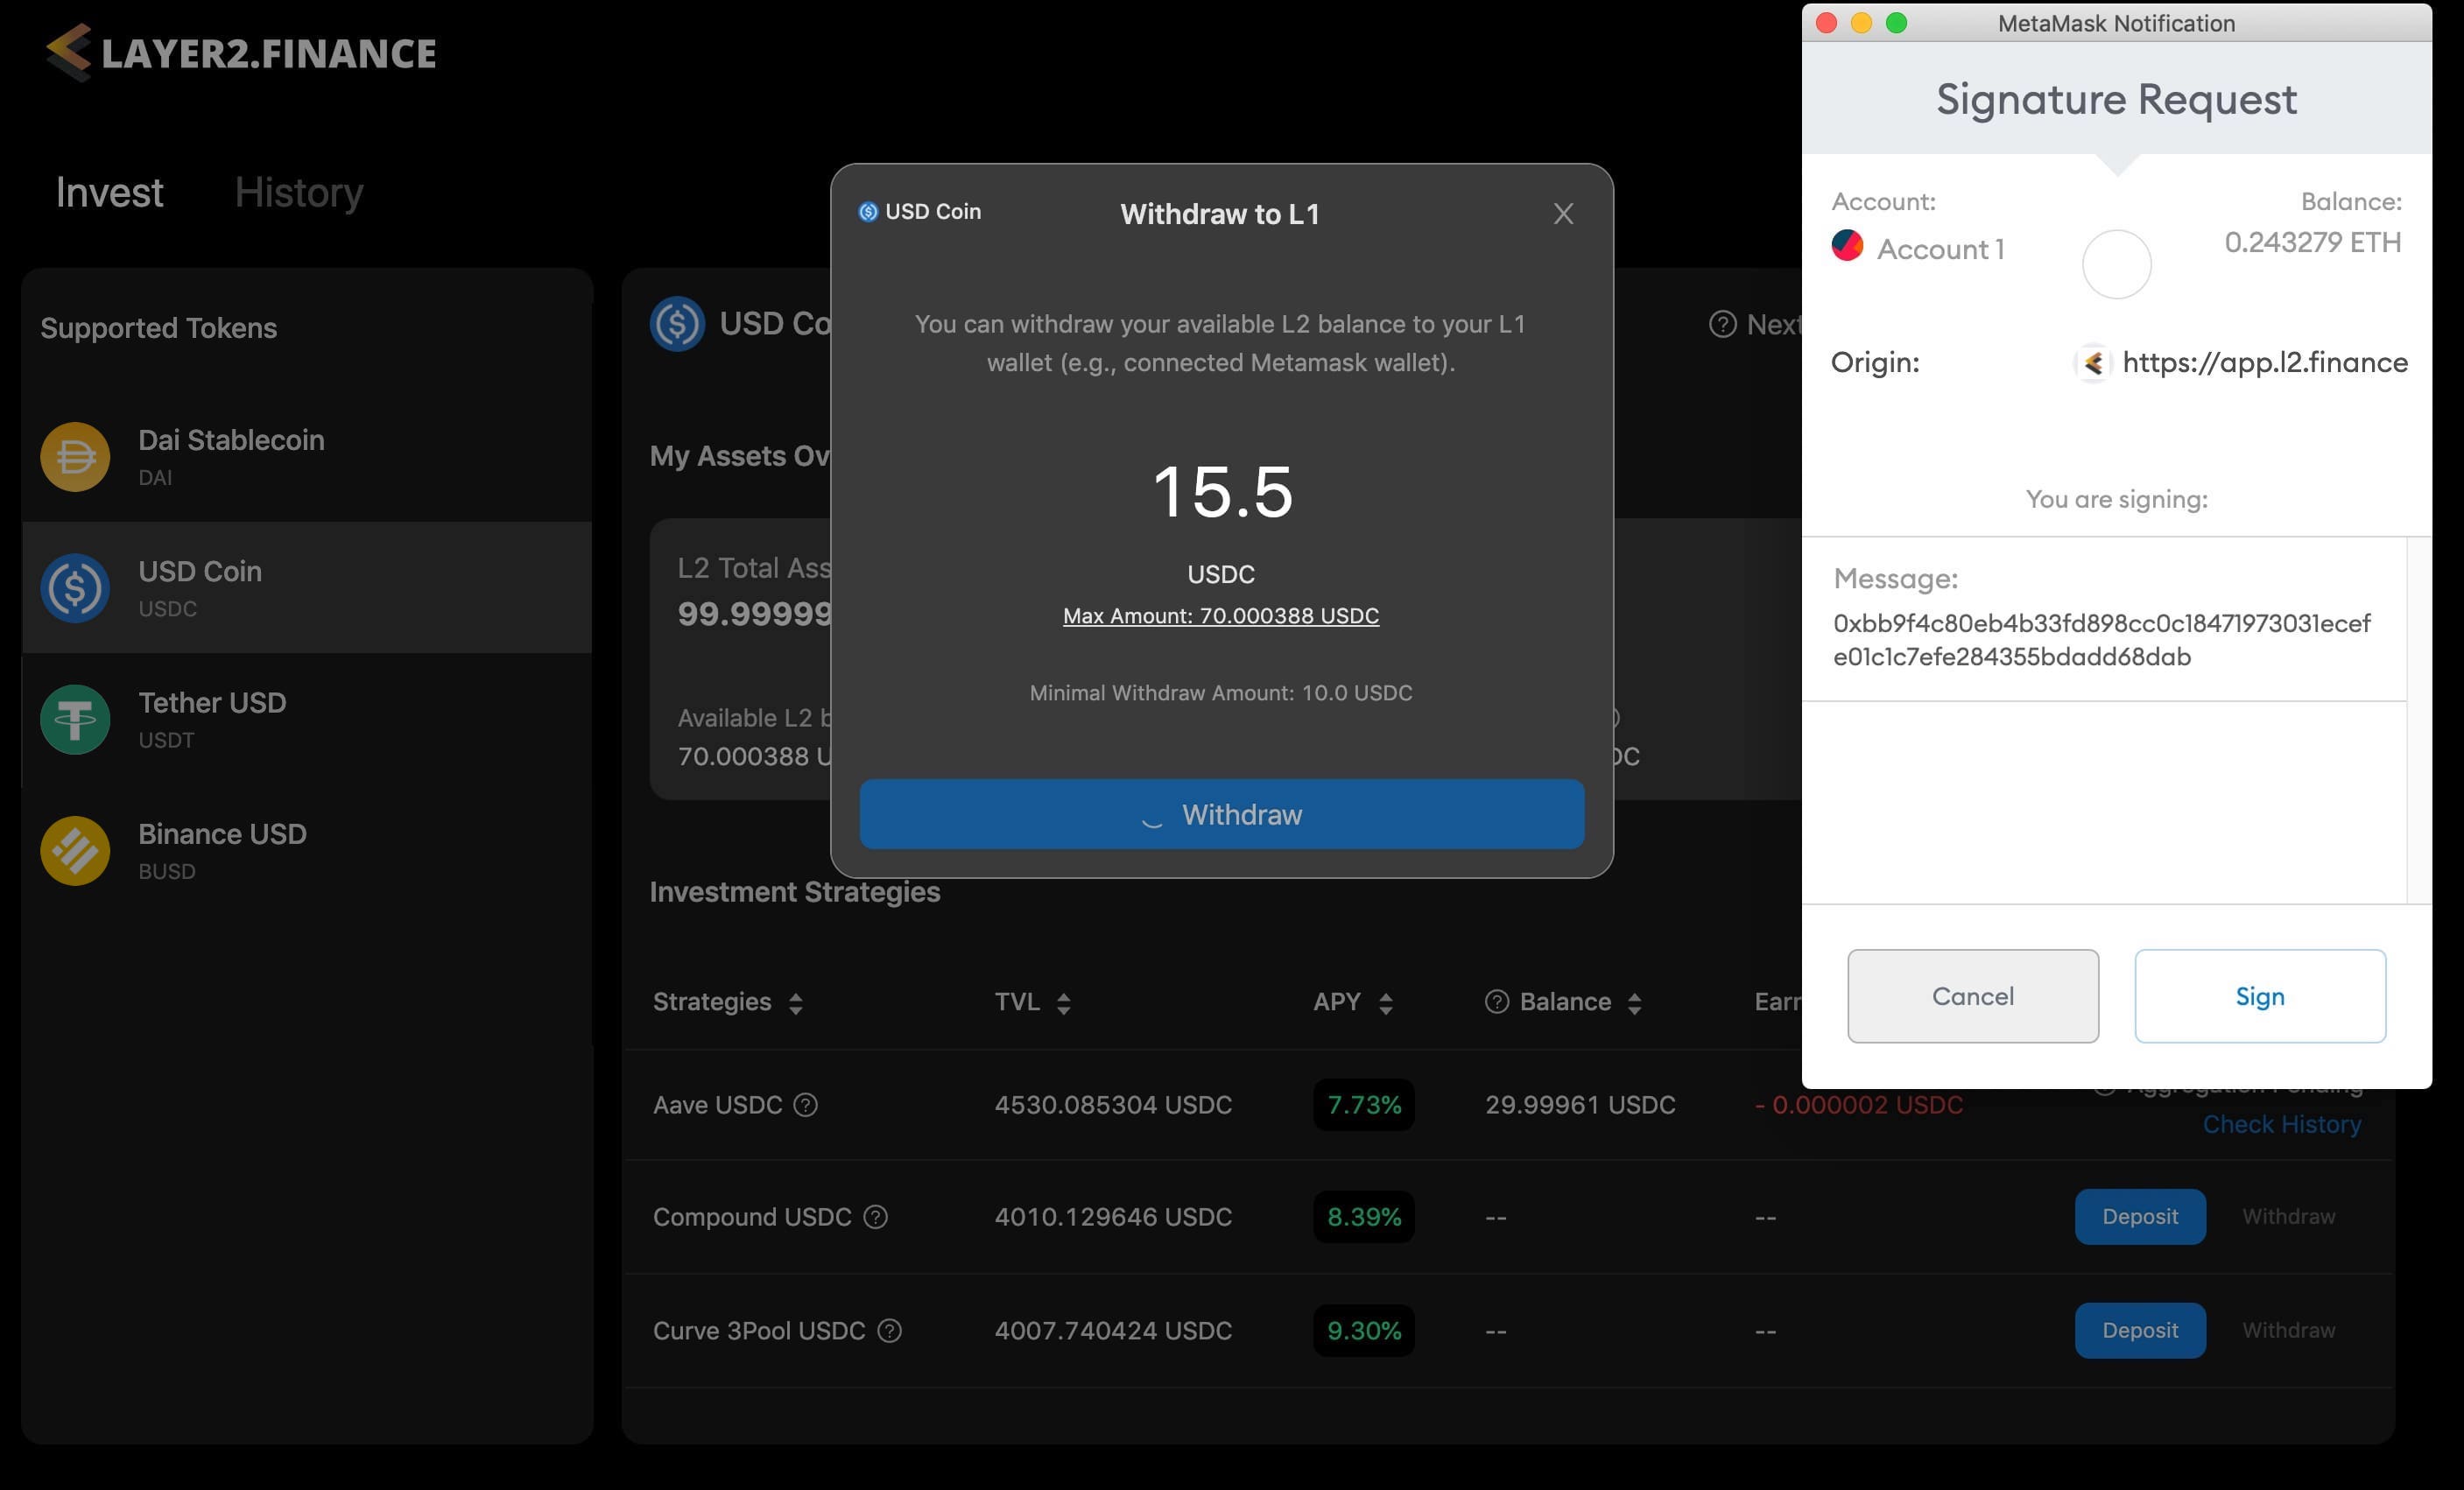
- Click the “Withdraw” button on the popup, and you will be prompted to sign the transaction in MetaMask.
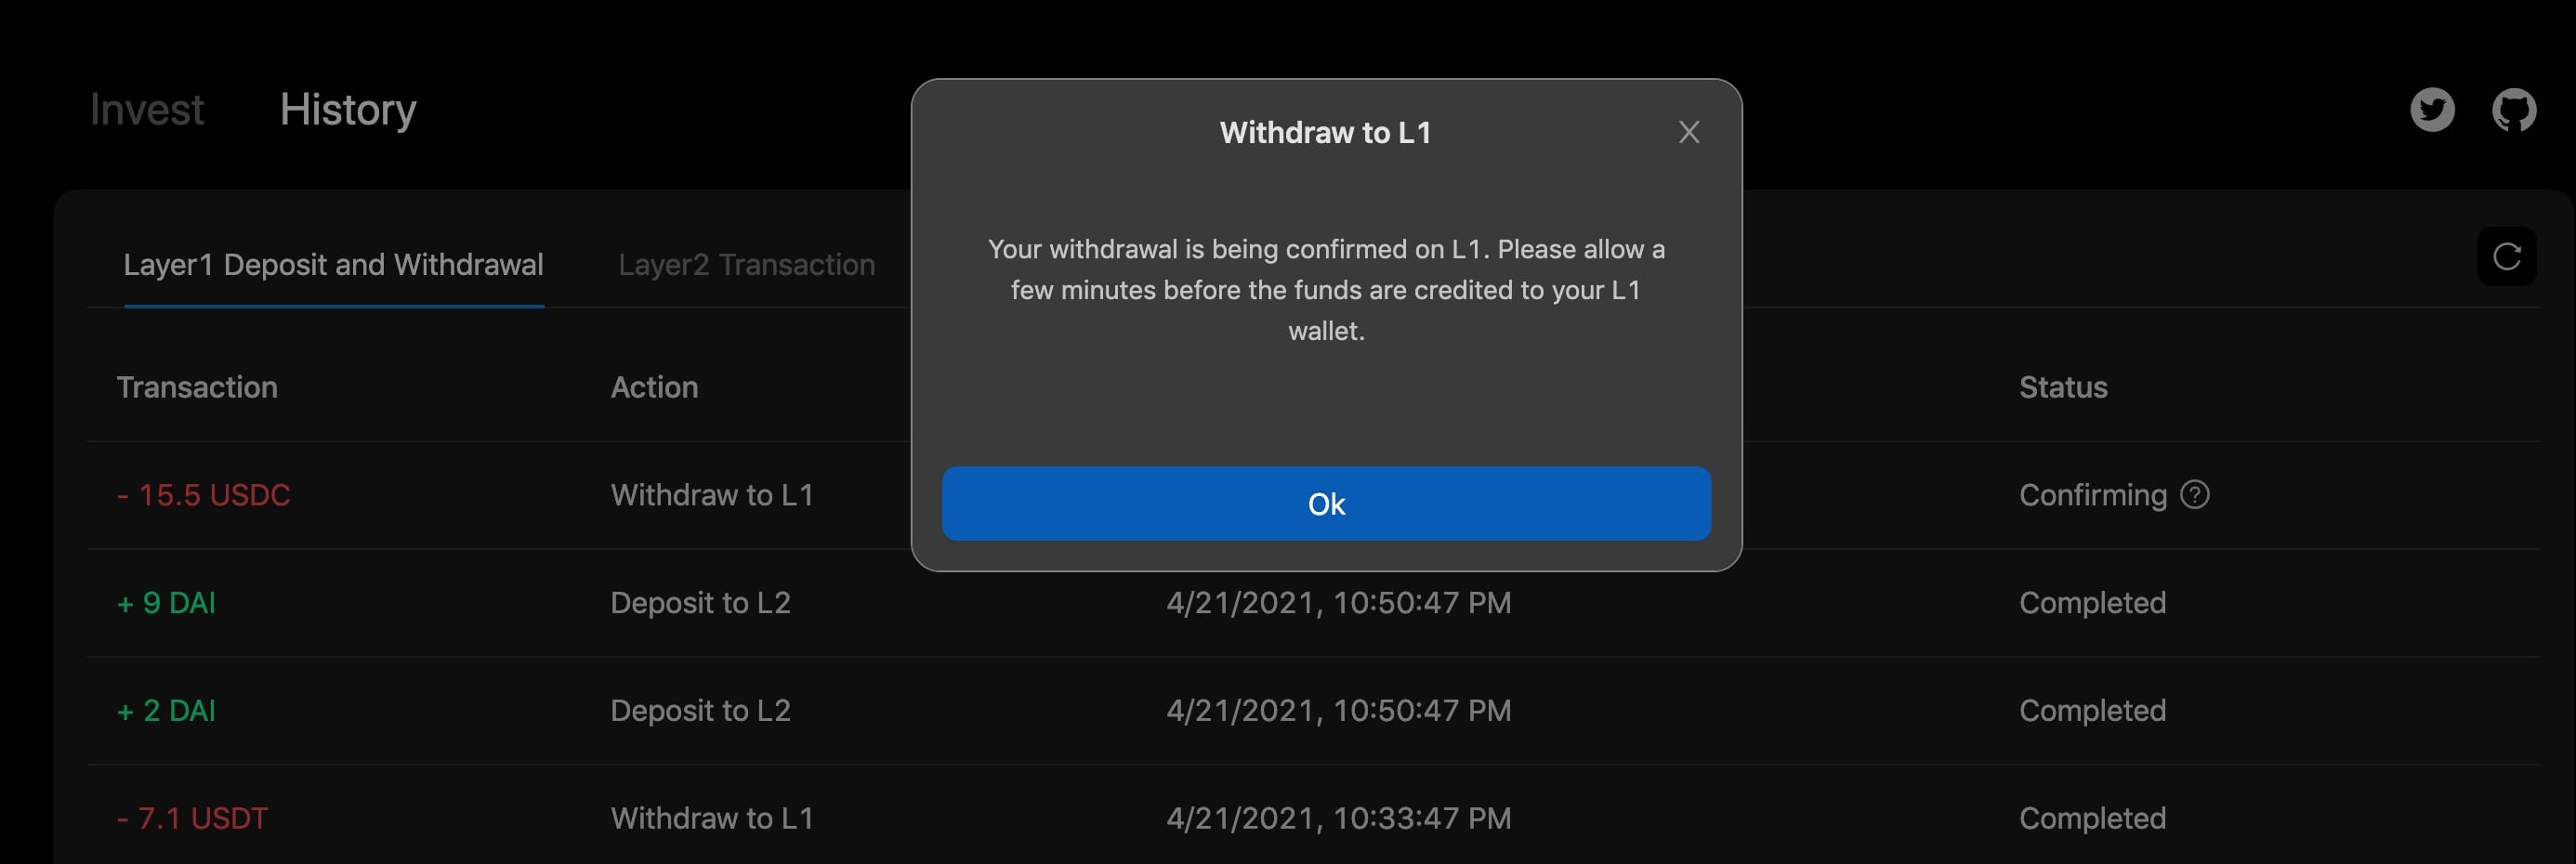
- Once you sign the tx in MetaMask, you will see another popup showing the withdrawal transaction has been submitted.
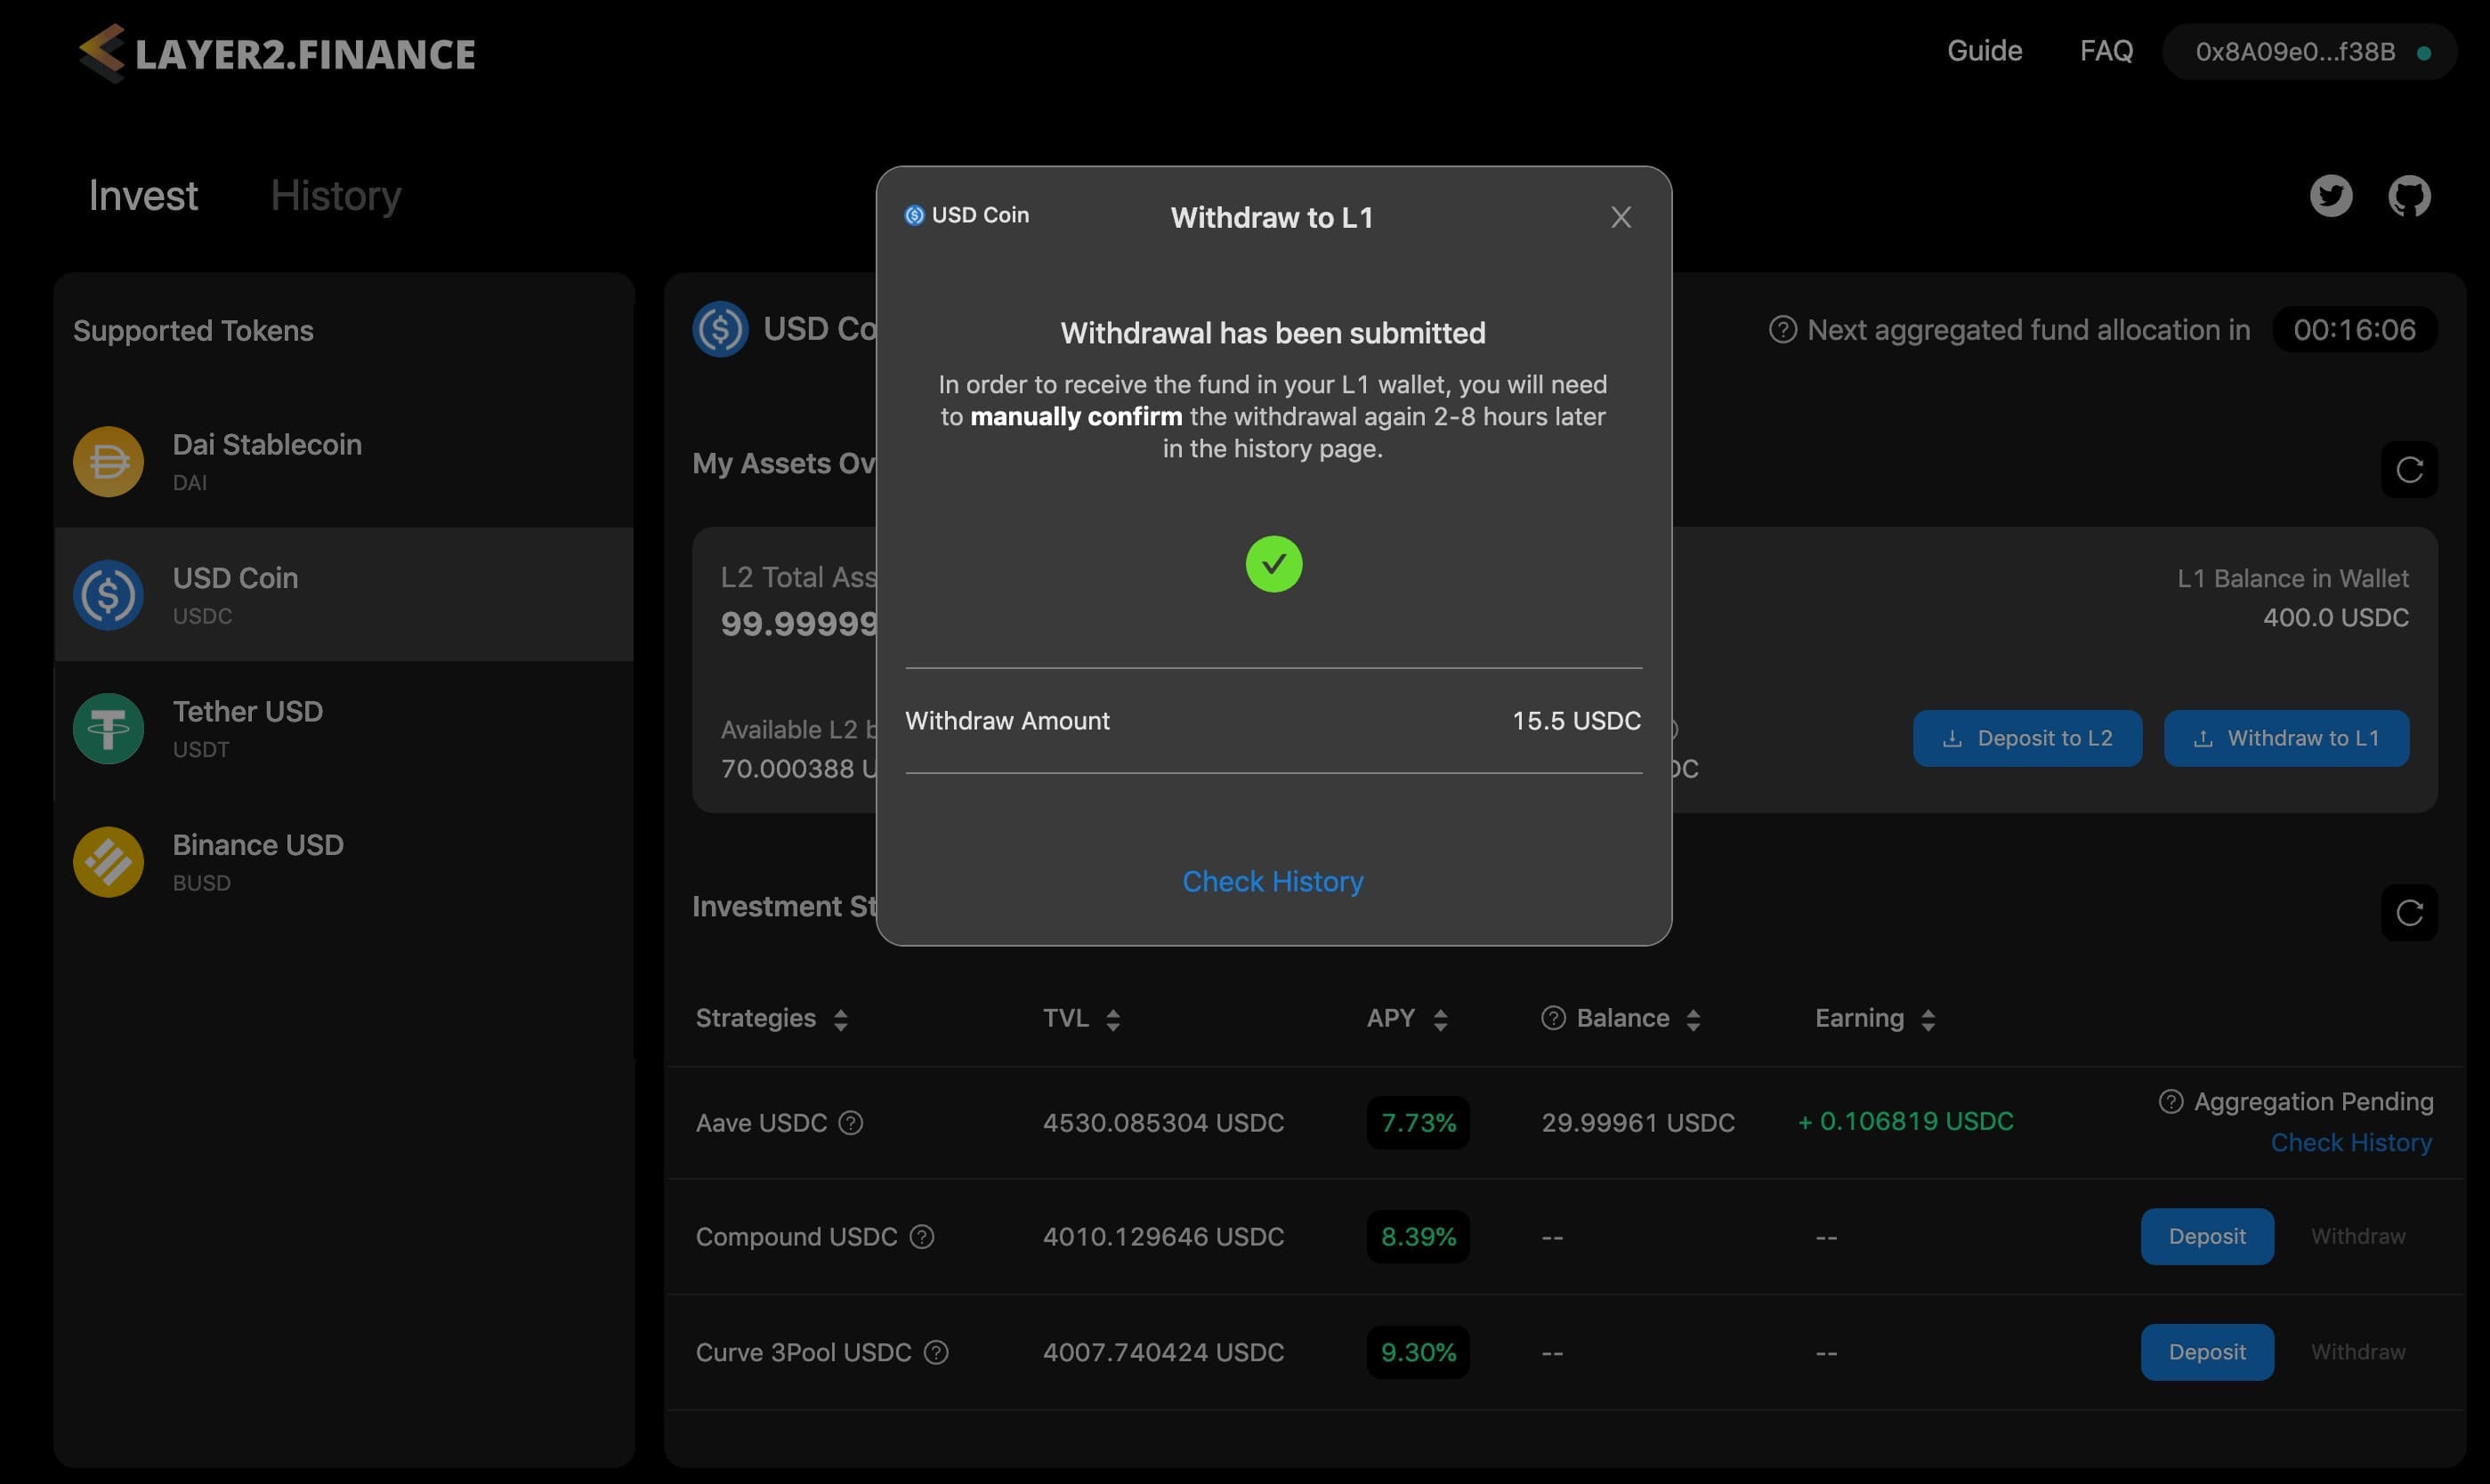
It may take 2-8 hours to process the transaction. You can check the status of the transaction in the “History” page.

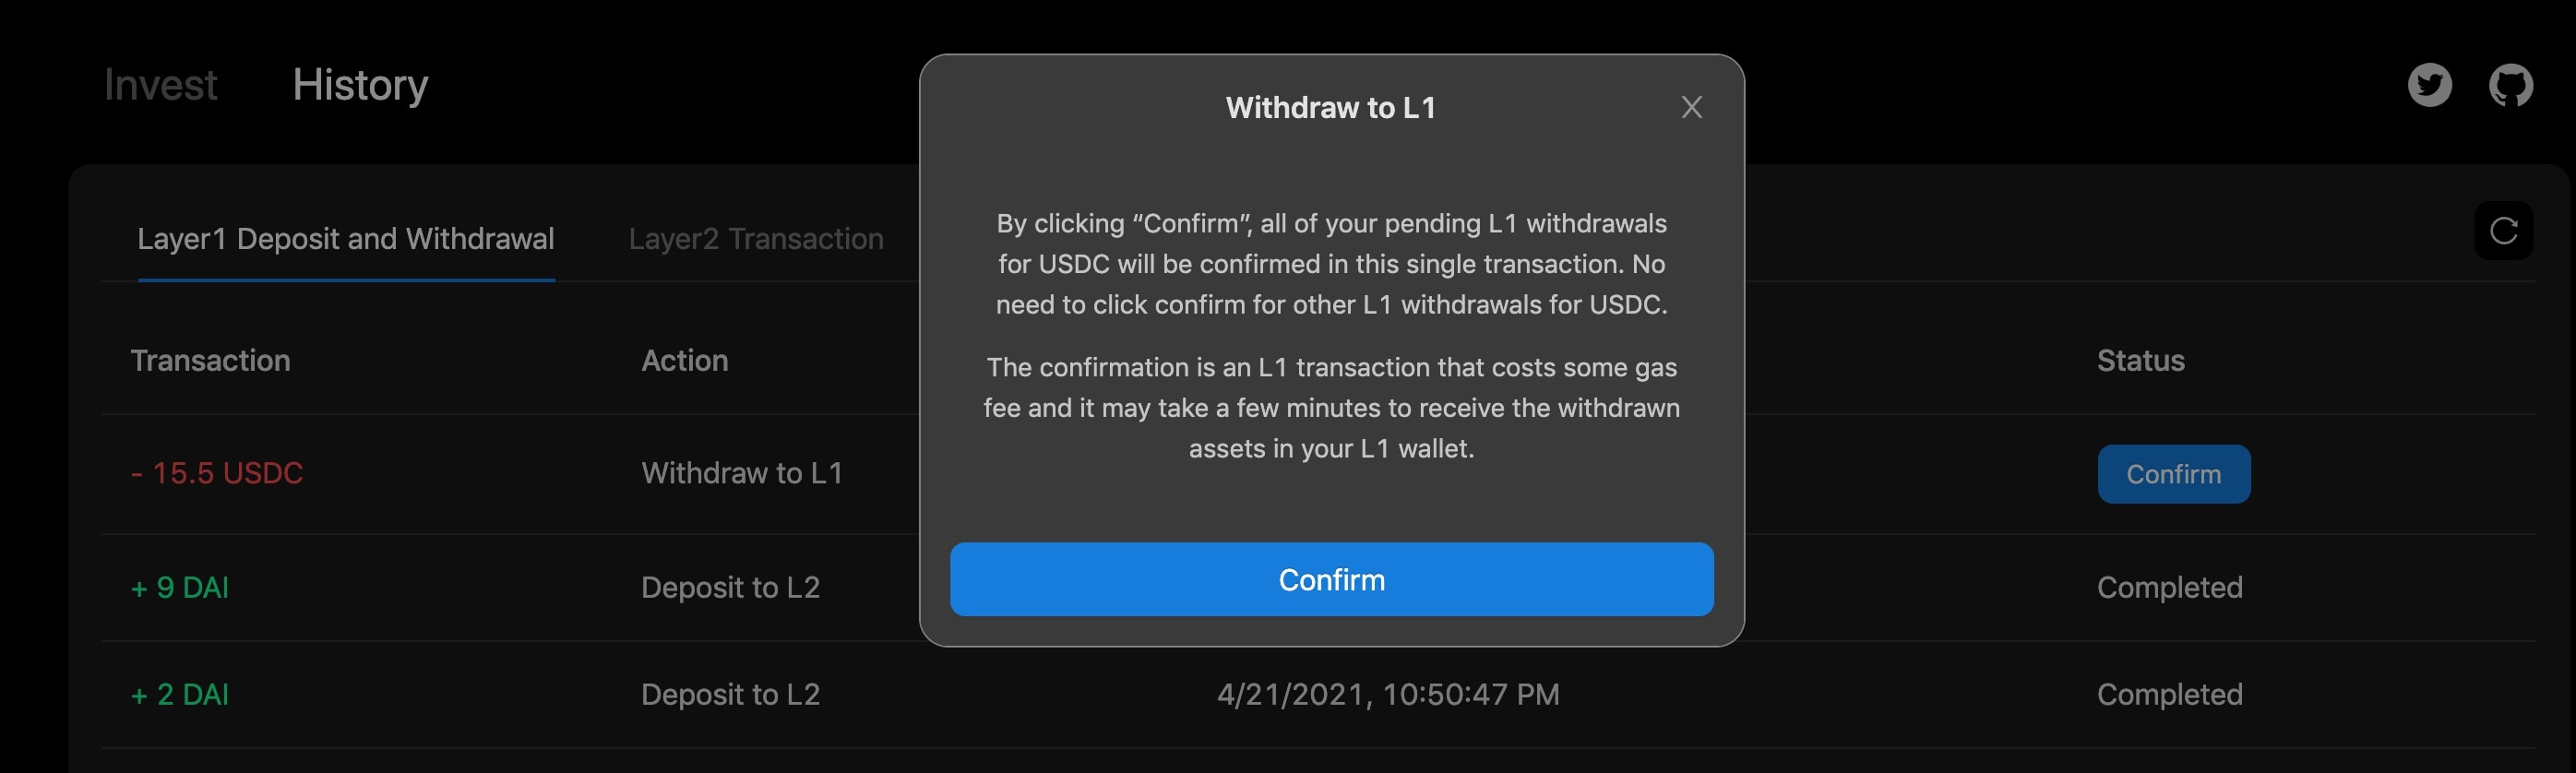
- (Important) A few hours after you submit the L2-to-L1 withdrawal request, remember to come back to the “History” page and you will see a “Confirm” button for the withdrawal transaction.
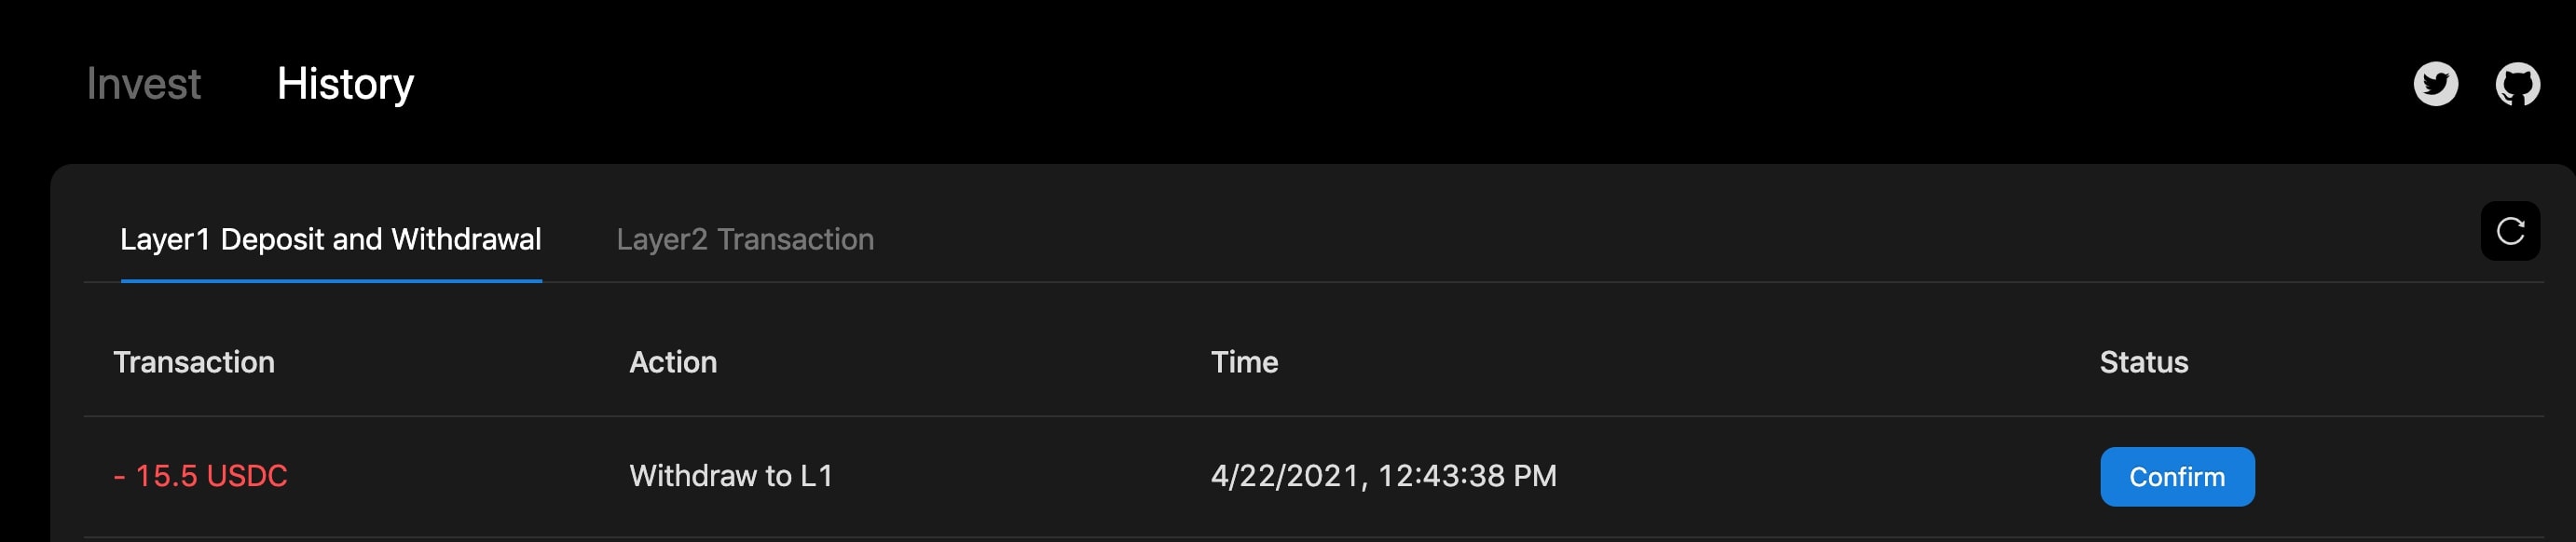
Clicking on the “Confirm” button, you will see a popup that shows some reminder and you need to do the double confirmation. After you click the “Confirm” button on the popup, you will be prompted to confirm the tx in MetaMask.
- NOTE: Confirming the L2-to-L1 withdrawal involves an on-chain transaction that costs some gas fees. Please make sure you have enough ETH in your L1 wallet to cover the gas fee.
Once you confirm the tx in MetaMask, the L2-to-L1 withdrawal will be submitted, you should receive the withdrawn funds in your L1 wallet in a few minutes (the actual waiting time depends on the Ethereum congestion level and the gas price you set in MetaMask).